
Mossberg 590 Nightstick
Mossberg 590 Nightstick Upgrades
In the first installment of this article, I presented the Mossberg 590 Nightstick, which I intend for use as a home defense and personal defense firearm. The first day at the range with minishell shotgun ammunition, which was (essentially) a box to range endeavor, yielded exceptional results. In this part, I’ll introduce you to some upgrades that I planned, carried out, and how they affect the effectiveness of the firearm, some of which I had already presented in part 1, but I’ll go more into detail regarding them in this article.
Upgrade #1 – The OPSol Minishell Adapter
This firearm is intended to shoot 1 ¾” minishells only. Therefore, it requires an adapter that would guarantee (almost, because nothing is perfect) 100% reliability in feeding these little guys. The OPSol Mini-Clip 2.0 Flex adapter was the answer.
In August of 2018, I wrote a review article on the OPSoL Mini-Clip, and the review was very positive. Shorty shotgun shells peaked my interest, after my friend and shooting companion converted his conventional Mossberg 500 to a pistol-gripped user-friendly shotgun around the same time as the article. In fact, the adapter found its way into one of my Mossberg 500 ‘tactical’ models (see, Mossberg 500 Tactical – 7+1 12-Gauge) where remains to this day.
While I do have a few Mossberg 500 shotguns, and one Mossberg 590A1 Tactical shotgun, the idea of having a shorter-barreled firearm of smoothbore persuasion enticed me, and thus the Mossberg 590 Nightstick was purchased due to several reasons with the main reason being to have a minishell-only firearm. The Mossberg 590 Nightstick, like my Mossberg 500 Tactical, had to receive the OPSol Mini-Clip 2.0 Flex product.
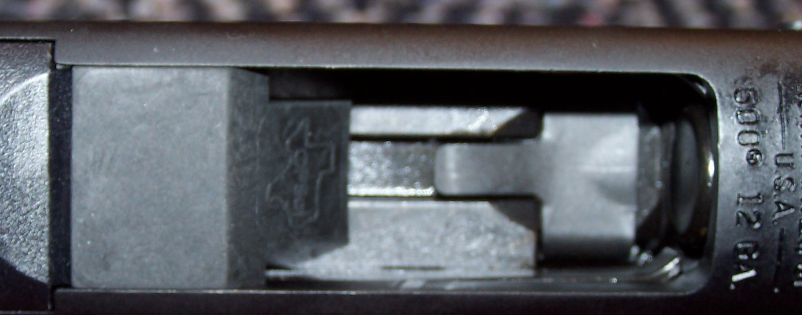
If you have not bothered to read the review article for the OPSol Mini-Clip, let me say here that the OPSol Mini-Clip 2.0 Flex installs quickly.
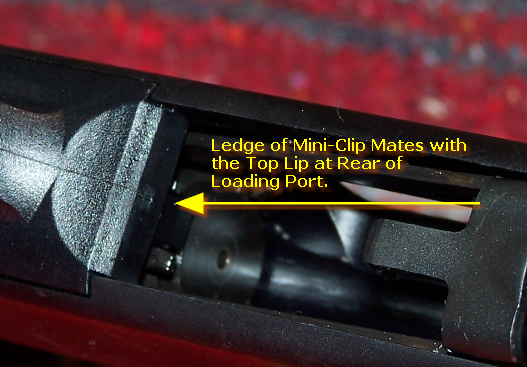
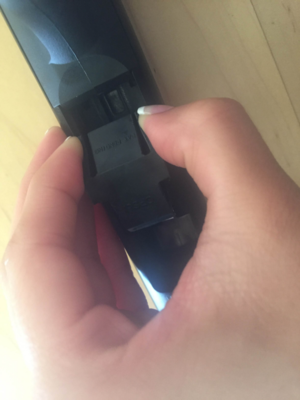
A Simple Press in Installation
Installation Instructions
- Put gun on SAFETY. Ensure firearm is unloaded with no shells in the magazine cylinder/tube or chamber. Make sure pump slide is in extended position.
- Squeeze the sides of the OPSol Mini-Clip 2.0 Flex and insert the back flat end into the loading port at an angle.
- Push in so that the OPSol Mini-Clip 2.0 Flex unit is in flush to the rear and the bottom. Rack the slide a few times to ensure the OPSol Mini-Clip 2.0 Flex is in position. It should not move. If it does move, remove the OPSol Mini-Clip 2.0 Flex and repeat steps 1, 2, and 3
It is also extremely easy to remove, should you want to run ammunition other than minishells:
Removal Instructions
- Put gun on SAFETY. Ensure firearm is unloaded with no shells in the magazine cylinder/tube or chamber. Make sure pump slide is in extended position.
- Rack the slide to the rear.
- Place a finger (your choice of fingers) into the ejection port and push the OPSol Mini-Clip 2.0 Flex downward and outward toward the rear of the loading port.
- Pull the OPSol Mini-Clip 2.0 Flex free of the receiver. The shotgun is now ready to receive standard-length or 2 ½” 12-gauge shells.
Upgrade #2 – Talon Grip Tape
The raptor handgrip on the Mossberg 590 Nightstick, as with the Mossberg 590 Shockwave, leaves a bit to be desired when gripping the firearm, as the grip (wood or composite) can be very slippery, although not much recoil is felt in the grip when shooting minishells. There are a few options one can exercise, from using skateboard tape or hockey stick tape. I chose a better option that is available from Talon Grips for the Mossberg 590 Shockwave, which also fit the Nightstick.
I did not want the rubber Talon grip material to dominate the grip of the Nightstick and I opted to use only the side panels, as shown below. The rubber version of the Talon grip provides just enough purchase for the hand and fingers when they are wrapped around the grip, and I think that the contrast between tape and grip looks good.
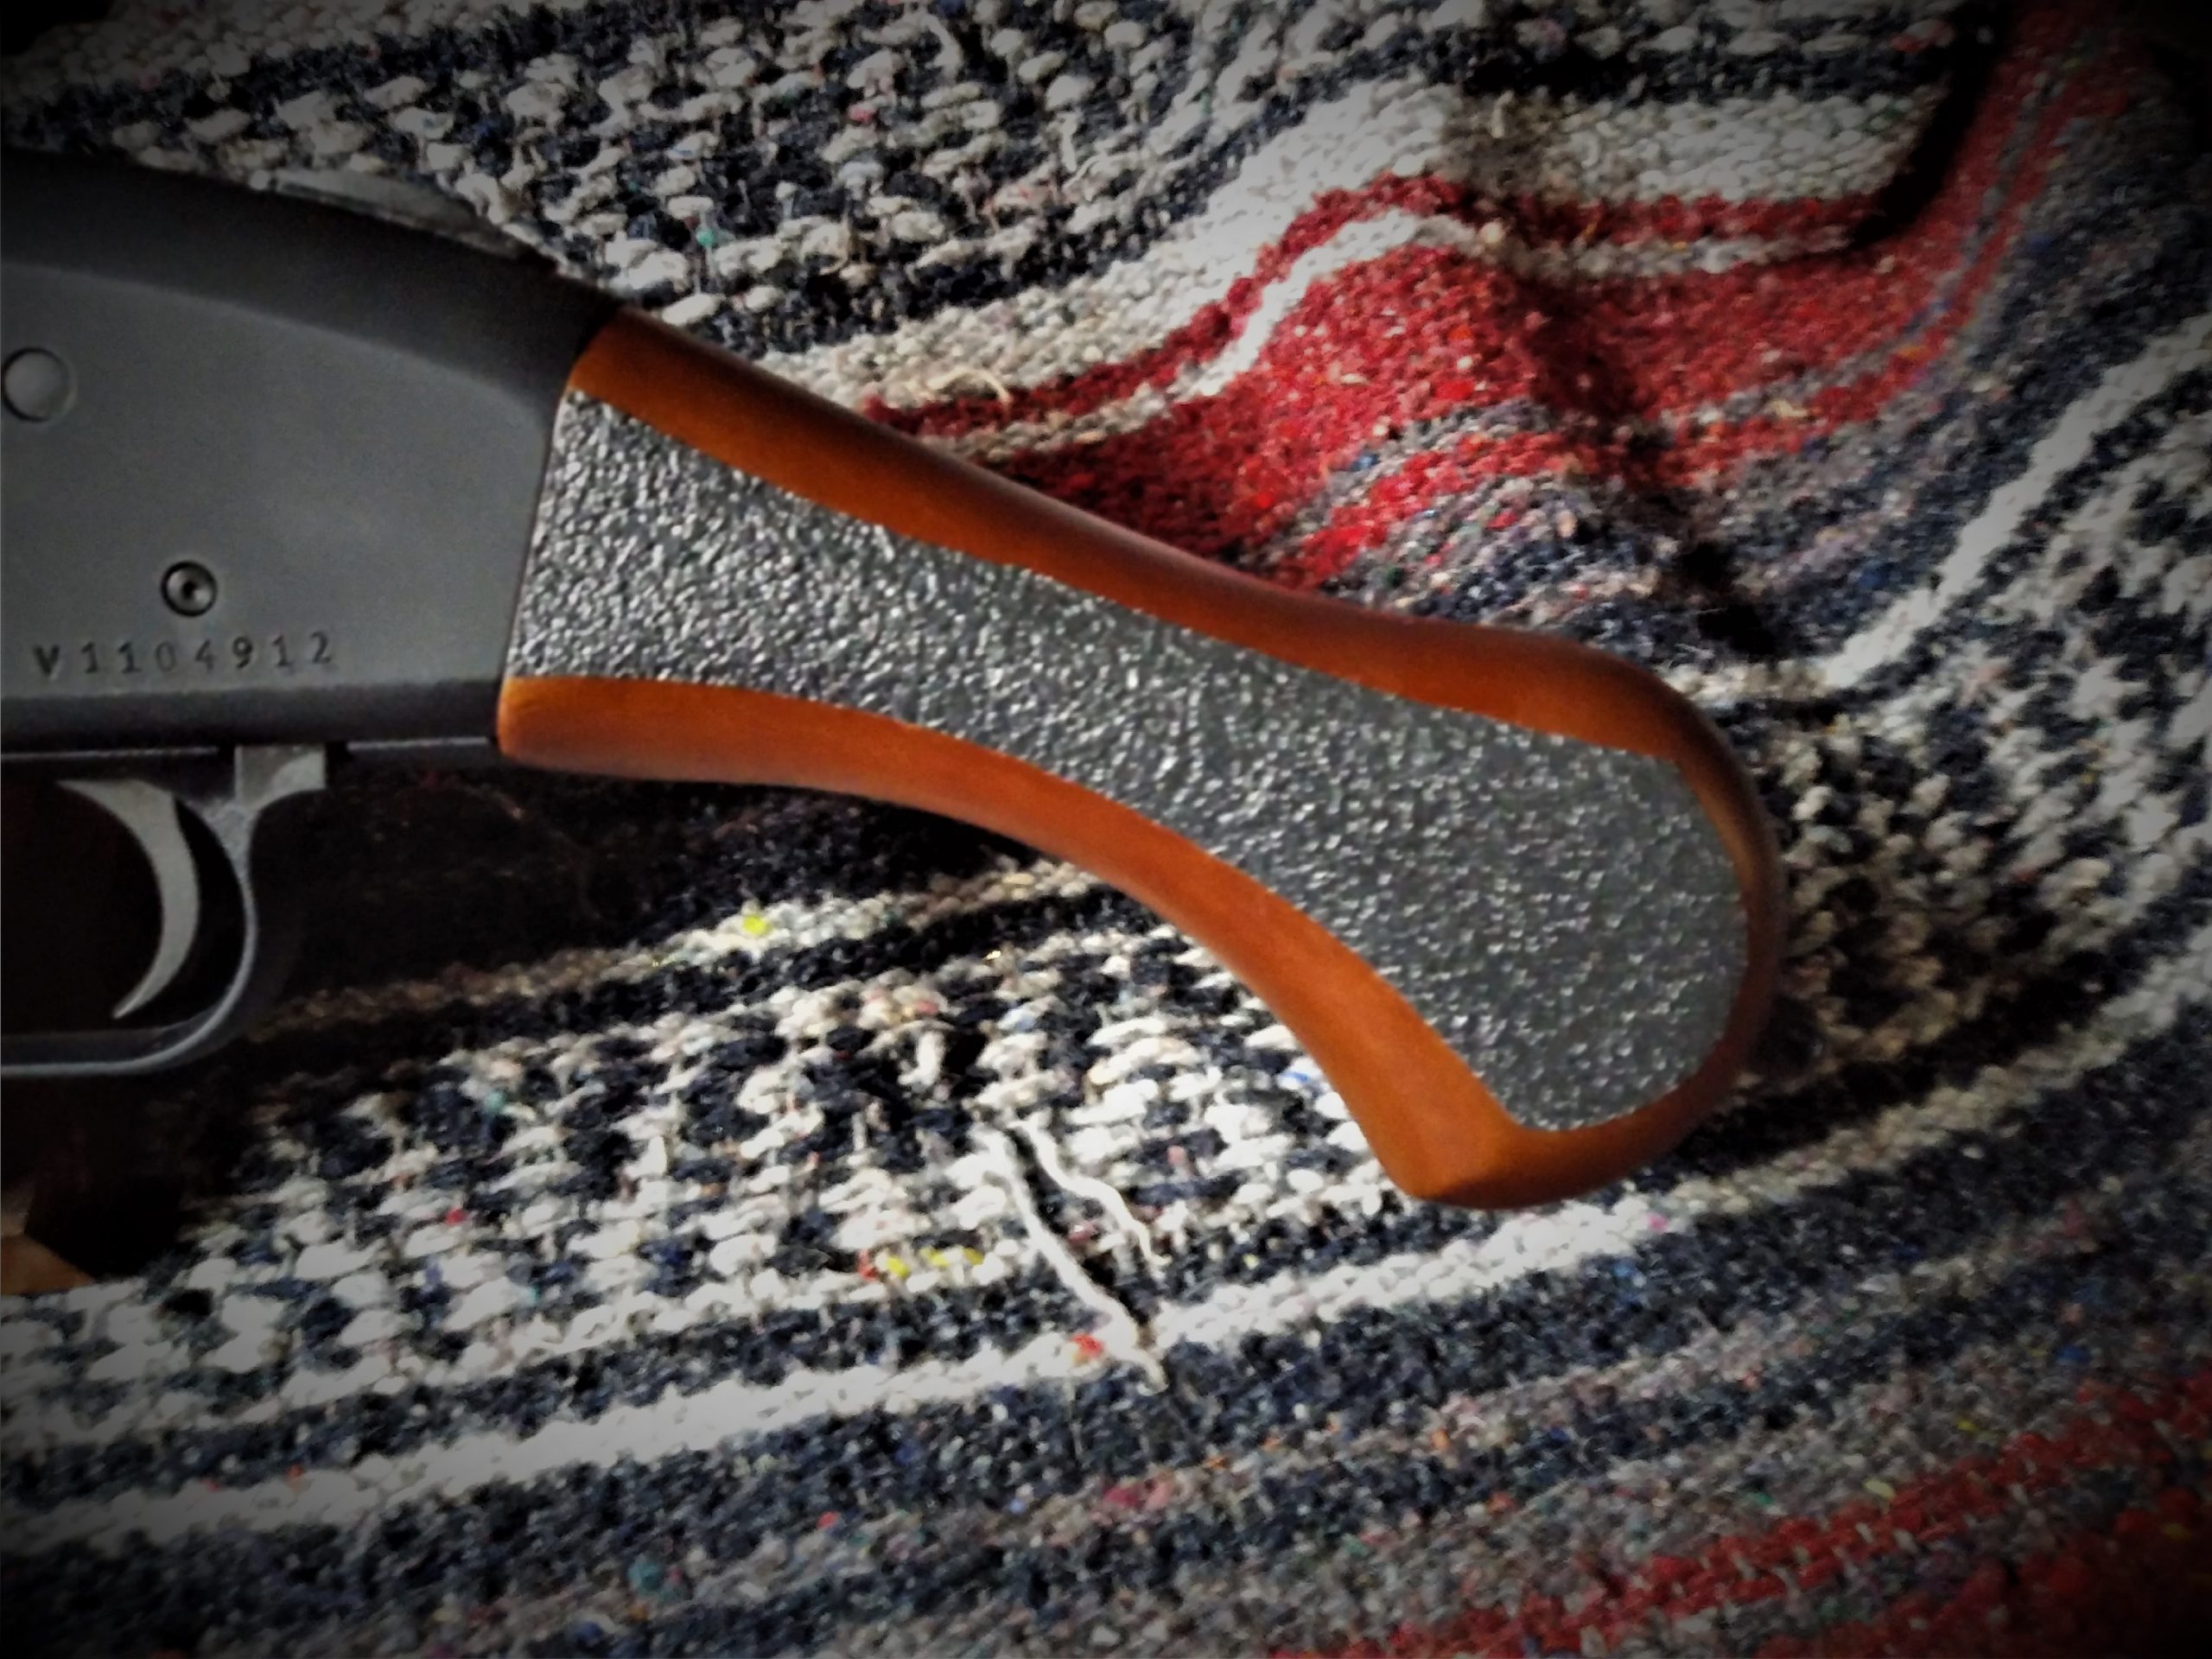
A Little Trimming of the Talon Grip Tape Yielded My Desired Result
Upgrade #3 – Front Sight Addition
The front brass bead sight, while adequate, needed a little help. The Hi-Viz Snap On Sight for Plain Barrel Shotgun (another product that I have experience with) adds some definite brightness to the front end of the barrel. The sight includes four interchangeable Lite Pipes; 2 green and 2 red in two diameters. The Lite Pipes are made of a chemical-resistant material and injection molded to achieve maximum brightness and a consistent sight picture.
The sight simply snaps onto the barrel (with a little effort) and has a small indentation on the front that wraps around the bead sight when fully pushed forward. I have never had one of these come off a plain-barreled firearm (shotgun or otherwise) yet.
For the price of $14.39 (through Amazon), this is an inexpensive means to provide an excellent, unobtrusive front sight on a plain-barreled shotgun, or a firearm like the Mossberg 590 Nightstick.
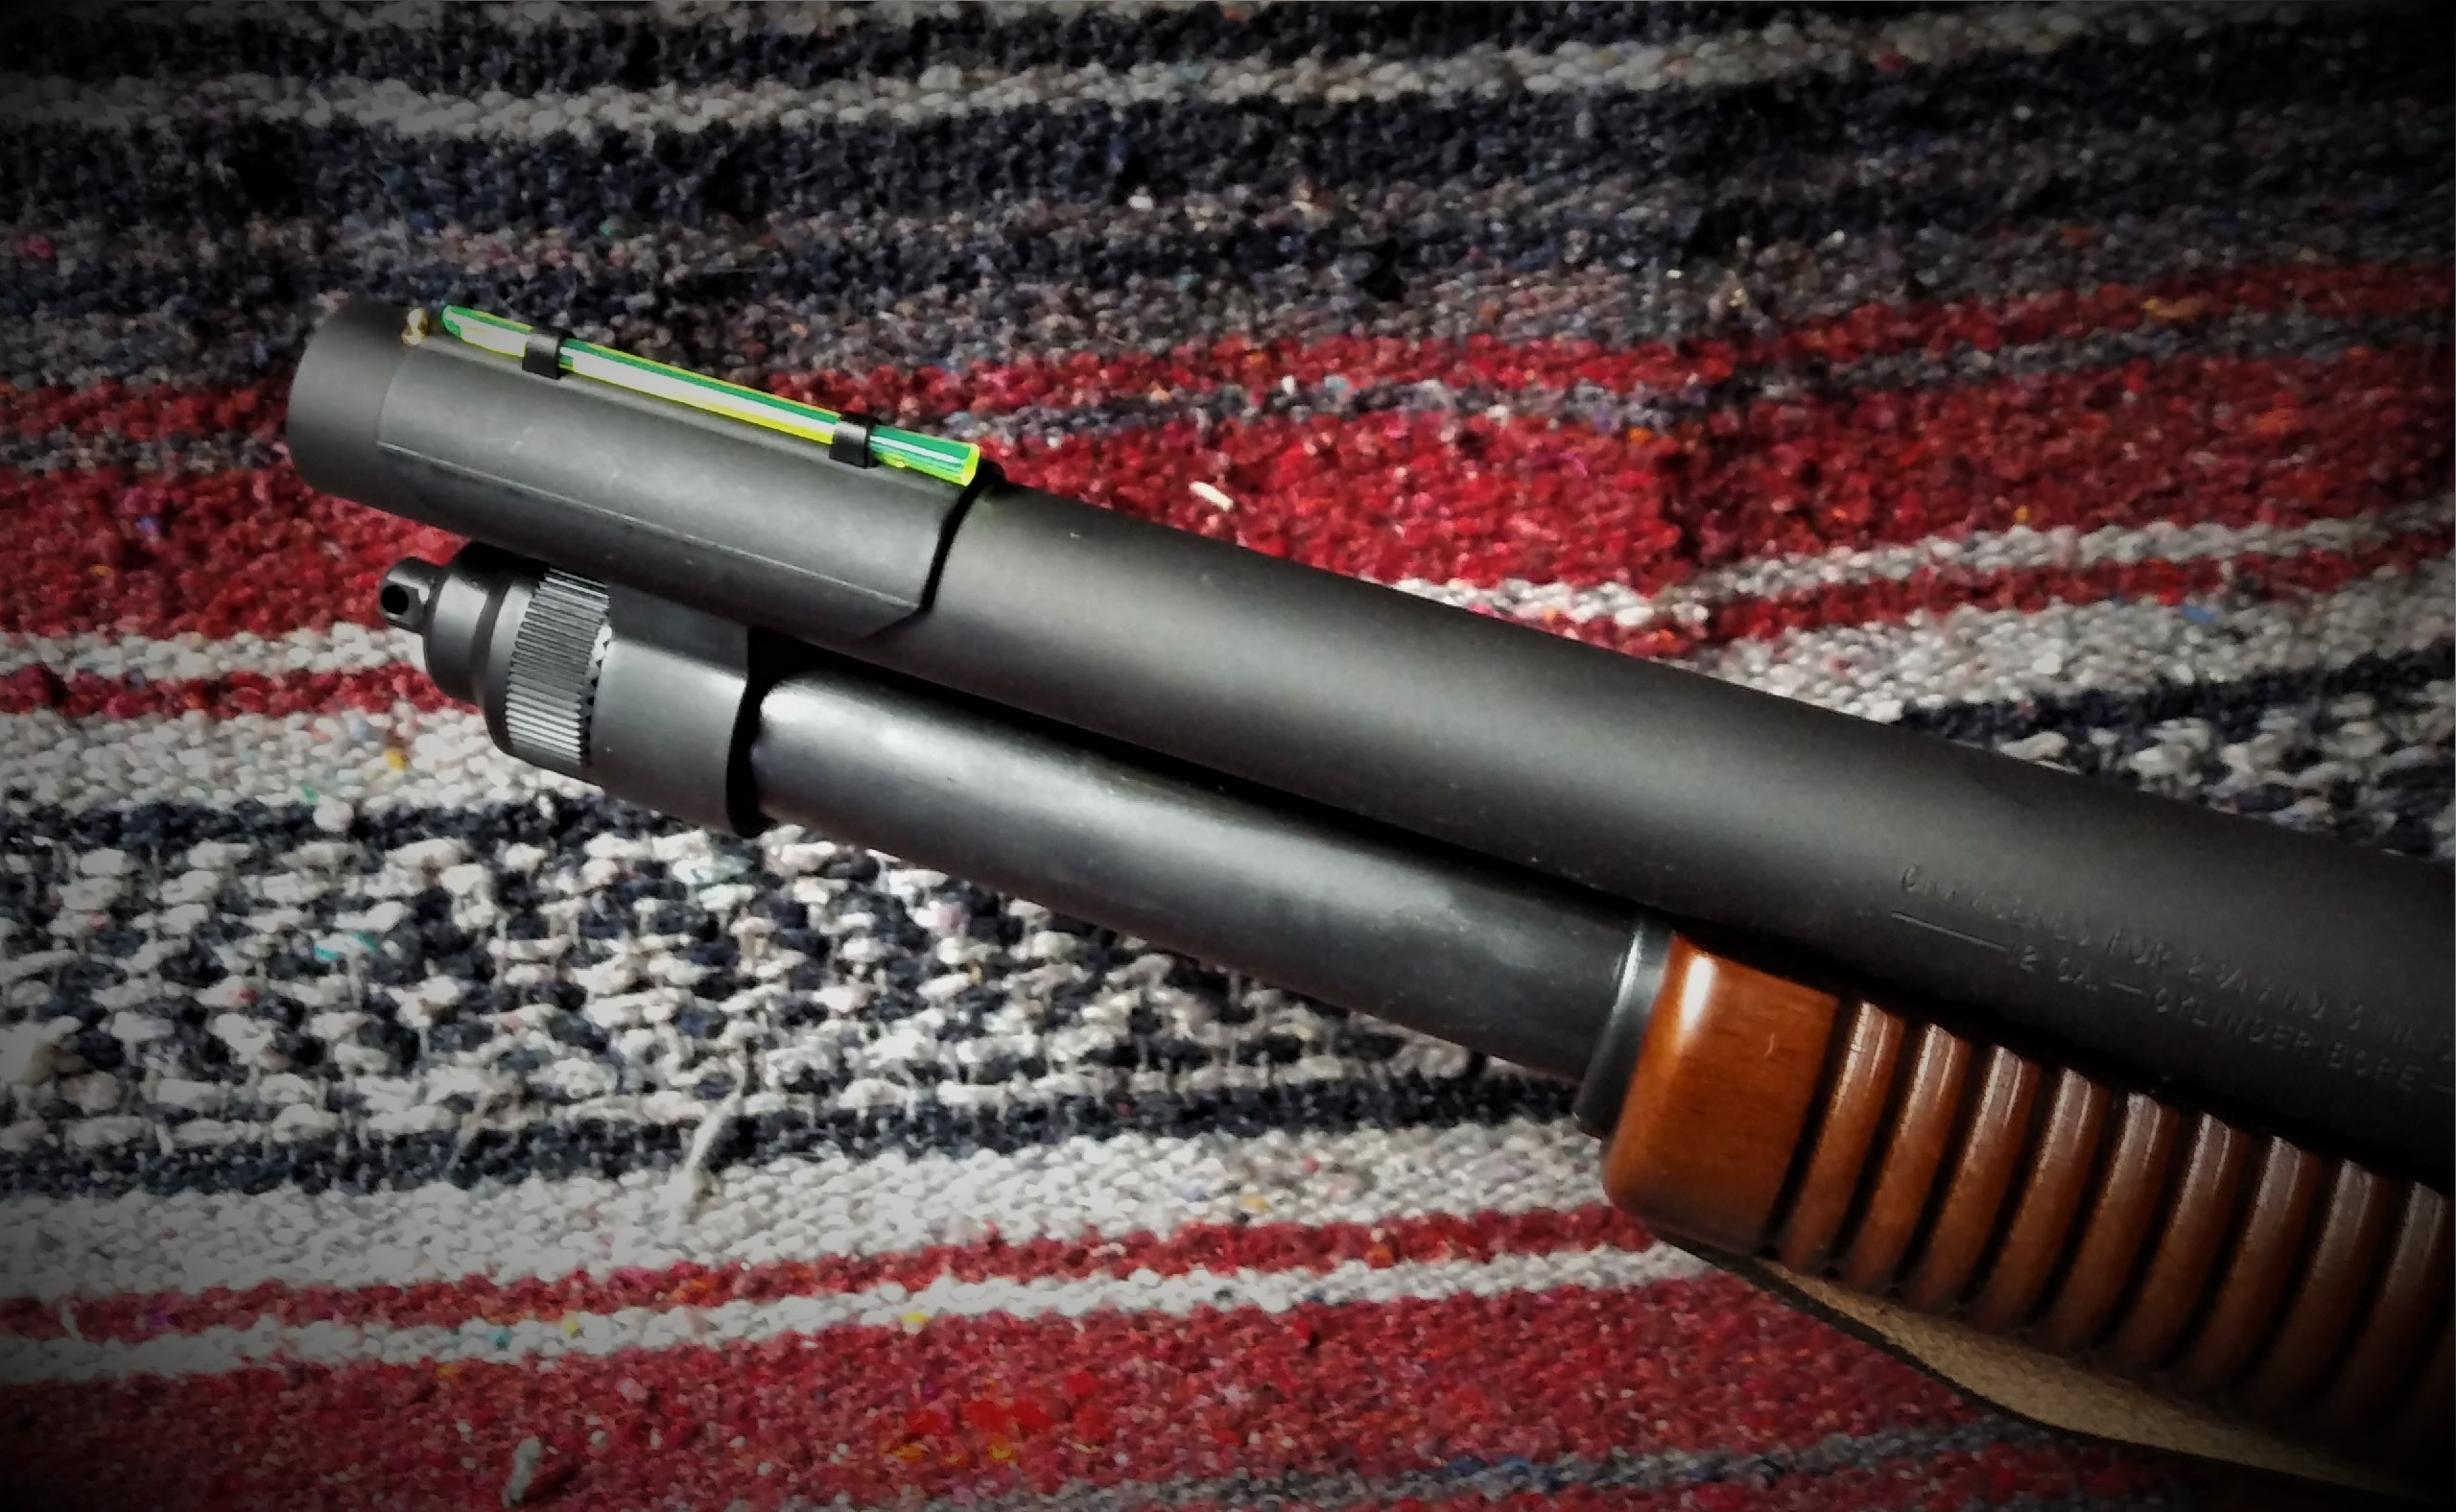
The Hi-Viz Snap On Sight for Plain Barrel Shotgun mounted on the Mossberg 590 Nightstick
Should I remove the laser optic (see Update #5 – Laser Optic) upgrade, I can still view the front sight while looking through (or over) the top rail (see Upgrade #4 – Top Rail) upgrade. The sight simply brightens up the front end of the firearm so that I know which end goes toward the target.
Upgrade #4 – Top Rail
To enhance the effectiveness of the Mossberg 590 Nightstick, I decided to add an optic (see Upgrade #5 – Laser Optic), but before I could do that I needed to mount something for the laser optic to sit upon. That led me to the UTG PRO Made in USA Model 500 Shotgun Picatinny Rail Mount that has the following features:
- Designed and made in USA, precision Machined from aircraft grade aluminum alloy with hard Anodizing with matte black finish
- Unique contoured bottom designed to fits on Mossberg MTU029SG 500 Pre-drilled shotgun receiver.
- 5.5 inch overall length with 13 Picatinny rail slots for optimal placement of scope, dot sight or iron sight, and flexible eye relief adjustment.
- Low profile with see thru design for Use of front bead sight. (Which means I can also sight in on the Hi-Viz Snap On Sight for Plain Barrel Shotgun (see Upgrade #3).
- Includes assembly screws and tools for simple and friendly installation, no gunsmith required.
Since the receiver of the Mossberg 590 Nightstick is already drilled and tapped, installation was simply removing the existing screws, mount the rail, and attach using the provided screws. Using a bit of Loctite® Threadlocker Blue 242® ensures that the mounting screws will not back out under recoil.
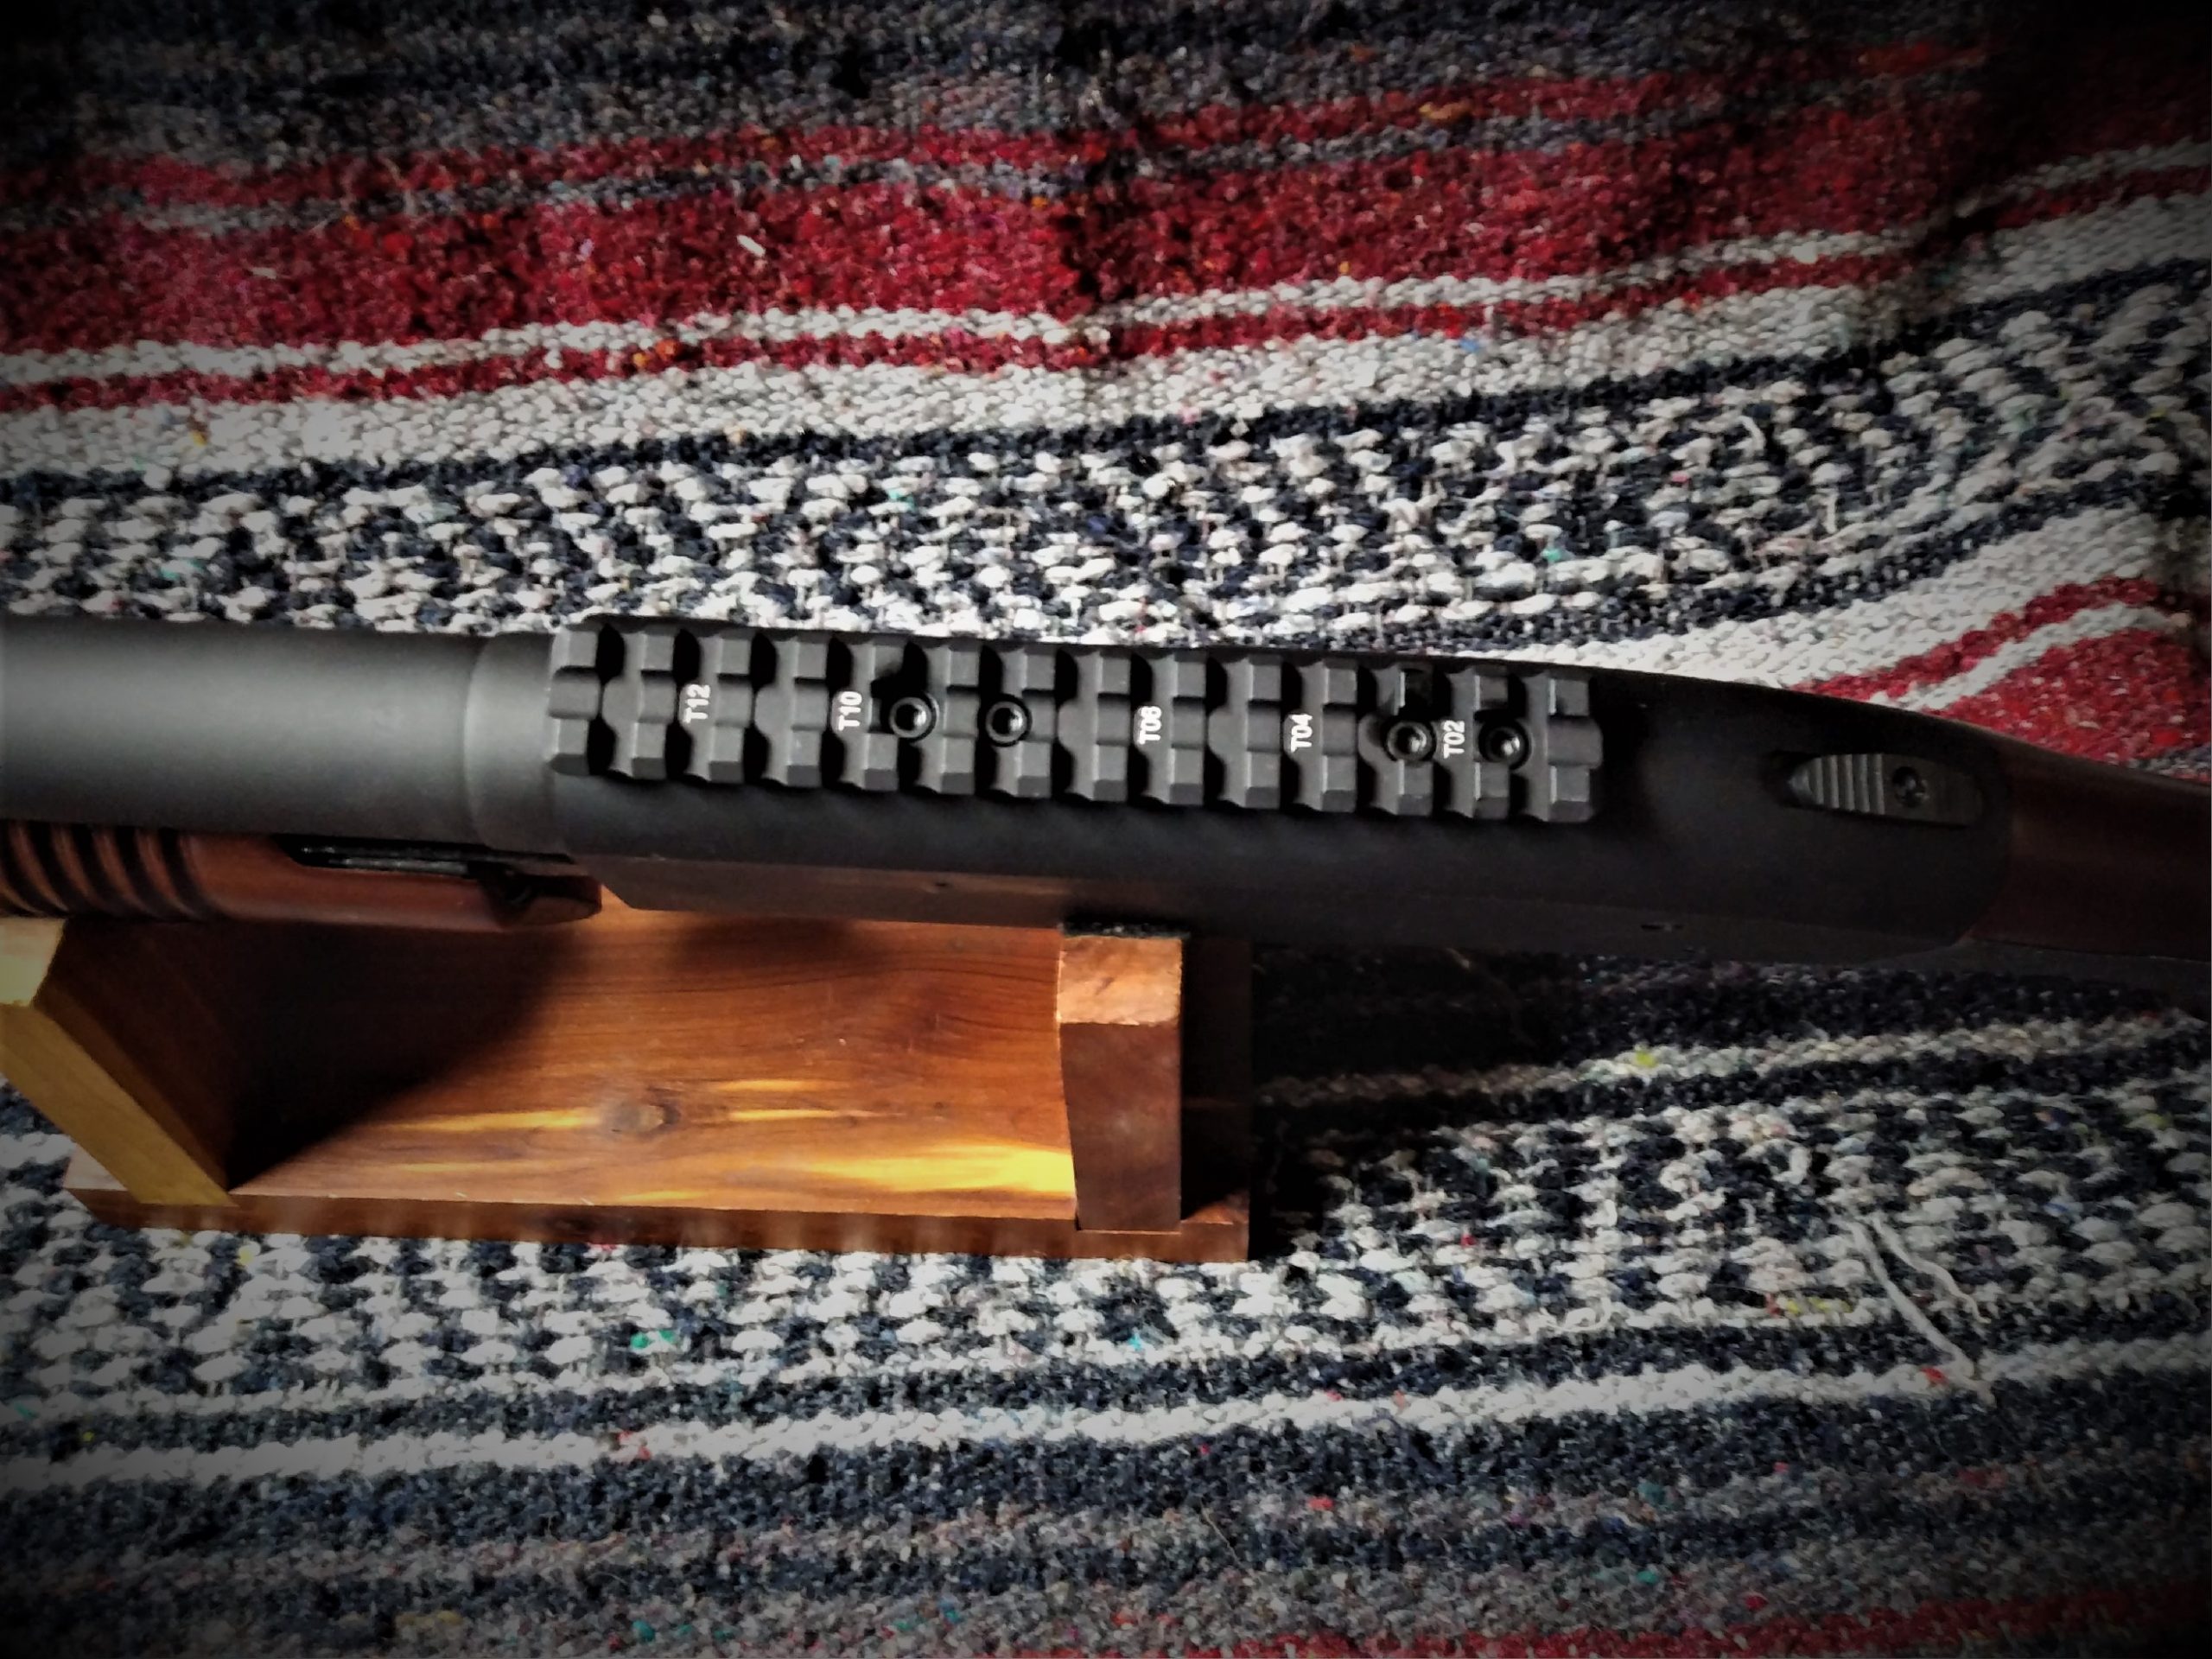
The UTG PRO Made in USA Model 500 Shotgun Picatinny Rail Mount Provides an Excellent Mount for Optics of Any Kind.
Upgrade #5 –Laser Optic
In my article, Lasers and Home Defense Shotguns, I expounded on using a laser optic and its advantages (and disadvantages) when mounted on a shotgun used for home defense. Some might consider a laser optic on a firearm like the Mossberg 590 Nightstick an appurtenance. However, and on a firearm like the Mossberg 590 Nightstick, a laser optic is a definite need, as you cannot sight it like a conventional shotgun or rifle. Although I have used a laser optic on a shotgun in the past, this laser optic is new to me, the UTG Instant Target Aiming BullDot Compact Green Laser. This laser optic has several notable features, as listed below.
- Expanded laser dot with 8” Diameter at 50 yards for instant target placement, versatile mounting and operation capabilities for a variety of uses.
- Revolutionary true strength platform and smart spherical structure, rapid target acquisition in high stress situations.
- Precise and wide range wind age/Elevation adjustment, High quality Aircraft grade aluminum construction and hard coat finish.
- Class 3R Green laser with output of 2. 0~4. 5mW, fully compliant with all international and US FDA laser safety Requirements.
- Integral Picatinny/Weaver style low profile mounting deck.
- Push Button, Pressure Switch, 1 ea. CR2 Battery.
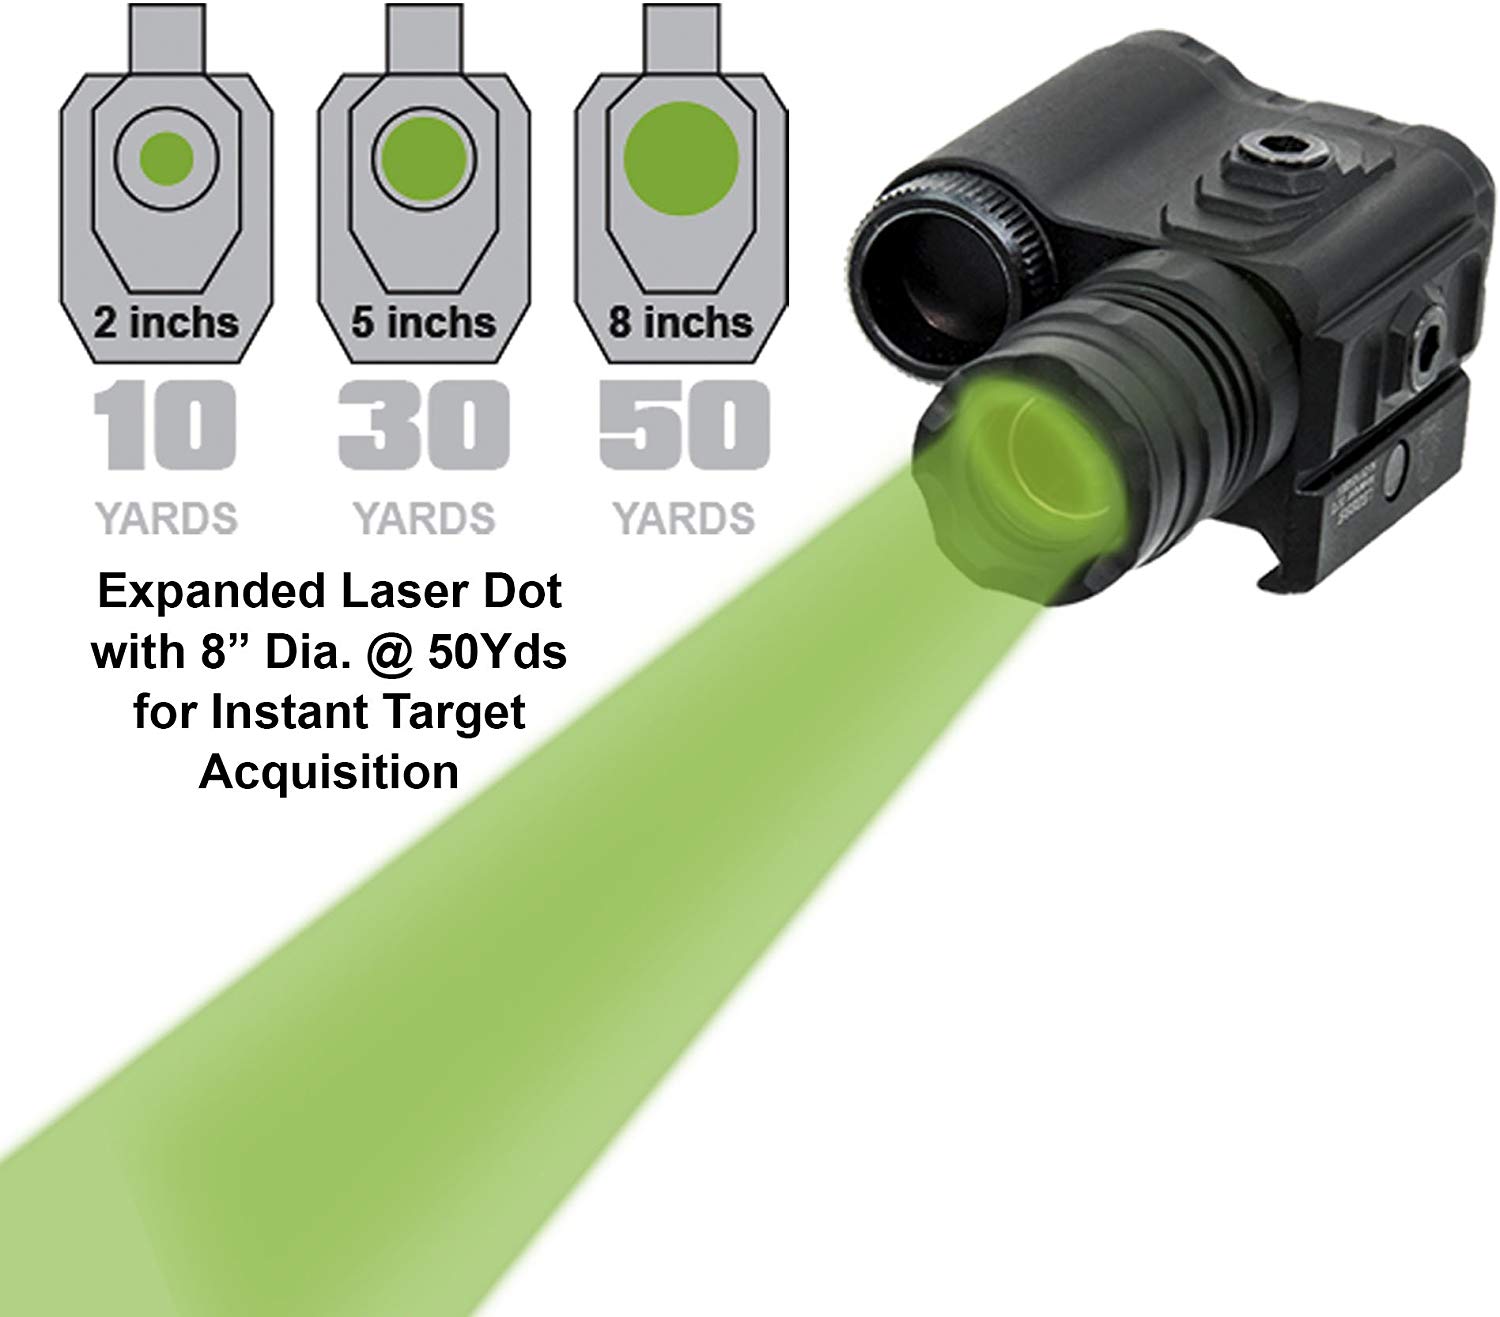
Expanded Laser Dot at Varying Distances
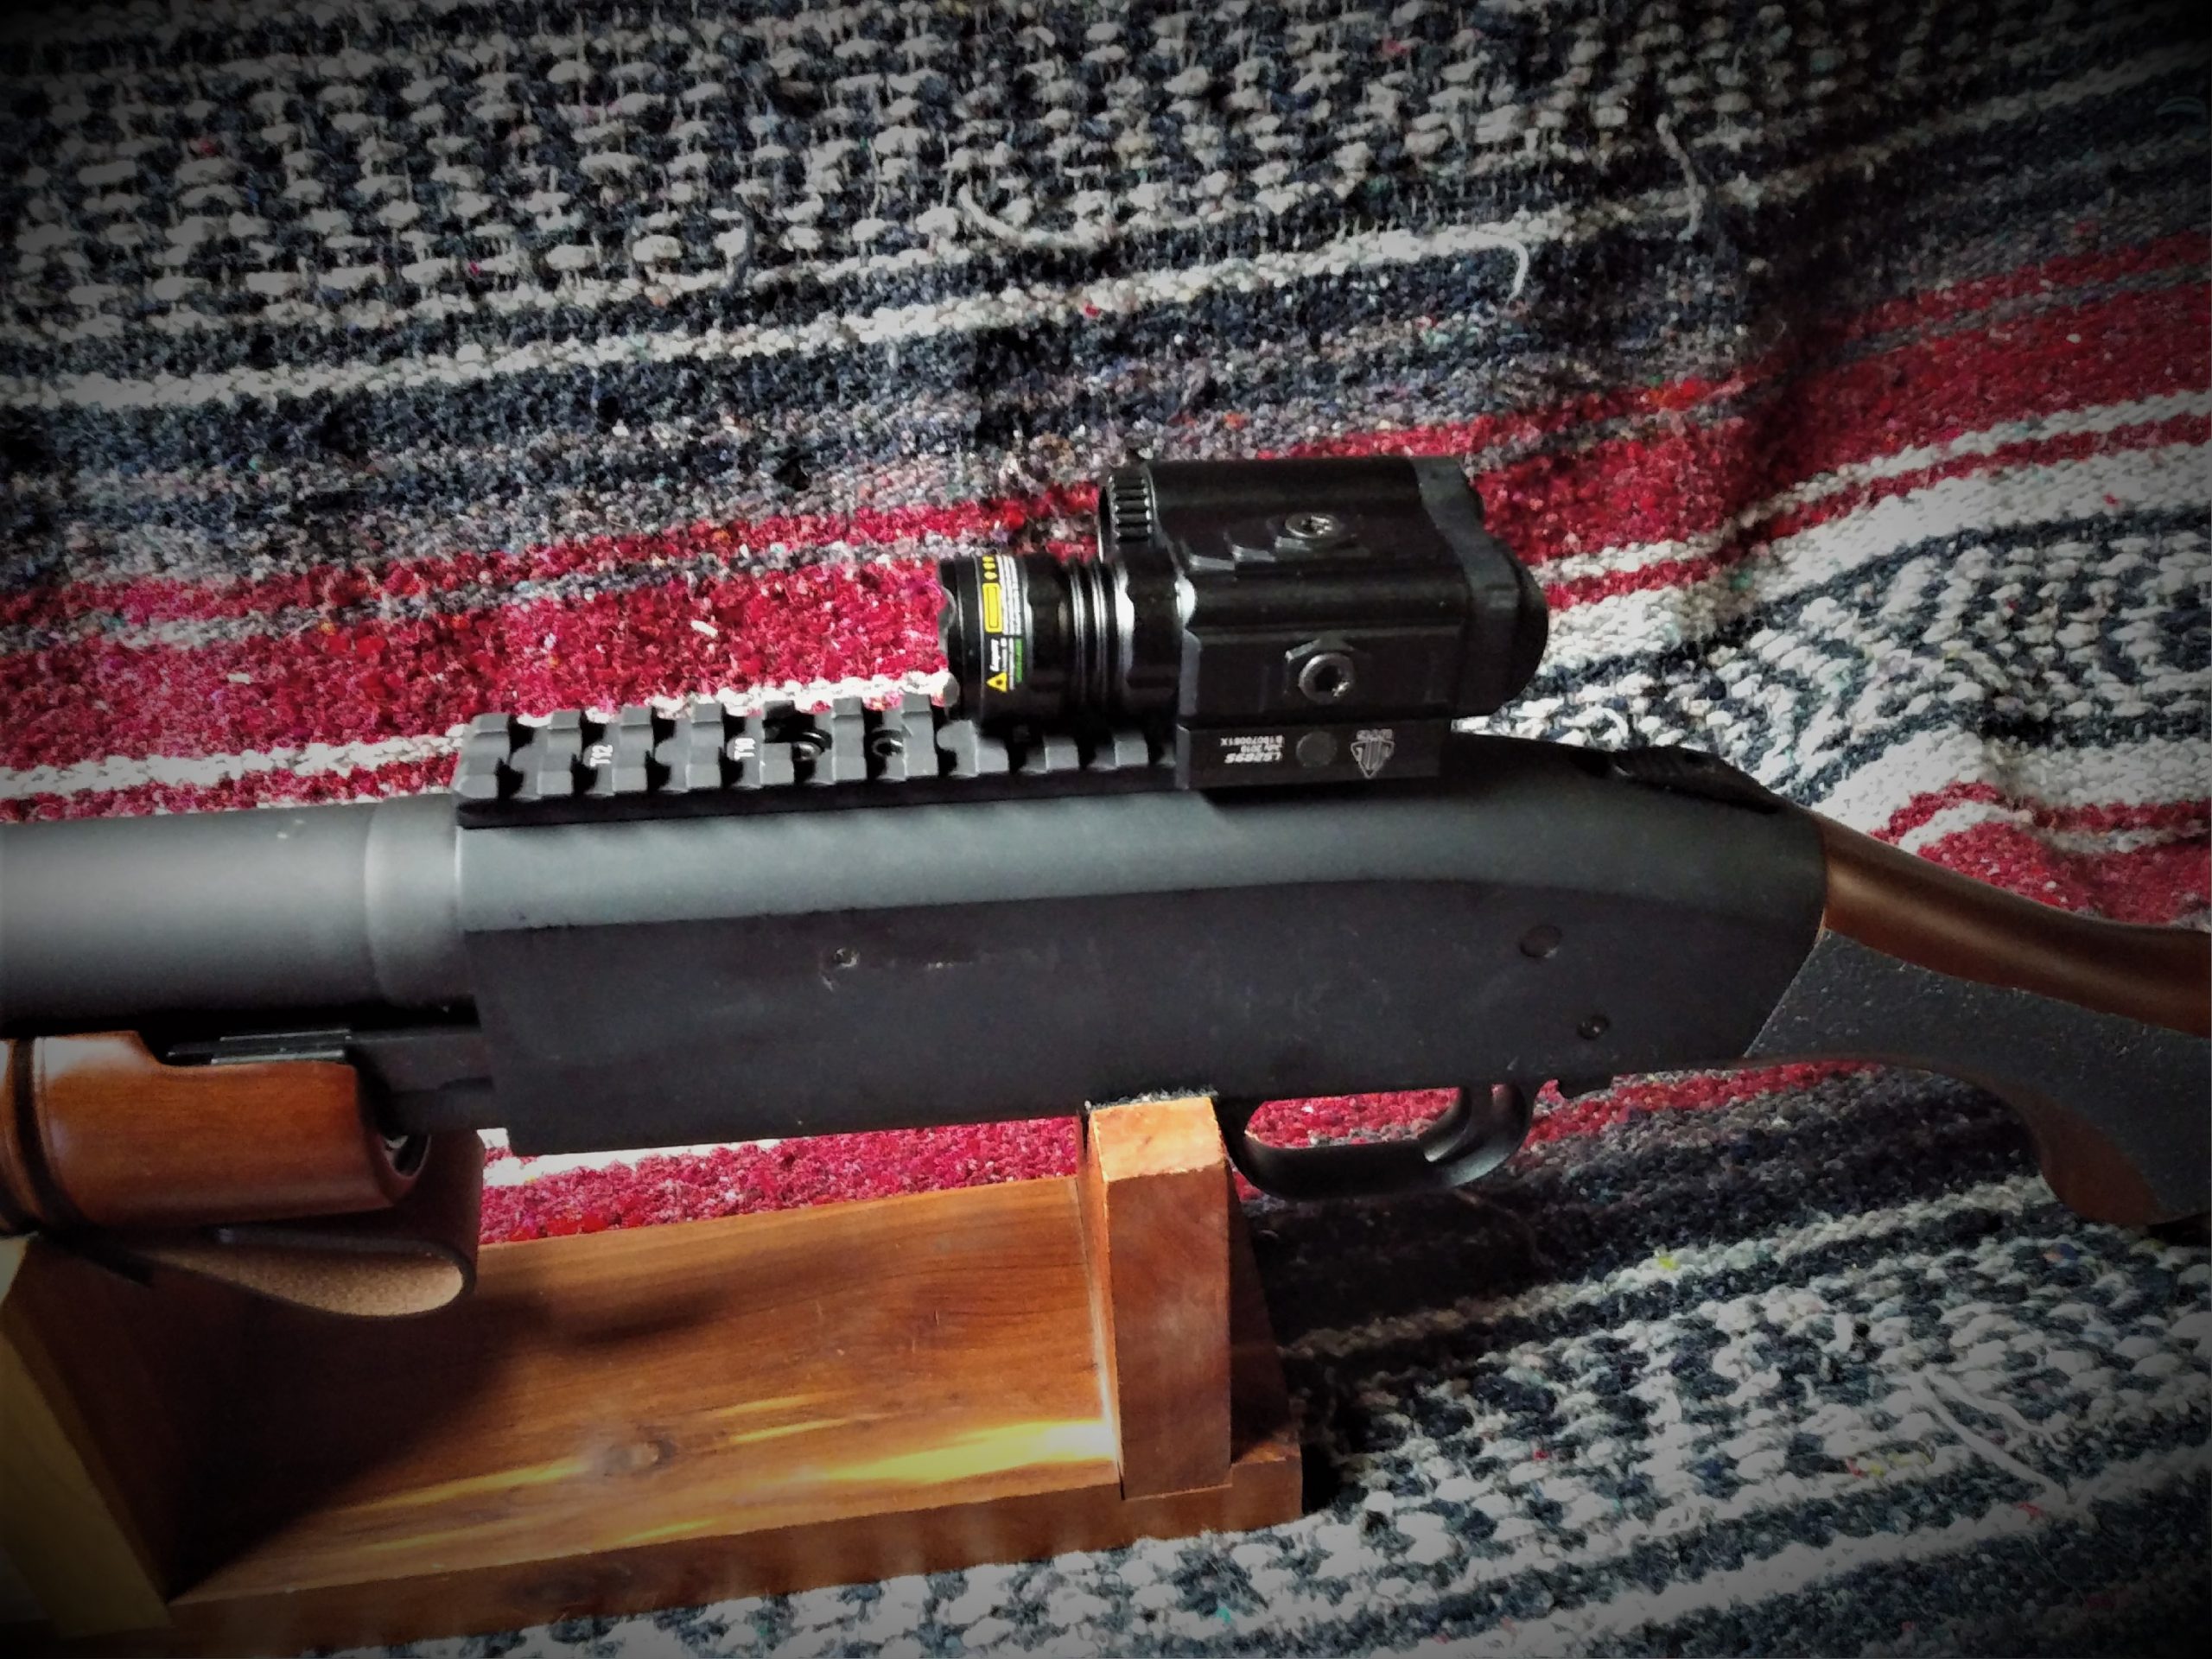
The Mounted UTG Instant Target Aiming BullDot Compact Green Laser
The laser optic uses 1 Lithium Metal battery (CR2), which is included. The battery compartment cap unscrews from the front of the unit.
Although the beam of the laser optic does expand at distance, the radius of the beam does not reflect the pattern of the firearm when shooting the Aguila Minishell Ammunition 12 Gauge 1-3/4″ #4 and #1 Buckshot 11 Pellets. It simply means that more of the target is covered with the beam, and that the beam will not get lost, as just a small laser dot can sometimes do.
The product dimensions are: 5.8 x 3.4 x 1.6 inches.
According to the manufacturer:
“A small beam diameter laser sight may not cut it in a fast pace atmosphere. The answer? A bright green expanding beam diameter laser sight. Meet the Compact Green Bulldot, a laser designed to expand up to an 8” diameter at 50 yards while diminishing in size the closer your target is to you, yet never to the point where it is even the slightest bit difficult to visually acquire. A large and expanding beam diameter combined with the natural movement of the laser will register with your eyes and brain faster, increasing the speed of the proper reactionary response. The green color of the laser is often more sought after and suitable than red, as it is effective across more atmosphere and light conditions.”
I cannot tell what the battery life is yet, but I am sure that I will learn about that. One answer to my question about battery life that I asked was that the user has had his laser optic since August of 2019 and the laser was working fine at the time of this article. While not as light as some laser units, the unit is well constructed, and should hold up well under the mild recoil of minishells.
Elevation and windage adjustments turn easily with the provided wrench. There are no detents felt during adjustments. Use will tell if the unit holds zero without detents.
With the laser optic mounted at the rear of the rail, I can simply turn it on (and off) with a push of the thumb of my shooting hand, which places my thumb (almost) directly above the top-mounted safety. The on/off button is highly tactile when pushed.
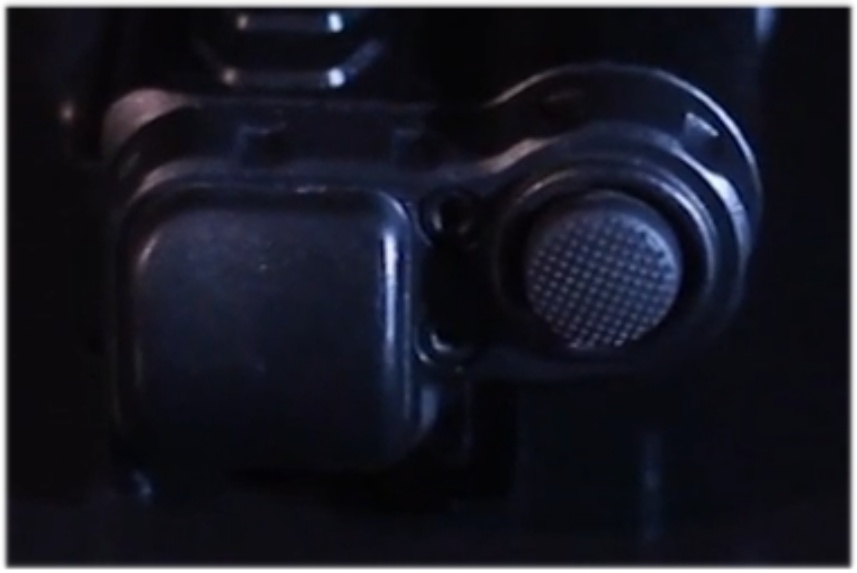
Laser Optic On/Off Switch – Very Convenient!
One advantage of this laser optic is that the beam does not leave a trail. With other green lasers that I have used, you could trace the dot back to the source of the dot by the trail that it left, more so under low light conditions. With this unit, all you see is the dot on the target, or should I say pattern, as this unit really does not have a dot, per se.
A second advantage is that the sight has a lifetime guarantee from the manufacturer.
One disadvantage of the optic is that it is perched on top of the firearm and could be subject to damage.
One of the cons of electronic optics is battery life. The laser needs an operational check periodically, or should I say the battery needs to be checked. I recommend purchasing a spare battery or two to keep on hand.
The unit is secured to the top rail by an integral clamp. A key is included that is used to tighten the clamp. A quick-release type clamp would have been nice over having a special key, although a tool like a Leatherman can be used in a pinch. At first, I was (somewhat) put off with having this unit mounted on top of the firearm, but I am starting to like it.
The odds are that the firearm will be stored more than it is going to be used.
Note that this laser optic is an experimental unit, as I am a bit put off at its size; I still have other options for (smaller) laser optics.
Upgrade #6 – Forearm Strap Modification
During the first range session with the Mossberg 590 Nightstick, the recoil from the firearm forced my ‘pumping’ hand to the front of the strap even with the highly ribbed forearm, which positioned my hand on top of the strap mounting screws. I decided to change that. The front mounting screws were removed, and the strap re-positioned so that the front mounting screws were in front of the strap (see the image below). The edges of the strap are finished, and the look is not hindered any. Although my hand may still move to the front of the strap under recoil, my hand is no longer abused by the front mounting screws. How well this will play out overall, I cannot tell. But, I will find out during the second range session with the firearm with all updates installed.
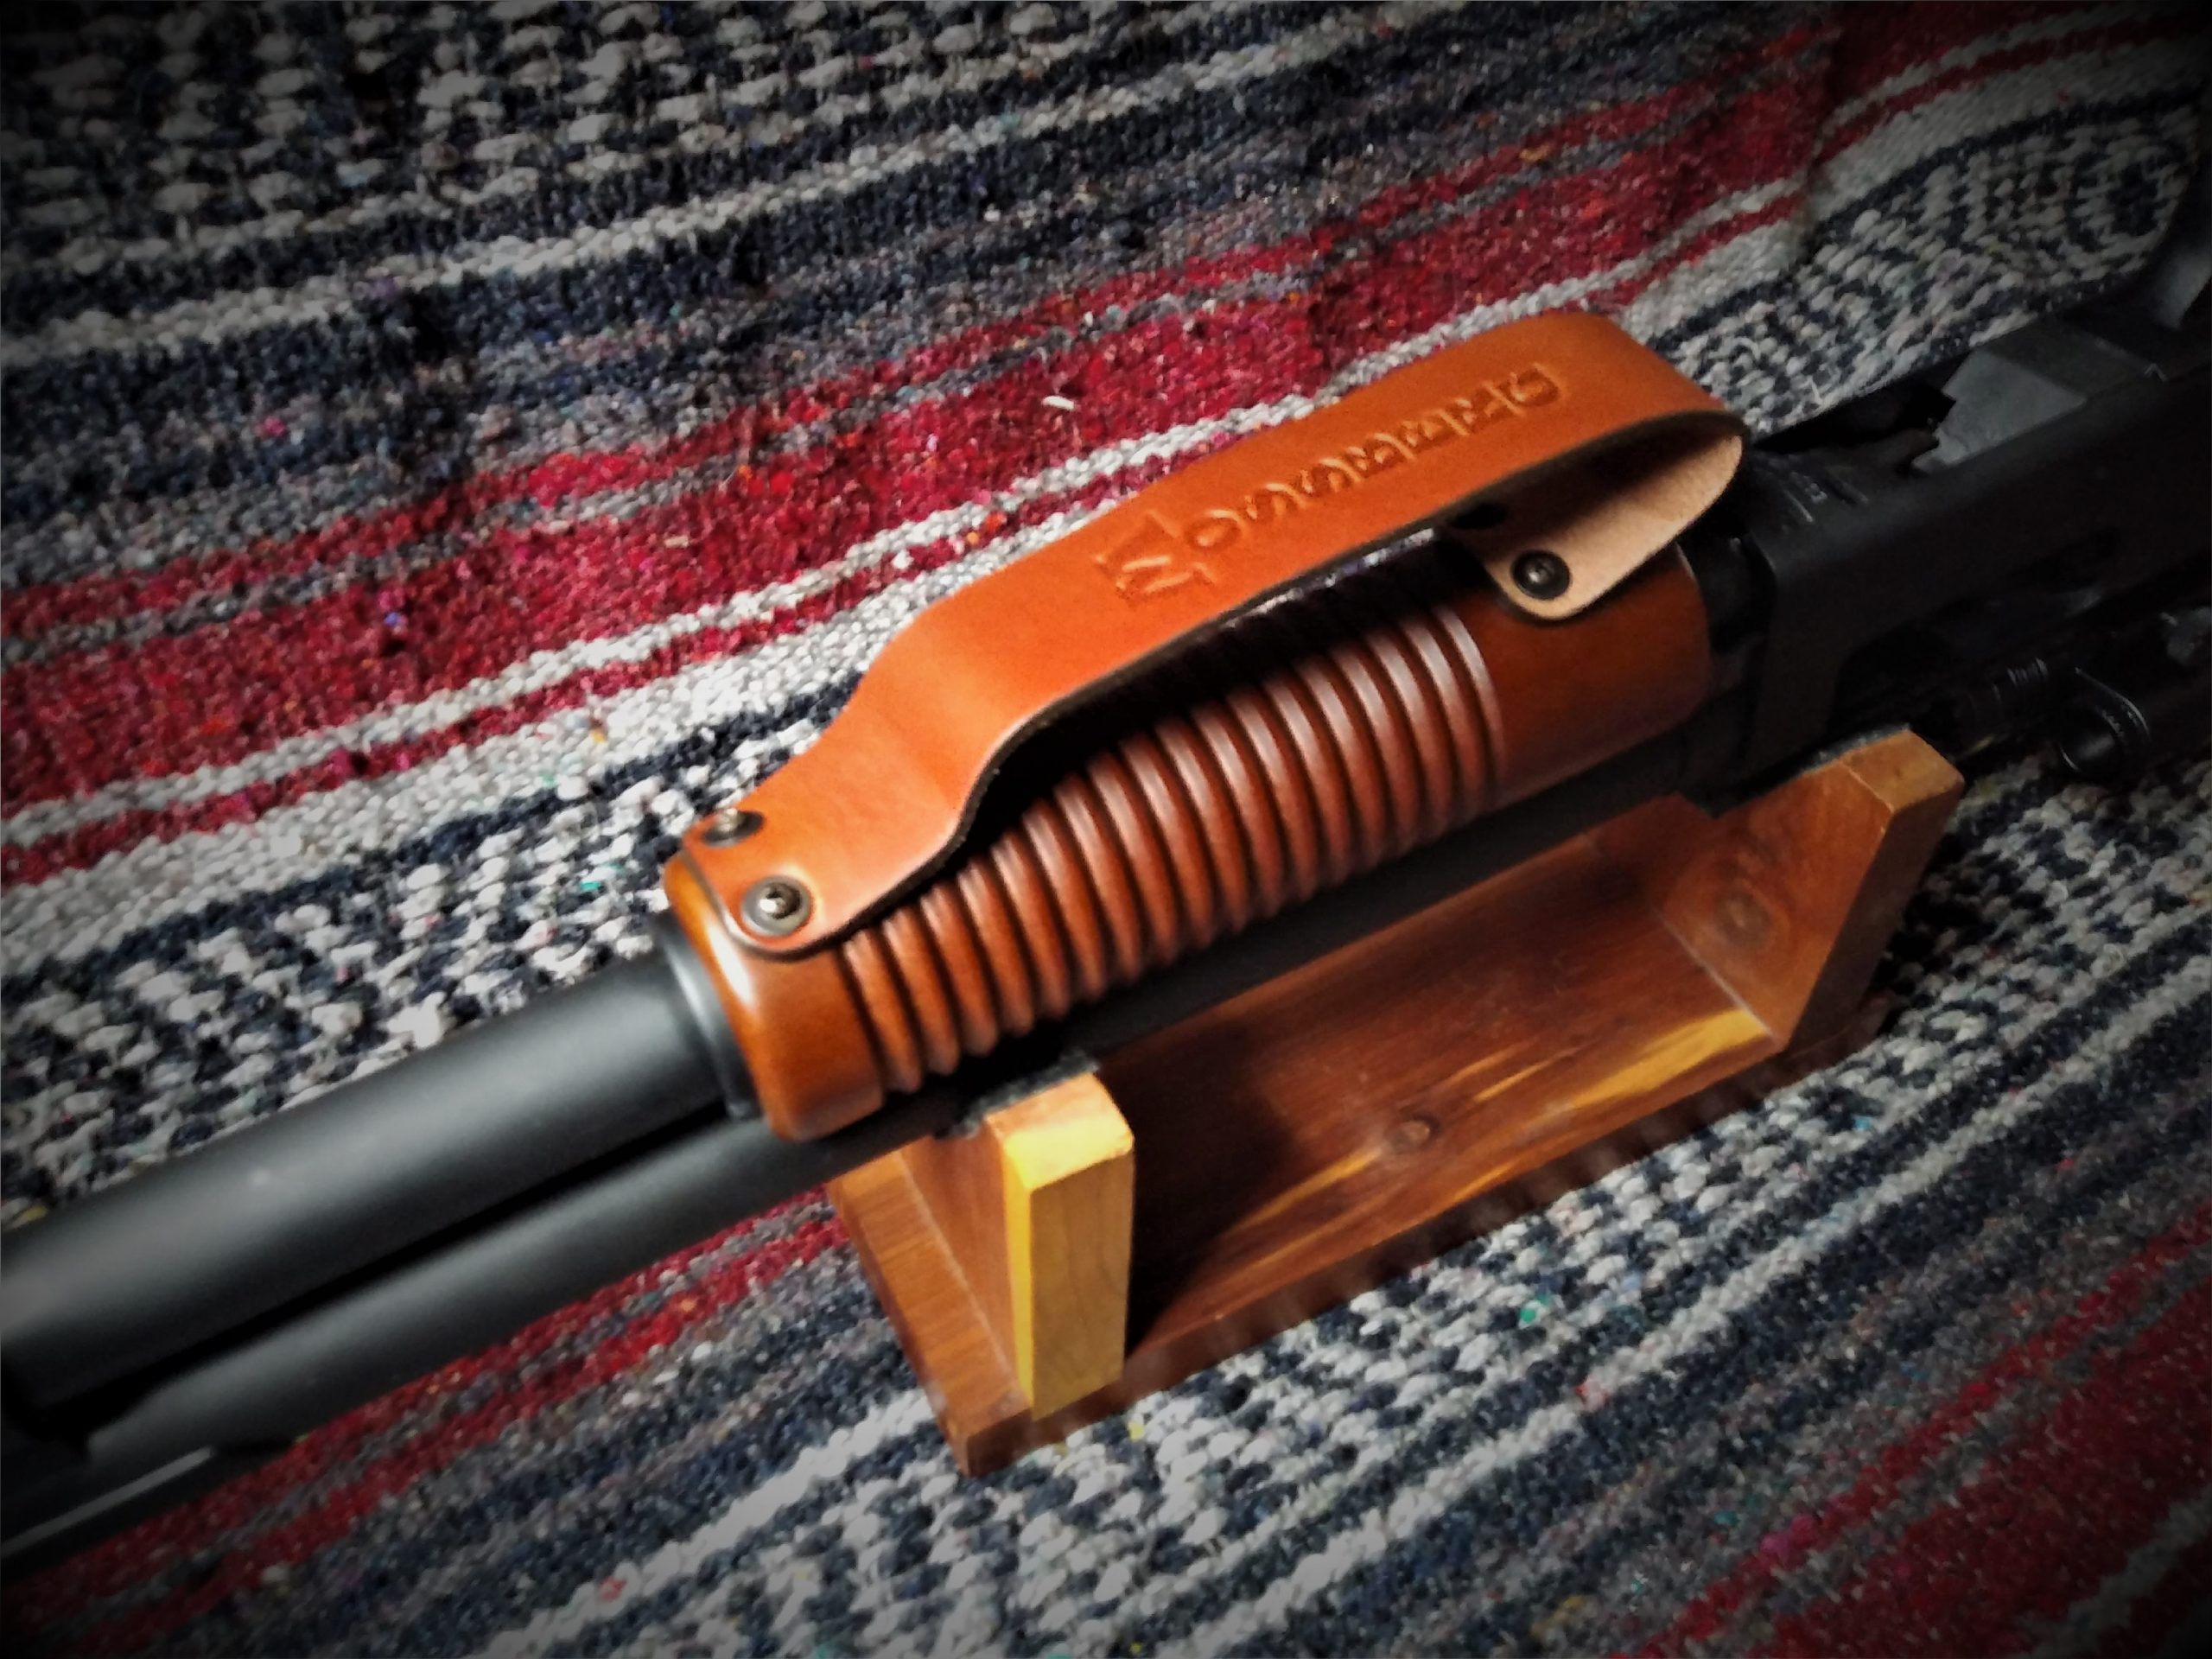
Front Strap Modification
Upgrade #7 – The Transport System
While all the above upgrades are about the firearm itself, there is one upgrade that is especially useful, although it not directly mounted on the firearm, and that is the transport system for the firearm. I needed something that would house the firearm while transporting the firearm and came across the Charlie Delta Tactical 30″ Padded Weapons Case w/Removable MOLLE Mag Pouches, Black.
Some “Tactical” types might prefer a scabbard of sorts; however, I wanted to be a bit more discreet when transporting the firearm and this 30” x 10” padded compartment case is working simply fine.
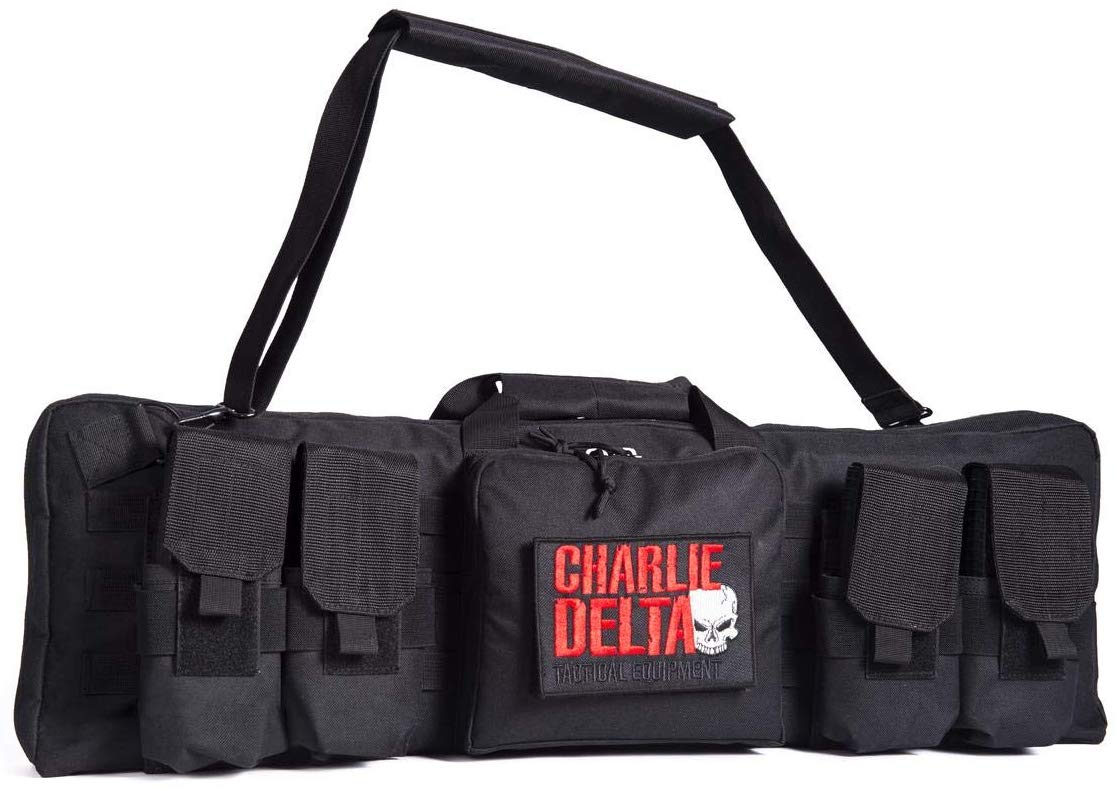
I have; however, exchanged the magazine pouches with two Tactical 5.11 Unisex VTAC Shotgun Ammo Pouch Bag for use with shotgun ammunition. The two magazine pouches that came with the case will be used elsewhere.
I have written a separate review article for this case and the two shotgun ammunition pouches. Click here to view the article.
Range Time with Upgrades
So, here I go with the second range session and with all upgrades installed. The only work that I had to do was to sight in the laser optic, which was done at ten yards. I used a pistol rest for sighting in, as I cannot shoulder the firearm. It was positioning the firearm’s feed tube on the rest while holding the forearm and grip, center the beam on the “X,” and let fly. Adjusting the laser quite easy with the provided wrench.
Remaining (Aguila Minishell Ammunition 12 Gauge 1 ¾-inch 7/8 ounce Rifled Slug) shots were fired offhand. As a parting shot (no pun intended), several rounds of Aguila Minishell Ammunition 12 Gauge 1-3/4″ #4 and #1 Buckshot 11 Pellets followed up on the slug shooting. All I can say is that the target was severely injured during the session.
The laser optic mount did manage to slightly loosen during the session. I had not secured the mounting screw with thread locker before the session, which was rectified after a thorough cleaning in the shop after the session.
I found it best, because of the laser optic, to load the chamber from over the top of the firearm, while laying the firearm on its side and using the fingers to help ensure that the minishell did not want to bounce or exchange ends during the loading process. Subsequent shells (or tactical reloads) were loaded normally; from the left side and beneath the feed tube.
I can tell you that my effectiveness with the Mossberg 590 Nightstick improved using the laser optic over the first session when using only my instincts. While I am close using my instincts, and with a .73 caliber slug I suppose close is good enough, but I am more accurate with the laser sight.
Day 2 of the range session, with all upgrades installed, left me with warm fuzzies and a high degree of confidence in the Mossberg 590 Nightstick.
Short-Shucking with Minishells
As I mentioned in Part 1 of this article, just because minishells are being run through the shotgun, or a firearm like the Mossberg 590 Nightstick (Shockwave, or Remington TAC-14, for that matter) does not mean that I can ‘short-shuck’ the firearm.
Short-shucking means that when you pull the forearm rearward you eject the fired shell (the hull), but the travel is not rearward enough to chamber the next round. You must take affirmative action with a pump firearm when pumping the firearm.
Practice shucking ALL the way back, not just far enough to throw out hulls. Even if you use minishells, the action must be cycled as it is intended to be, and you must be programmed to open the action all the way to the stop.
Summary
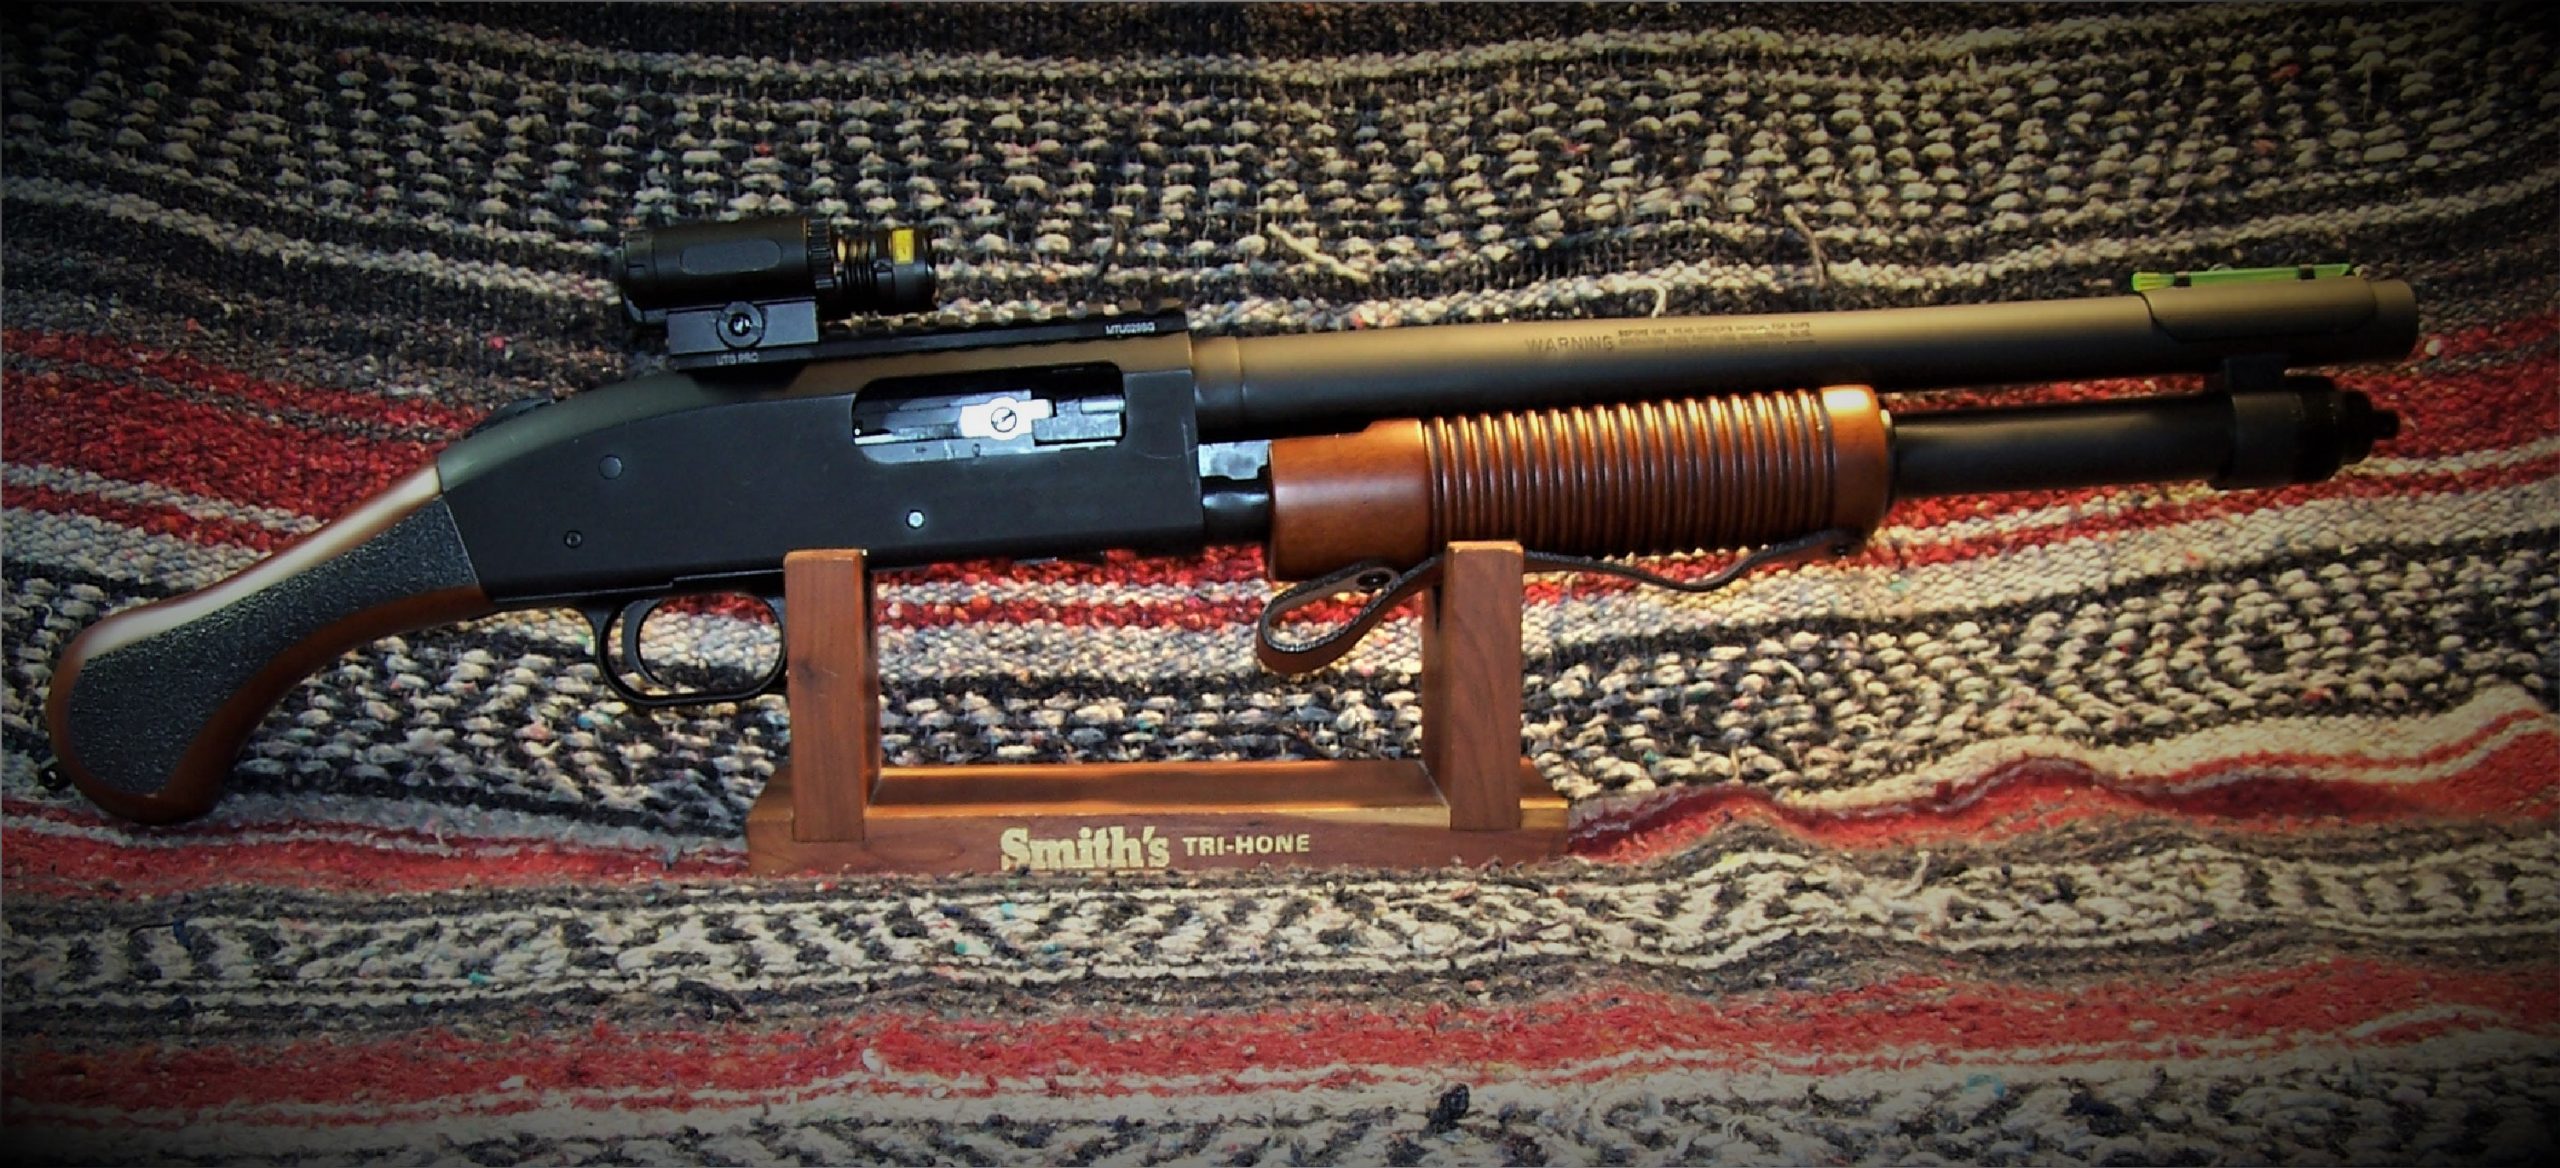
With all upgrades, the firearm’s dry weight has gone from 5 pounds 4 ounces to 5 pounds 10.6 ounces. Not a significant increase in the grand scheme of things.
Do the upgrades make the Mossberg 590 Nightstick unwieldy? Not at all. While it is not as streamlined as in original form, the handling has not been affected, although the functionality has – for the better.
The Mossberg 590 Nightstick is destined to be the bedroom “Go to” firearm. With the selected ammunition and upgrades, I have no doubt that the Mossberg 590 Nightstick will be able to carry out the duties that I impose on it without fail.
Note that I have no plans to install a side saddle shotgun shell holder like many do. I am comfortable enough with the 8+1 capacity that minishells provide.
Update 09/11/2021
The top rail and laser have been updated. In fact, they are now the same unit. Read about the update at: Monstrum Red Laser Sight System with Picatinny Mount.
![]()

