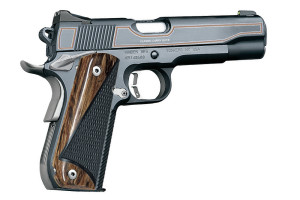
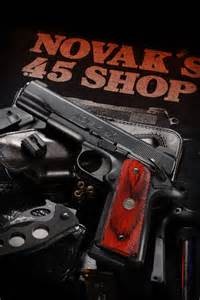
I have owned, sold, and handled quite a few firearms in my short life and it seems that I gravitate to the 1911-based pistols more than most other types of semi-automatic pistols. The fact of the matter is that although I don’t need another 1911-based pistol, I will find it hard-pressed for me to turn one down if the quality is there and the price is right.
I have been in several gun shops lately and have come across people who are interested in owning a 1911 but know nothing about the pistol, which contributes to their reluctance in purchasing one. If I overhear someone asking questions, I have a bad habit of trying to interject my knowledge of the pistol and answer their questions. Not that I am a1911 expert – far from it. However, I do feel that 40+ years owning and shooting them does give me a heads up on the subject matter and I am happy to share my limited knowledge with someone who is interested in owning/carrying a 1911-based pistol. One of those folks just might be you.
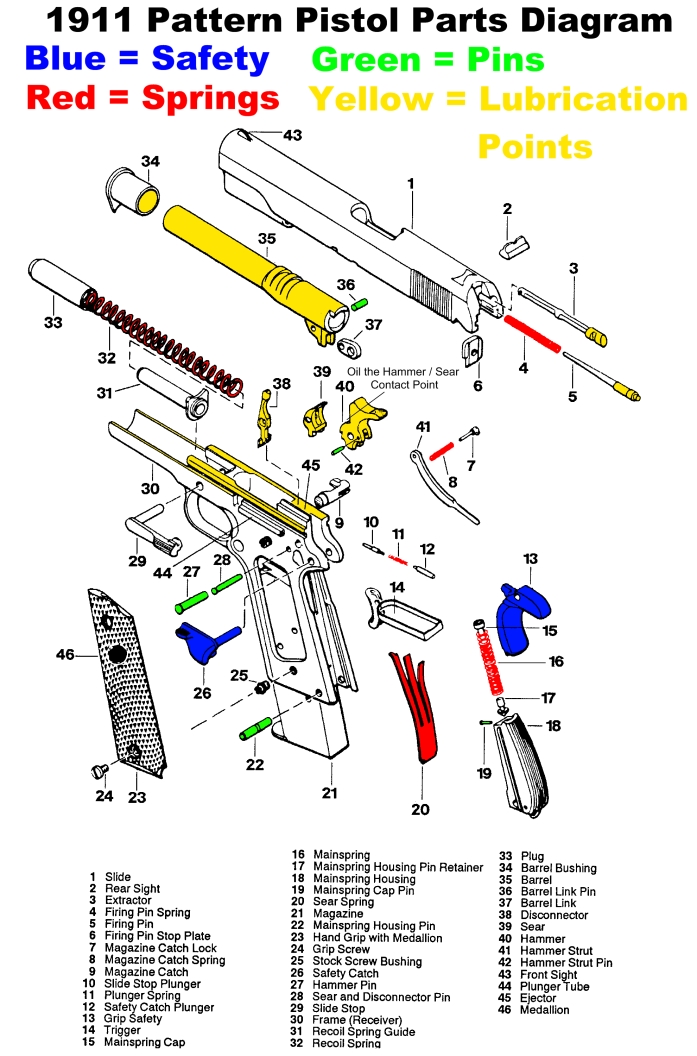 As a guide in this discussion, we have to come to terms with terms. If you already own a semi-automatic pistol, you may already be familiar with some of them. There are cross-terms that can apply to the 1911 and to other semi-automatic pistols, but there are some terms that apply only to the 1911. And, then there are component nomenclatures. Like any other semi-automatic pistol, the 1911 is comprised of parts and in our discussion of the 1911 pistol; it is good that we are on the same page. I have included a parts diagram for that reason. Throughout the discussion I will refer to a part and then include the illustration’s reference number in parenthesis (where I feel it is necessary to do so) for your ease in locating the part. Feel free to click, download, and print the “1911 Pattern Pistol Parts Diagram” to use as a reference while reading this article.
This write-up is not going to be a detailed and exploded view of the 1911 pistol and I’ll refrain from providing details about parts like sears, and pins, and such. I am going to limit the discussion to major categories and provide some information within those categories.
DISTINGUISHABLE FEATURES:
The 1911-based pistol has several distinguishing features that may, or may not, set is aside from other semi-automatic pistols and these will be discussed in somewhat detail later. All features are contained on or within two functional groups: Slide and Frame.
Slide:
The slide consist of the barrel, barrel bushing (or not), machined barrel locking lugs, guide rod components (31, 32, and 33), sights, firing pin and firing pin spring with retainer 4, 5, and 6), extractor (3), breech face, disassembly and slide lock notches, and (depending on the series that is mentioned at the end of this article) a firing pin block (not shown).
Frame:
The frame consisting of all fire control components (to include trigger 14), disconnector (38), grip and thumb safety (13 and 26), trigger housing, slide stop (29), grip panels and mounting hardware, magazine housing, mainspring housing and pin (18 and 22), hammer components, main spring (20), and magazine release assembly (9).
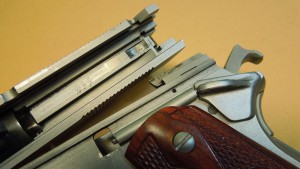
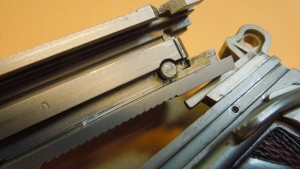
The slide and frame are mated together through a rail system that is machined into each group.
The above mentioned groups and associated components are standard on any 1911-based pistol, regardless of the category in which they are included.
The major categories under discussion are as follow:
- Size
- Manufacturer (or smith)
- Features and Options
- Chambering
SIZE:
There are three basic sizes, all originally introduced commercially by Colt, and thus referred to by the Colt name.
You may see a given size/model of 1911 referred to by the model of its manufacturer’s choosing, or frequently, by the Colt designation:
Government:
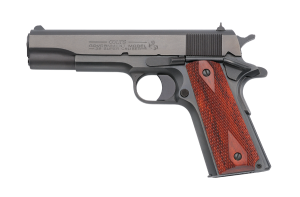
The “Government” model has a; 5-inch” barrel, full sized grip frame, and a 7 or 8 round magazine. This model may also be referred to as; Custom, Full Size, or FS. It is most commonly referred to simply as a 1911, Government, or G.I Model.Commander:
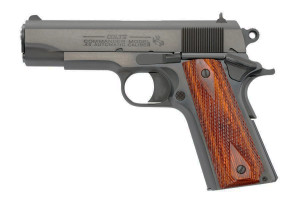
The term, “Commander” is actually a trademark of Colt. The “Commander” model has a 4″ or 4.25″ barrel, full sized grip frame, and 7 or 8 round. magazine. The “Commander” model may also be identified by the terms; Pro, Champion. Custom, Compact, Carry, or MS (for medium size) as the manufacturer of the pistol see fit.Officer:
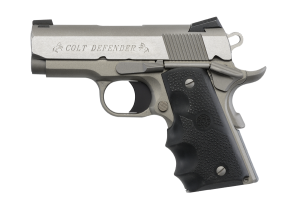
The Officer model consists of a 3″ or 3.5″ barrel, shortened grip frame, and a 6 or 7 round magazine. The Officer Model may also be referred to as: Ultra, Compact, Micro-Compact, Ultra-Compact, Ultra Carry Hideout, Undercover etc…Additionally, there are some other variations, including the long slide (typically a 6″ barrel and slide), the CCO (commander barrel and slide on the officers frame), and a few have put an officers slide and barrel on a full sized frame, with several different names.
Different manufacturers are inconsistent about what they call their different sized 1911s. In fact, sometimes the same manufacturer isn’t consistent with model names. Kimber and Springfield have both changed what they call different sizes more than once.
MANUFACTURER OR GUNSMITH?
Essentially, there are three levels of 1911 manufacturing:
- Factory Standard
- Factory/semi customs
- Full Custom
Factory standard:
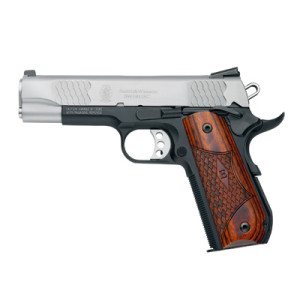
The Smith & Wesson E-Series Round Butt 1911. A Fine Pistol For Concealed Carry Right From The Factory
All the major manufacturers are roughly equivalent in quality for a given feature set. All use certain cast or MIM parts. Most of them have their frames and slides forged in Brazil or Argentina; and only final machined here in the U.S. (even though other than Springfield, they don’t label them as such).
Of this group, Para-Ordinance, S&W, SIG, and Dan Wesson are the only manufacturers doing their own forging, or at least using forgings done in the U.S. or Canada (Para-Ordnance used to be Canadian, and did their own forgings in Canada; but they moved to the US a couple years ago, and I’m not sure if they still do. At some point, all three of the others have used Caspian forgings, but again, they may have changed by now. Someone has reported to be that Para-Ordinance U.S. frames are all cast in house now) for any models at all; and I’m not even sure they’re still doing that. I’ve heard from various sources that all of them have off-shored or moved to investment casting, but I cannot confirm it.
So, what are the real differences?
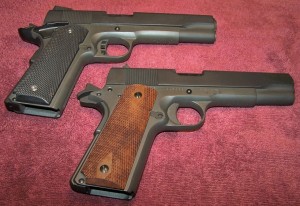
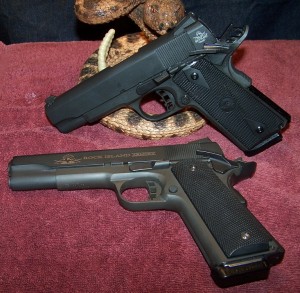
Rock Island 1911 FS Tactical (Top) and 1911 FS G.I. (Bottom). Both are Excellent Performers for a Very Reasonable Price
Colt has excellent quality control, but poor customer service. Kimber has poor quality control, and awful customer service. Both S&W and Springer have excellent quality control and customer service.
Dan Wesson is now owned by CZ, who has a reputation for excellent quality control and customer service, but they are new to the 1911 business and the new Dan Wesson line hasn’t had much time to build up a market history as of yet. That said, all indications so far are very good; especially since they have decided to use hard parts from STI and Ed Brown (two of the best custom manufacturers in the business). I almost put DW in the “semi-custom” category because of this.
Armscor/Rock Island Armory, Colt, and Springfield offer some low end models, with the most basic features. If you don’t like the “modern” 1911 features, you can get a Springfield Mil-Spec, or GI model; or a basic 1991 or a repro WW2 pistol from Colt. The Colts are still Colt expensive; but the Springfields list out at $600.
Expect to pay from around $600 to around $1300.
The Factory/semi Customs:
All the major manufacturers play in this space; but S&W, Kimber, Colt, Springfield, and Remington have a MAJOR production effort devoted to it (in fact, all Colts guns except the basic 1991 are “custom shop”). They use higher quality parts, and have their in house custom shops do the final machining, assembly, and QC.Also, the larger custom manufacturers like Ed Brown, Les Baer, Wilson Combat, Rock River, STI, SVI, and Nighthawk all have offerings in this market position as well.
Almost all of the factory/semi customs (except Kimber and Springfield armory), use parts from Ed Brown, Les Baer, Wilson Combat, or STI; and most of them (again, excepting Kimber and Springer) use frames and slides from Caspian or STI. So what you end up with when you order from one maker, are probably the same actual parts you would get if you ordered the same features from another maker. The only differences being the finishing, and the specifics of gun- smithing etc…
All are excellent; and they have any number of models and features to choose from, at several different price points.
Expect to pay: anywhere from around $1200 to around $2500.
Full Custom:
This is the domain of the custom manufacturers listed above; as well as a few high end custom gun smiths (Ted Yost, Hank Fleming, Wayne Novak, Bill Laughridge, Clark Custom etc…).They use the highest quality parts, and meticulous hand machining, fitting, final assembly, testing, and quality control. They also fit a gun specifically to you, with whatever features you want (and leaving off those you don’t, which can be more important).
The gunsmiths who have good reputations in this business have it for a reason. They all do great work, and it’s hard to say one is any better than another.
Expect to pay: anywhere from $1500 all the way up to $5000 for standard 1911s; without accounting for any fancy decoration, engraving etc… which can run into the five figures range.
FEATURES AND OPTIONS:
The 1911 is easily the most customizable; and most customized pistol of the modern era. There are literally hundreds of thousands of different parts and options to deal with.
I’ll try to keep this as basic as possible while starting with the slide assembly.
The Slide:
The original slide of the 1911 came with small serrations on the rear and on each side of the slide that aided the user in racking the slide to the rear and locking it in place, or to sling-shot the slide closed to chamber a round.
Modern day slides may have additional serrations on the front of the slide in addition to that in the rear.
The ejection port of the original 1911 was small and probably contributed to jams more often than not. Gun smiths soon found themselves working on 1911 slide to enlarge, lower, and flare the ejection ports to provide faster and more positive expended case ejection. Today, lowered, flared, and extended ejection ports are the norm while true clones of the original 1911 remain the same as when they were first designed.
Barrel:
The original 1911 was equipped with a straight barrel forward of the locking lugs that slid through a barrel bushing (34) at the working end of the barrel.
There are two basic barrel styles here, standard and bull.
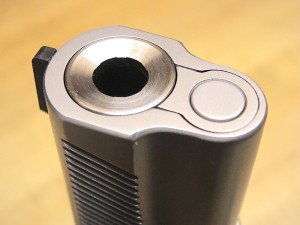
Bushingless Bull barrels:
Bull barrels (also referred to as “Tapered” barrels have thicker metal machined in a cone shape at the muzzle end. Bull barrels can mainly be found in “Commander” and “Officer” models of the 1911 pistol, as there is some additional weight at the front of pistol to aid in recoil management.The Bull Barrel may or may not use a barrel bushing as do standard barrels.
The length of the barrel may also play into the use of a bull barrel, although I have seen, and do own, “Commander” model 1911s that incorporates a standard barrel in their design. Since the rear of the barrel drops slightly downward during recoil, the angle of the barrel at the muzzle is greater than with a “Government” or “Completion Long-Slide” barrel and a different type of barrel guide may be necessary.
Most, if not all, “Government” model 1911s have a “standard” barrel
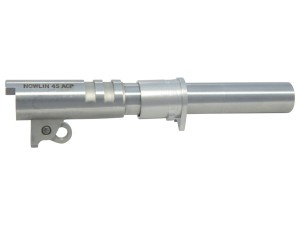
Standard Barrel:
Standard barrels keep approximately the metal the same thickness throughout, and engage a bushing in the slide.In keeping with the original 1911 design, most 1911 pistols today incorporate the swing’ link (37) in the barrels design. The swing link allows the barrel to pivot downward at the breech end after a round is fired and the barrel unlocks from the slide. This downward movement allows the barrel to line up and receive the next round.
A bull barrel or standard barrel can have either a “standard” aka “thumbnail” feed ramp; which uses a partial feed ramp built into the frame, and a partial thumbnail feed ramp cut into the chamber; or they can be a fully ramped barrel; which cuts the feed ramp out of the frame, and builds it into the barrel.
Generally speaking, fully-ramped barrels are stronger, and feed better, so I prefer them; but some do not (I’m not sure why, other than perhaps traditionalism).
Guide rods and Recoil Control:
This is probably the single most controversial option on 1911 type pistols (which is a bit odd, because they are standard on most other types of automatic pistol). The subject is a bit too long to go into in a paragraph and I will defer you here: http://anarchangel.blogspot.com/2007/05/muthaflgr.html.If you don’t feel like moving away from this article, I’ll try to provide the “Reader’s Digest” version of guide rods here.
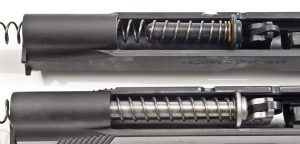
The original 1911 came equipped with a short guide rod (31), a recoil spring (sometimes referred to as the guide rod spring) (32), and a guide rod bushing (33) that was a removable, closed-end affair and housed within the slide. The barrel bushing also served to keep the guide rod bushing in place. Essentially, the guide rod guided the recoil spring during compression and expansion. It worked then and it works now. However, at some time the full-length guide rod was introduced and it is a very popular, and misunderstood, feature in modern 1911 pistols.
Standard Guide Rod:
The standard guide rod is a short rod that rests against the inside of the pistol’s frame and has a designated spot to do so. It provides a base for the recoil spring and is essentially used to keep the recoil spring straight under recoil conditions (when the recoil spring is compressing) and when returning to its rest and pre-loaded state.
The standard guide rod also allow you to perform a “press check” to assist you in determining if the pistol is loaded – as if you should not already know.
Full Length Guide Rod:
The full length guide rod butts against the frame and serves the same purpose as the standard guide rod but in a different way. The full length guide rod runs through a guide rod bushing in the slide. The guide rod bushing may be external or internal to the slide. If external, the barrel bushing holds the guide rod bushing in place. If the guide rod bushing is internal, the recoil spring keeps the guide rod bushing in place against the inside of the slide. The full-length guide rod lessens any lateral movement of the recoil spring during its normal cycling (compression and expansion). The full length guide rod also adds weight (about 1-ounce or less) to the front of the pistol, which some say, aids in recoil management due to the added weight.
Also, some say that the full-length guide rod aids in accuracy. However, even top competition shooters and other experts have debated this.
The full length guide rod may or may not add complexity in disassembling and/or assembling the pistol. I have worked with one-piece and two-piece full length guide rods. With some, the pistol can be disassembled as it would be with a standard guide rod. With others, disassembly (and subsequently assembly) of the pistol is more complicated. What it essentially comes down to is how lazy you are or what you can live with.
For example, the Springfield 1911 Loaded comes with a two-piece full length guide rod that runs through an external guide rod bushing. You must first unscrew the top section of the guide rod. Then the pistol can be further disassembled as normal to the 1911. I have since retained the full length guide rod, but exchanged the two-piece unit with a one piece unit as it eliminated the need to carry a 5/32-inch Allen head wrench with me. As a second example, I have several 1911 pistols that include full length guide rods, but are of the internal guide rod bushing type. For these pistols, the slide is removed in a manner dictated by the design of the pistol, but the guide rod must be pressed forward (under spring tension) until a “captive” hole is revealed. Then, a modified paper clip is installed into the “captive” hole to hold the now “captivated” guide rod assembly together, which can then be removed from the inside of the slide. To further the disassembly of the guide rod “assembly”, the modified paper clip must be removed – and this does take a “special” tool to prevent loss of guide rod parts and possible injury from flying guide rod parts. This also applies to assembling the guide rod “assembly.” You can read about my “special” tool at: https://guntoters.com/blog/2015/12/11/rock-island-armory-armscor-1911-standard-ms-product-review/
This is not to persuade or dissuade you from purchasing a 1911-based pistol with or without a full-length guide rod. I would rather see you with a 1911 regardless of the guide rod system used. With that, it is up to you to determine what you want in guide rod systems. With that said, there are many semi-automatic pistols that incorporate full-length guide rods in their design and they seem to run just fine.
With a full-length guide rod installed, you will be unable to perform a “press check” as you can with a 1911 equipped with a standard guide rod. Some manufactures cut a small notch at the rear of the chamber so that you can visually see if a round is chambered. If the slide is closed, I personally consider the gun loaded regardless if a magazine is inserted or not.
Sights:
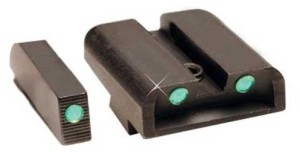
The front and rear sights (43 and 2) on the original 1911 were wanting, for lack of a better description, but were suitable for the roll that they intended to fill that, it seems, was to simply get the barrel in the right direction. The front and rear sights were built close to the slide in order to get them as close to the bore-axis of the pistol as close as possible. The original 1911 was a combat pistol, after all, and meant to provide CQB protection for the carrier of such pistol. A simply rounded post in the front to line up with a very shallow notch in the rear sight and it took quite a pistolero to achieve hits at the Government’s specification of placing a round of 230-grain ball ammunition in a target at a distance of 50-yards. Sights; however, can be damaged in combat and thus the reason to keep them as low-profile as possible.The sights are your second most important interface with the weapon after the trigger… and only slightly less important at that.
There are many visual options here, including plain black, three dot, tritium (night sights), fiber optics; as well as several construction or style options like low profile, high profile, target style etc..
Basically, again, it’s a matter of personal preference and your intended use of the pistol. More importantly, I feel, is how well you use any type of sight to achieve the purpose of hitting your target.
Most 1911 pistols manufactured today for the general shooting public, come with quality 3-dot sights, fiber optic, adjustable rear target, or night sights.
Finish:
There are a lot of options here; with modern polymer based finishes, nearly anything you’d like in fact.
I personally prefer matte or brushed stainless steel; because it can’t wear off, and you can machine it, or buff/brush/blast scratches out without refinishing. Others prefer traditional blued finishes, which are beautiful, but not very wear or corrosion resistant.
Many pistols are now coated with cured (heat, chemical, or both) ceramic, or polymer based finishes; which can be had in nearly any color. Some of them even have nickel, or Teflon, or other materials embedded in them, to add wear and corrosion resistance.
My personal recommendation is to choose a wear and corrosion resistant finish that matches whatever aesthetic you prefer.
Frame:
Most of the frame configurations mentioned earlier is available in several different frame materials.
Traditional is, of course, carbon steel (usually blued), but most manufacturers also offer stainless steel, and lightweight aluminum options. Some even offer titanium, or polymer frames.
There are advantages and disadvantages to each choice:
- Carbon steel was original to the 1911. Carbon steel is strong, durable, and relatively cheap; but it is heavy, and has essentially no corrosion resistance.
- Titanium is light, strong, and corrosion resistant; but expensive to manufacture and machine, difficult to finish, and can crack easier than the others.
- Aluminum is light, corrosion resistant, and easy to machine; but not as strong or wear resistant as steel, and more expensive.
- Stainless is corrosion resistant, but more expensive than carbon steel, more difficult to machine finely, and to finish.
- Polymer is cheap, easy to manufacture, and corrosion resistant; but it’s hard to keep it to tight tolerances, durability for some parts is iffy (they usually put steel inserts in various places to help compensate), and it’s ugly.
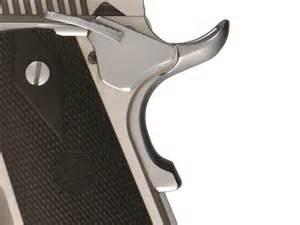
Trigger:
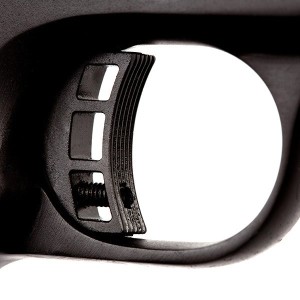
Long, Skeletonized Triggers with Over-travel Adjustment is Very Common On all Modern 1911-Based Pistols
Today, different lengths, weights, faces, materials, and pull weights are available.
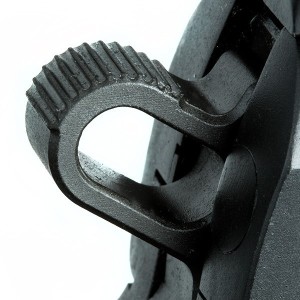
Most people prefer long or extra long triggers, with serrated faces. Lightweight aluminum, skeletonized, flat-face triggers are very common on 1911-based pistol being manufactured today.
As to trigger feel, I like a trigger between 4 and 5 pounds in pull weight for a 1911-based pistol used for self-defense, but I’ll accept a heavier trigger weight as long as the trigger is smooth in operation. I also like a little take-up (slack), a crisp break, and no over-travel (all my triggers are adjustable for over-travel).
Hammer:
The original “Government” model 1911 was equipped with a spur hammer (40).
Again, you have different shapes, weights, and materials are available. There are three basic styles of hammers:
The Spur:
The spur hammer is long, narrow, and flat; and usually has a serrated or knurled cocking surface
The Rowel:
The Rowel hammer is round, has a hole through the center, and serrations. The Rowel hammer is sometimes called the commander hammer, or the HiPower hammer, because both configurations use this style by default.The skeleton: If you took the long part of the spur hammer, grafted the circle part of the rowel onto the tip, and hollowed out the middle, you would have a skeleton hammer. This is the most popular style in premium and custom guns today.
There are also numerous other styles that involve bobbing off bits from one of the above, or changing the shape a bit one way or another.
As to material, I personally recommend going with a forged and machined tool steel part; but cast parts, MIM parts, even titanium hammers are available.
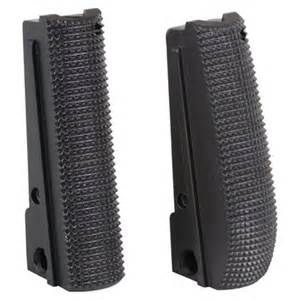
Grip Panels:
The original 1911 wore a set of wooden grip panels (23). The original grip panel thickness was approximately 0.25-inches and that dimension is pretty much the standard to this day.
This is utterly a matter of personal preference. It affects both ergonomics and looks. If you have small hands, thin grips are available. There are also thicker grips available for those big-mitted folks.
Grip panel materials vary widely from wood, polymer, rubber, natural bone, composite, aluminum, G-10, and even pewter. There is also a wide range of designs (checkering, inlays, etc.) that will enhance the looks and feel of the grip panels in the hand and also provide more control over the pistol under operating conditions.
Also, the grips are the single easiest change you can make to a 1911. You can completely alter the look and feel of the gun with a simple $20 (or $200 or more depending on your tastes) grip change. So if you like a gun but don’t like the grips, go for it, they’re cheap and easy to change.
Wood, polymer, and rubber grip panels are found on most Off-The-Shelf 1911 pistols available today.
Thumb safety:
The original 1911 was outfitted with a small thumb safety (26).
Again there two choices to make here, Single sided or ambidextrous.
Single Side:
The original 1911 came equipped with a single, left-side safety lever. Left-handed folks had to learn how to use the safety either by using the trigger finger (or shooting hand thumb) or use a
Ambidextrous:
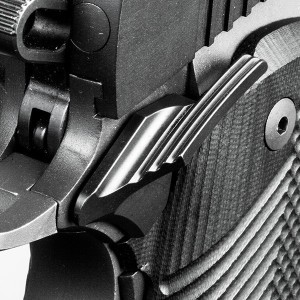
Some people prefer to have a safety on both sides of the gun for left or right handed use. Some people prefer to keep the safety right side only, both for looks, and to reduce points to snag on.There are several different shapes; wide, narrow, long, short, bobbed etc… Again some people don’t like how various styles look or feel.
Honestly, there are advantages and disadvantages to whatever you chose; just go with what feels good in your hand. Personally, I like rounded edges on the safety but I won’t throw a 1911 away because the edges are more squared than I like.
I prefer an ambidextrous thumb safety (that was not always the case) as I feel that left (weak) hand operation is just as important as right (strong) hand operation. If you are a left-only, then an ambidextrous safety might appeal to you. However, consider that even if you find a 1911 that you really like, but it does not have an ambidextrous thumb safety, one can be installed by a certified and competent gunsmith at a later time.
Whatever you choose though; I HIGHLY recommend going with a forged and machined steel part here. Being forged doesn’t guarantee it is better; but you have a much better shot at it being a better component (IMHO).
Single or double-stack:
The original 1911 was intended to operate with a single-stack magazine (21). Almost all manufacturers offer their frames in the traditional single stack configuration; which typically holds 6, 7, or 8 rounds (at least in .45 acp).
Many manufacturers also make double-stack models, which as the name implies are thicker in the grip, and hold as many as 14 rounds (in .45 – as many as 18 in 9mm). The Para-Ordinance Model 14-45 would be an example
Grip safety:
A grip safety (13) was incorporated into the original design of the 1911 pistol. If the grip safety is not pressed, the pistol will not fire. It was imperative to have a firm grip on the pistol. The original grip safety was short and smooth, unlike many of today’s manufacturing.
Today, there three choices to make with a grip safety
Standard:
The standard short and smooth grip safety today is mostly found on “clones” of the original 1911. The “spur” of the original grip safety (the part that fits into the web of the hand) was very short and if the hand somehow found it way above the spur, the hand usually was “tattooed” by the spur of the hammer as the slide moved rearward and the hammer was forced into the cocked position.
Today, some manufacturers of the basic 1911 pistol have extended the “Spur” of the grip safety somewhat to help eliminate “Hammer Bite.” The Remington 1911 is one example.
Beavertail:
A beavertail allows you to grip the gun deeper into the web of your hand, prevents hammer bite, and aids in recoil management. I recommend beavertails to most people for most guns. Without it, you have to have the gun sit a bit higher, which worsens recoil control. Although, some people dislike the way they look, beaver-tail safeties work.
Memory bump:
A memory bump is a bump, hump, or wedge shaped protrusion on the bottom back of the grip safety, that helps your hand more positively disengage the trigger blocking mechanism; and also helps you index your grip by feel a bit faster. Some people find them uncomfortable or awkward.I personally recommend that people get a beavertail, with some kind of bump; because they really do improve ones grip and indexing. Again, some people dislike the way they look and fell, but like beaver-tail safeties, the memory bump works work.
Again as to materials there are several different available; but as the grip safety is not a stressed part, most just go with standard cast steel or aluminum.
In most cases, and on today’s 1911 pistols, the memory bump is part of the grip safety.
Disconnect Safety:
The disconnect safety (38), or simply the disconnector, is not something that you can see until you disassemble the pistol, as it is internal to the firearm. All 1911 pistols have a trigger disconnect safety. The purpose of the trigger disconnect safety is to prevent the hammer from falling during the recoil/chambering cycle until the trigger disconnect safety falls into a special notch after a round is completely chambered. Also, and if for some reason a round fails to completely chamber, the trigger disconnect safety prevents the hammer from falling on an “out of battery” round.
A quick check that you can make when handling a 1911 of your own or when perusing through 1911 pistols at your local gun shop:
- Cock the hammer.
- Grip the gun with a normal firing grip (pressing the grip safety), and pull the slide back about 1/4″ with the other hand.
- Pull the trigger. The hammer should not fall.
- Repeat the test pulling the slide fully rearward and releasing the slide slowly while pulling the trigger every 1/2″ of slide movement. The hammer should not fall until the slide is fully in battery.
Mainspring Housing:
The original M1911 was equipped with a flat mainspring housing. In 1926, the M1911-A1 was introduced. Among other changes to the pistol, the pistol was equipped with an arched mainspring housing.
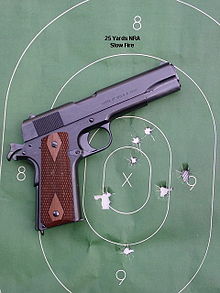
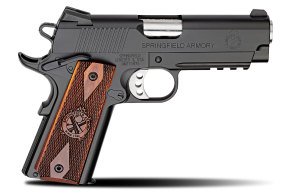
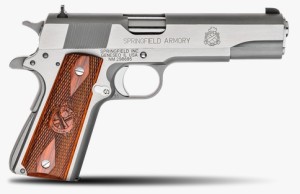
Today, 1911-based pistols can be found with both styles of mainspring housing. While I like the arched mainspring housing, as it fits well in my hand, most of my 1911 pistols have flat mainspring housings. The Springfield 1911 Mil-Spec .45ACP (shown in the lead-in image) is a fine example of the 1911-A1 version of the pistol.
Slide Lock:
The original 1911 came equipped with a small slide lock (29) on the left-side of the pistol. Today, there are many that can be purchased from 3rd party vendors if you don’t like what comes with the desired pistol. For the most part, the slide lock assemblies found on modern 1911 pistols are adequate for use. Most now come with an extended slide lock lever for ease of use when releasing the slide by either hand.
CHAMBERING:
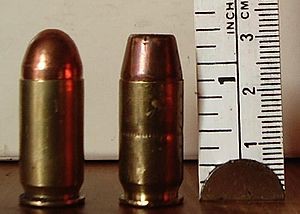
The original chambering of the 1911 was the 230-grain ACP round. It represents a good balance between size, weight, power and performance, and cost.Today, the 1911-based pistols can be found in a variety of calibers to include; .22, .22 TCM, .38 Super, 9mm, .40 caliber, 10mm, .45 ACP, 45 GAP, .45 SIG, and even the .45 Winchester Magnum. There are also 1911-based pistol designs in .380 caliber (I had one of the early Colt “Mustangs” and it was a fantastic little pistol).
Most people will want their 1911 in .45 ACP caliber.
The beauty is that you can select a 1911-based pistol in whatever chambering works for you.
OTHER THINGS UP FOR CONSIDERATION:
Frame Design:
Grip:
The majorities of 1911-based pistol frames are manufactured with a straight grip area and incorporate flat mainspring housings or arched mainspring housings. With few exceptions in factory pistols, the mainspring housing is polymer in material. Again, main spring housings can be changed to the type and material you desire.
There are some that incorporate a rounded grip section in their design. One such pistol is available from Smith & Wesson as part of their E-Series and Kimber .
Rails:
The original M1911 did not incorporate rails, as do many frame designs of today’s 1911-based pistols. Rails allow you to hang lasers and/or flashlights on the bottom of the frame. In fact, there are bayonets that you could attach to a rail. 1911 purists hate rails, tactical-types love them, and I love to hate them, but that is my personal preference in regards to rails on any handgun that I will carry as my EDC. While there are some manufacturers that are proud of their rails and make them a predominate feature, there are others that effectively blend the rail in with the design of the pistol. Consider that you can also purchase (or buy with the pistol) grip panels that have built in laser functionality and unless you absolutely must have a flashlight on your 1911 have your rails. Otherwise, laser-equipped grips would be a viable option.If your current (or future) 1911-based pistol does not have rails, and you wish to have them, there is an option called “rail adapters” and selections of these can be viewed at http://www.amazon.com/s?ie=UTF8&page=1&rh=i%3Aaps%2Ck%3A1911%20rail%20adapter.
Extractor:
The original M1911 had an internal extractor (3) and while many manufactures of modern 1911-based pistol have remained with an internal extractor, some (Sig Sauer, for example) have moved to an external extractor. I have no problem with either as long as they work, which is to extract the spent cartridge shell and hold it long enough for the ejector (45) to do what it is supposed to do – eject the spent shell far, far away from the pistol.
With the above stated, you are far more likely to encounter a 1911-based pistol that has an internal extractor. I have not had an internal extractor fail on me yet, and I am confident in one not failing me in the future. If you are pushing a lot of rounds (thousands) out the barrel, everything is subject to failure at some time, and you can count on any failure as being just normal wear and tear.
Springs and Things:
The standard recoil spring (32) rating for the original 1911 pistol was 16-pounds, which was fine for shooting 230-grain ball ammunition at 850fps out of a 5-inch barrel. Most of the .45 ACP ammunition used for self-defense today exceeds the 850fps of the 1911 days of yore. This leads me into the next paragraph.
No matter what you do though, the first thing you should do when you get the gun broken in, is buy a couple of higher power recoil springs (from Wolff for example), and use the heaviest one that your 1911 will cycle reliably with. If nothing else, you will know what rating of recoil spring you are working with. For the most part, and for my “Government” 1911s, the #18 recoil spring from Wilson Combat works well with light range loads (825 – 850fps) and my defensive loads (currently Remington Ultimate Defense 230-grain BJHP). I am not going to subject my 1911 to +P loads, but I also have #20 and #24 recoil springs available if I do decide to.
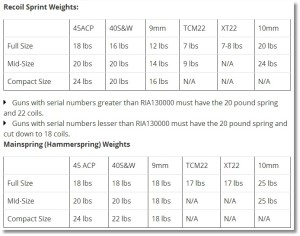
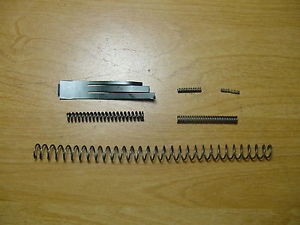
For convenience, I have included a guide from Rock Island Armory recoil and trigger springs for their different categories of 1911 pistols. This guide is also useful for any 1911-based pistol within the categories previously mentioned in this article.Recoil springs and other springs used in the 1911 are inexpensive and several recoil (and other) springs can be kept on hand for little cost. If nothing else, and if you are comfortable (or capable) of replacing springs other than the recoil spring, having springs on hand will cut time and cost for a qualified and competent gun smith to install them. I generally have two springs on hand of each spring rate weight for each category of 1911 that I own.
Magazines:
An 8-round steel magazine was issued with the 1911 and 1911A1 pistols as the standard magazine.
With few exceptions, many 1911-based pistol magazines that are being sold with the pistol are not the best. It’s one way for the factories to save money. If you buy a SIG, an S&W, or a Dan Wesson, you don’t have that problem; because they come with Wilson or McCormick magazines already.
Secondly, not all 1911 magazines will work in all 1911 pistols. If you think you’ve got an unreliable gun, try shooting it with a high quality magazine from Wilson Combat or Chip McCormick. I have also had good experiences with magazines from MEG-GAR. Regardless, plan on investing in good magazines.
I recently had three magazine failures. I was running the Rock Island Armory (Armscor) and had a variety of magazines with me for trial with this pistol. A magazine that were provided with the Ruger SR1911, a Chip McCormick Power Mag, and a Pro-Mag did not pass muster; the Ruger magazine, as did the Chip McCormick Power Mag, popped out during firing, but work perfectly in all three versions of Ruger’s SR1911 series of pistols. The Pro-Mag would not lock the slide back on the last round and was probably caused by a weak magazine follower spring coupled with a magazine follower that tilted forward in the magazine. All Wilson Combat magazines worked splendidly.
I did find some difference in how deep the notch in the magazines was cut. The Wilson Combat magazine notch was slightly deeper than those found on the Ruger and Chip McCormick magazines. Although these magazines seemed to lock-up in the RIA, perhaps it was due to these differences in notch cuts that prevented them from staying in the pistol. Regardless, the Ruger and Chip McCormick magazines that I have will be dedicated to use in Ruger SR1911 pistols. As a note, Wilson Combat magazines function in all Ruger SR1911 pistols without fail.
Weight:
Generally, the two major weight classifications of 1911 pistols are: heavy and tolerable.
If you have been carrying a polymer “wonder” pistol up to his point, you will soon find that a carbon or stainless steel 1911 is heavy. In fact, it might be too heavy to carry. Balderdash! The 1911 has been carried OWB and IWB longer than your polymer “wonder” pistol has been in existence.
It is only when you consider a “lightweight” 1911-based pistol is when you need to be concerned about some things. Early in the lightweight 1911 game, the method of feeding the beast caused some serious consternation among those owning them. While the slide would be made of steel, the frames were usually made of aluminum, which did not fare well with hollow-point defensive ammunition. If the feed ramp was integral with the frame, it would be damaged over time and there was no recourse but to replace the frame.
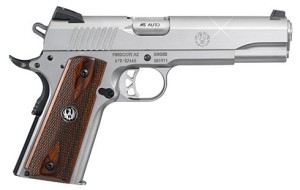
In several modern versions of the lightweight 1911, several means of feeding ammunition are available and should be considered when you are shopping for a lightweight 1911. The Springfield lightweight version of the 1911 pistol use a “thumbnail” feed ramp that is integral to the barrel, which is also of the same material as the barrel. There are also other manufacturers that use this design. The recently introduced Ruger SR1911CMD-A “Commander” style pistol incorporates a titanium insert in the frame that provides feeding, and I can attest that it works very well.
While I may enjoy carrying a light 1911 pistol (and I have), I don’t enjoy them as much when shooting them. The weight of a steel 1911 is very helpful in keeping the muzzle as close to the plane of fire as possible regardless of the category of pistol. As a comparison, my Ruger SR1911CMD-A takes some work to keep muzzle flip down. While it also takes some work to keep the muzzle flip down with my Ruger SR1911CMD (an identically-sized pistol in stainless steel) the effort is quite less and even less with the “Government” model Ruger SR1911. It is just the nature of the beasts.
Personally, I prefer the “Commander” 1911 because I find it a good balance of weight to power. In fact, my current EDC is the Rock Island Armory (Armscor) 1911 MS (Medium size or “Commander”) Standard, which comes equipped with standard features that would have been considered as custom in the early days. The influence to carry this pistol stemmed from carrying a Colt MK IV Series 80 “Combat Commander” many years ago and carrying the Ruger SR1911CMD-A not too long ago. The obvious difference between these pistols is the ambidextrous thumb safety of the RIA, which is now a requirement for me, and I did not want to alter any of my other “Commander” 1911 pistols.
Recoil Buffers:
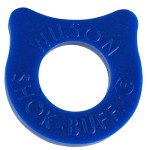
1911-based pistol do not come equipped with recoil buffers; they are an add-on.Recoil buffers fall within the discussions of standard vs. full-length guide rods as to their effectiveness. Here is my take on them.
Recoil buffers are small, flexible units that slide over the guide rod and rest against the base of the guide rod. The recoil spring is lipped over the end of the guide rod and rests against the recoil buffer. The intention is to prevent the base of the recoil guide from battering the frame during recoil, since the rear base of the guide rod is against the frame.
I know of one shooter that installs them for range use and then removes them for carry use. I also know IDPA competitors that swear by them. To tell you the truth, I have no use for them.
When I bought my Rock Island Armory 1911 FS Tactical, the recoil spring was so weak that the pistol would not chamber rounds during a normal course of fire. If it did manage to chamber round, I could definitely feel the impact of the barrel slamming into the top of the frame and the recoil spring fully compressing and forcing the base of the guide rod into the frame of the pistol. There were also numerous jams and stove-pipes. At first chance, the recoil spring was replaced with a #18 Wilson Combat recoil spring. Needless to say, the problem went away. The pistol now chambers anything that is fed in it and I can feel the difference in recoil impulse.
The bottom line is that the recoil spring should never fully compress. It works as a shock absorber and should have a range of motion that allows it not to fully compress or expand. Ensure that your recoil spring is properly rated to the ammunition that you are firing (for example, if you are shooting +P ammunition, the recoil spring rating should be higher than that used for range loads (or even standard loads) and a recoil spring rating of 20-pounds to 24-pounds is well within reason for a “Government” 1911 when shooting hot loads.
The original 230-grain cartridge was rated at 850fps and a recoil spring rate of 16-pounds. Modern .45 ACP defensive-use ammunition, in most cases (no pun intended), exceeds the original 850fps (for example; the Speer Gold Dot round is rated at 890fps, the MAGtech 230-grain Hornady GGJHP is rated at 1007fps at the muzzle, and Fiocchi 230-grain Hornady XTP JHP is rated at 900FPS). It would only make sense to ensure that the recoil spring is matched properly with the ammunition used.
Changing a recoil spring is an easy and inexpensive thing to do.
In short, the use of a recoil buffer is unnecessary if you keep a watchful feel of what your recoil spring is doing.
Running Spares:
Part of the logistics of owning a 1911-based pistol, or any pistol for that matter, is the availability of spare parts and someone to install them if needed.As I mentioned earlier, purchasing a spring kit should be considered. I also keep on hand parts like extractors, firing pins, grip bushings (long and short), and an assortment of various screws that are used in 99% of all 1911-based pistols. With the exception of a few parts that would require a gun smith to accurately fit and tune, I can replace just about anything else in the pistol. If nothing else, parts are readily available and this cuts time and money in gunsmithing costs.
THE WORLD SERIES:
You may hear or read about “70” and “80” series 1911 and that can be confusing if you are new to 1911-based pistols. There are a lot of both series of 1911s on the market. In order to understand the term, we have to look at the Colt 1911 history.Prior to 1983, Colt developed what is known as the Colt MK IV Series 70. This series featured a new “Colett” style barrel bushing that had four fingers (an abysmal failure, by the way). There was, at this point, no firing pin safety although the pistol already had a disconnector, half-cock “safety”, thumb safety, and a grip safety. If the pistol was dropped on the hammer, the firing pin was forced forward and could strike the primer of a loaded round. It should be pretty obvious what happens when this occurs.
In 1983, Colt came out with the Colt MK IV Series 80 that, incidentally, is what I carried as a LEO. There were two distinct improvements in this model. First was the addition of a firing pin block safety system. This system featured an arrangement of internal levers and a plunger designed to ensure the firing pin was blocked until the trigger was pulled. The result was the gun could not accidentally discharge if the weapon was dropped on a hard surface.
The second feature was an improvement on the “Half-Cock” safety that had been incorporated into the pistols design from the start. This improvement was that the “Half-Cock” notch was changed to a flat shelf shape instead of a hook, which could break and allow the hammer to fall anyway.
The half-cock notch was also relocated closer to the hammer’s full rest position (de-cocked). This way, even if you pulled the trigger while the hammer was half-cocked, the hammer’s fall couldn’t impact the firing pin with enough force to set off the primer in the chambered shell (it couldn’t “go off half-cocked”).
While the second improvement did not garner much (if any) attention, the first sure did. Many 1911 purist complained that the trigger was not as “responsive” as with (and before) the Colt MK IV Series 70. Many gunsmiths were put to work by many 1911 owners who wished the “80” series restored to a “70” series pistol. Today, many manufactures make the 1911 in both configurations.
So, in doing your homework as to what series a certain 1911 is, you might find the above useful in understanding the difference between series of 1911 pistols. (The Ruger SR1911 series, all Rock Island Armor (Armscor) 1911 pistols,
While there might have been a discernable difference in triggers of the early Colt MK IV Series 80 and Colt MK IV Series 70, I don’t believe that is true of today’s 1911. I have 1911 pistols with both configurations and I can’t feel any discernable difference between the two, I am not a 1911 purist, and as long as the trigger does what it is supposed to do as I want it to do, I have no problem with either. Regardless, the improvement to the “Half-Cock” notch is still present in today’s 1911 pistols. However, most manufacturers advise against carrying the 1911 with the hammer in the “Half-Cock” position and is probably advised due to liability (and not reliability) concerns.
While most modern manufacturers of the 1911 today make “70” series pistols, there are also wise enough to include a lightweight titanium firing pin and heavy firing pin spring, which negates the need for a firing pin block, offering an updated safety feature to the original “Series 70” design without compromising trigger pull weight. I know that you can find this feature on the Ruger SR1911 series and also the Springfield 1911 series. I believe that the Rock Island Series of 1911s still uses a standard firing pin and firing pin spring (the improved “Half-Cock” ledge has been incorporated, however). If you are targeting a 1911 that you like, it is best to do some research on this if it is a concern of yours. To me, it matters not.
WRAPPING UP:
The 1911-based pistol is an entirely different platform that what you may be used to, or it may be a platform that you are interested in for your first pistol. There are a plethora of 1911 pistols on the market today with features that would have been considered custom components in the early days. You can purchase plain-Jane, bare-bones, G.I clones of the 1911 in any of the three major categories, or purchase a 1911 with features to your liking (extended controls, better sights, grip panels, beaver-tail grip safety, ambidextrous thumb safety, finish, weight, etc.) and these are not expensive pistols for the most part. You can have a quality 1911 for under $500 dollars or you can spend up to (and possibly beyond) $5000 for a pistol of your dreams. Since the 1911 is a highly customizable pistol, all components can be replaced with updated units. I recently read that a gunsmith purchased a Rock Island Armory 1911 ($475) as a donor and built a slightly over $1000 pistol with the options he chose. Of course, the gun smith costs were free. Most of us do not have that luxury and we have to be more careful in our pistol selection. I don’t know about you but I need a pistol that will run out of the box with as little effort on my part as possible.I hope that I have provided some useful information that will add to your already growing arsenal of information regarding the 1911-based pistol, and regardless if this is your first 1911 or you are adding a 1911-based pistol, there are many things to consider.
Purchasing a quality 1911-based pistol is really not that hard nor does it mean breaking the bank, but it helps to know what to look for and if you like what you are looking at when considering one for target, competition, or as an every day carry. If you can’t find one at your local gun shop, one can be built for you. How great is that!
Now, after you have purchased your first 1911, we can talk about the rest of the stuff.
As a bonus, I have included an inspection checklist (in .pdf format) that you can download to your computer. While some of the checks you will be able to perform at the local gun shop, there are more detailed inspections after work is performed on your pistol InspectionChecklist.
![]()


