For those who like to own and shoot reproductions of early black powder Colt revolvers, the name Uberti should roll off the tongue. “Uberti set the standard for producing quality replica firearms by which all others are judged. Uberti’s extensive line of traditional guns has established a long history of reliability. Enjoy the thrill of shooting a gun from the Old West and experience how history repeats itself.” – UbertiUSA
(Author’s Note: If you have begun to read this, I must assume that you are actually interested in the Colt Dragoon in particular and percussion capped revolvers in general. If, by the end of this article, you decide that percussion capped revolvers and black powder firearms in general are just way too much work, all I can say is go back to your modern firearms and be happy. For those who like to venture into firearms of the past, please enjoy them.)
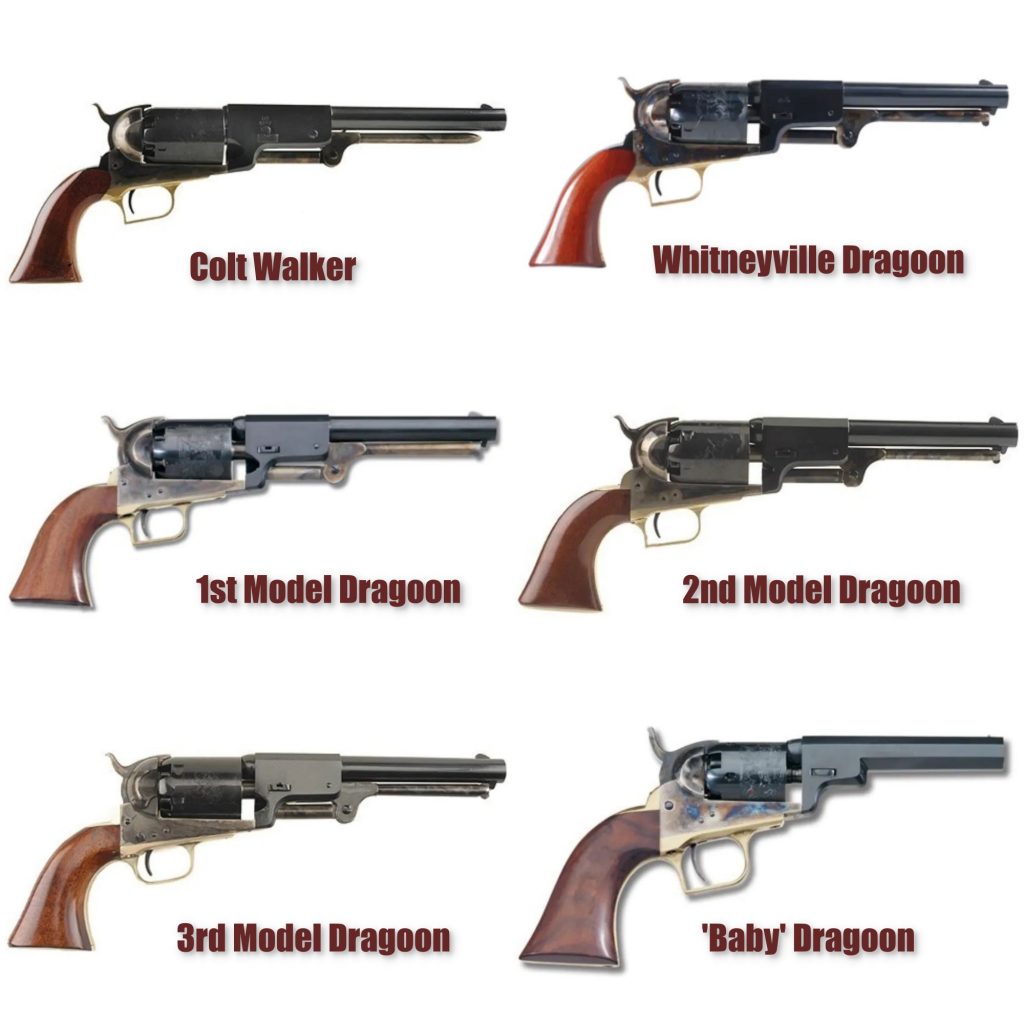
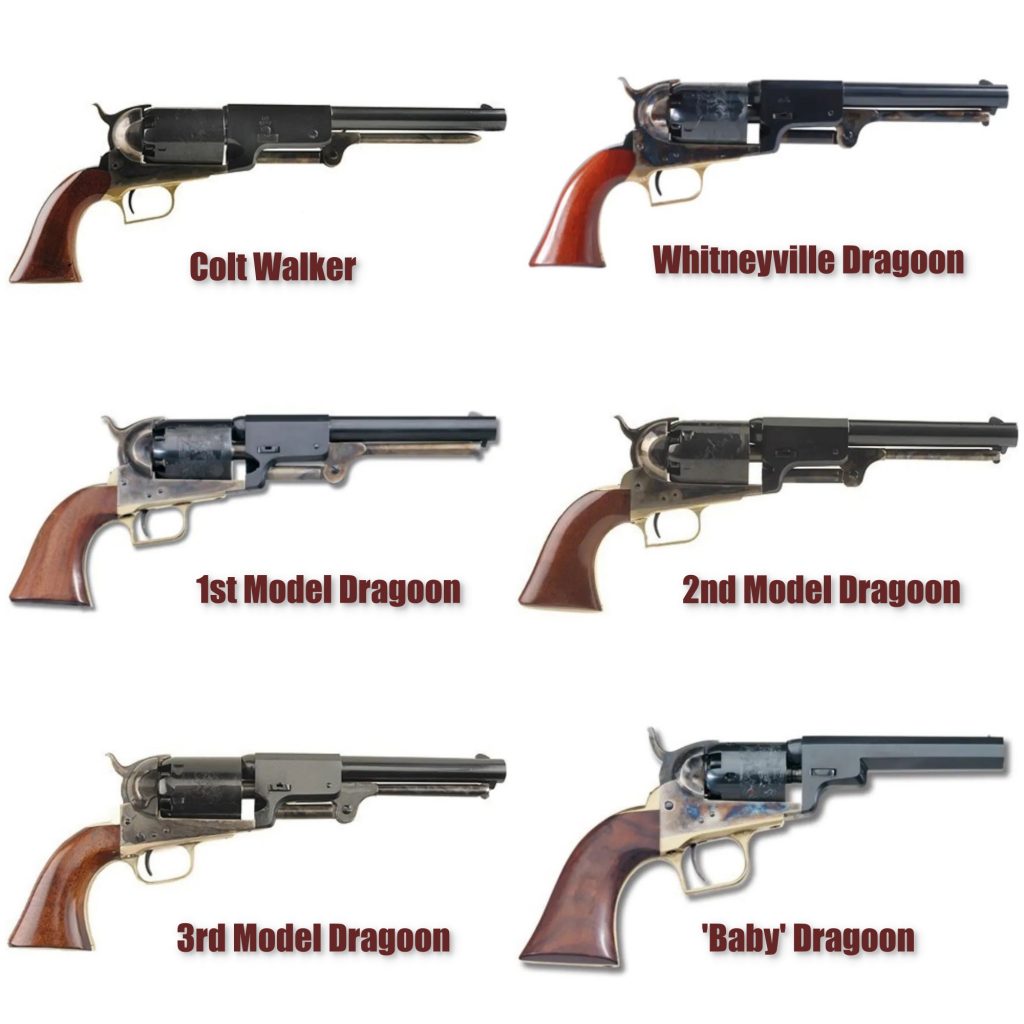
First came the Colt Paterson (designed 1836) revolver then the Colt Walker (1847). What followed was a series of five regnant revolvers of their time – ‘Dragoon’ revolvers, reproductions of which Uberti has made available for those of us who enjoy collecting and shooting these examples of early Colt revolvers.
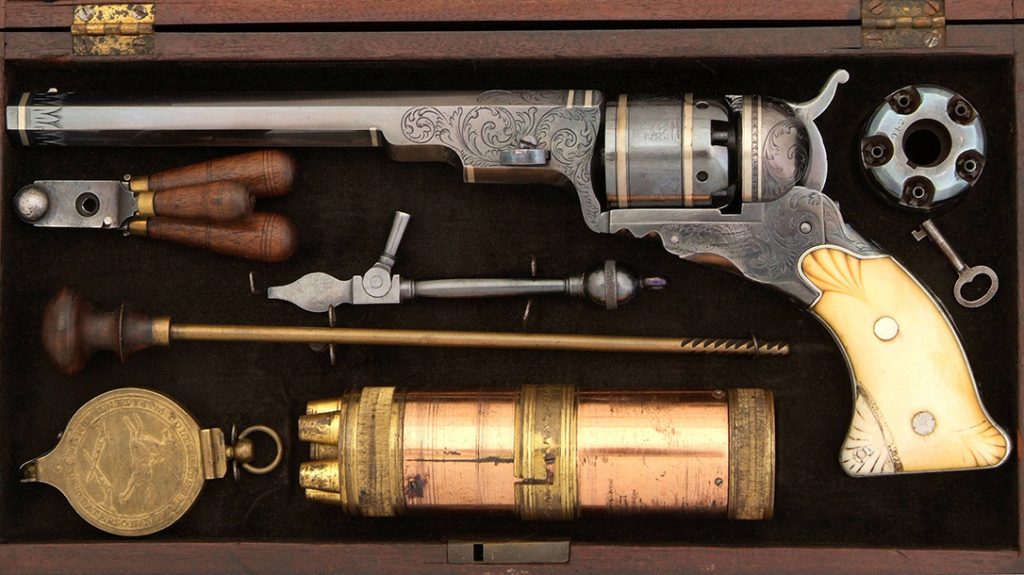
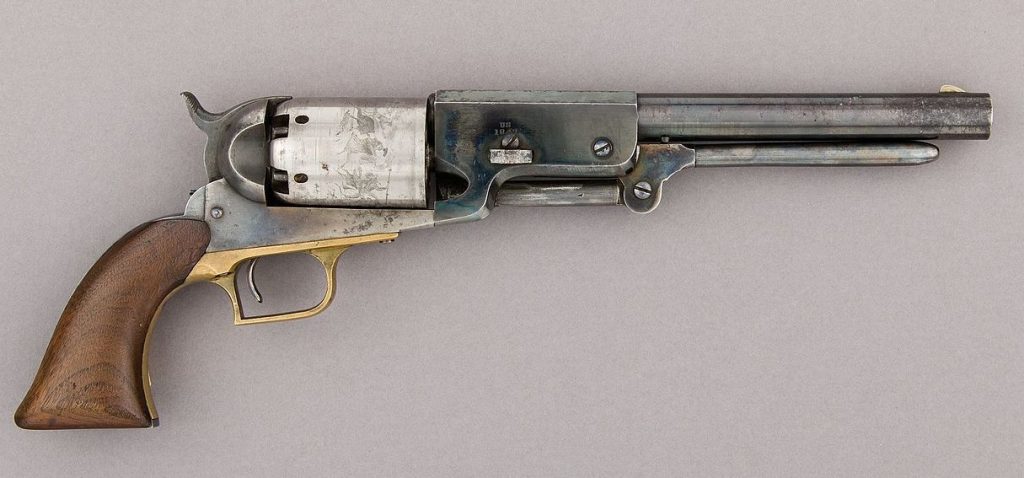
According to Wikipedia, the following is a list of Colt Dragoon revolvers:
- Whitneyville Hartford Dragoon Revolver (1847 and 1848)
- First Model Dragoon (1848 and 1850).
- Second Model Dragoon (1850 and 1851).
- Third Model Dragoon (1851 through 1860).
- 1848 Pocket Pistol (Baby Dragoon).
Except for the 1848 Pocket Pistol, which was chambered in .31 caliber, all Colt Dragoons were chambered for .44 caliber.
Although there were other Colt revolvers (1851 Navy in .36 caliber and Colt Model 1855 Sidehammer Pocket Revolver in .31 caliber) all the improvements made to the Colt Dragoons eventually made their way into the Colt Army Model 1860 that was chambered in .44 caliber.
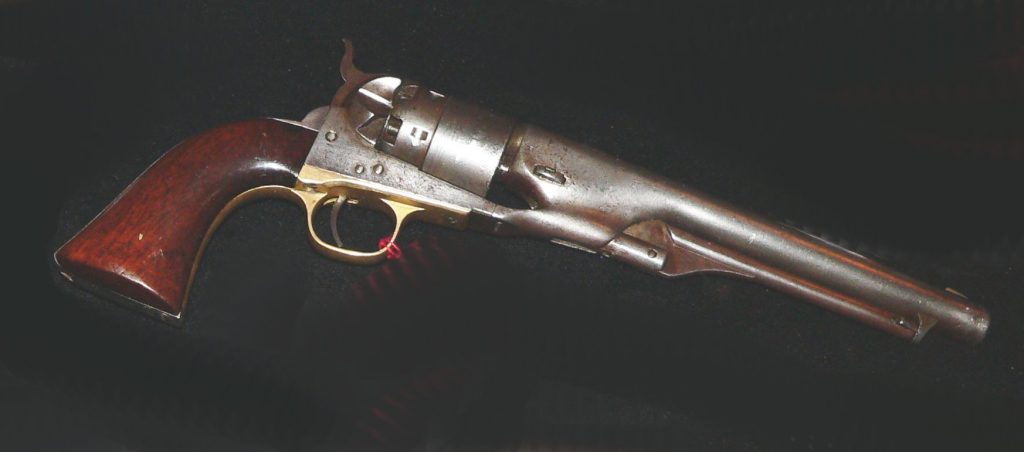
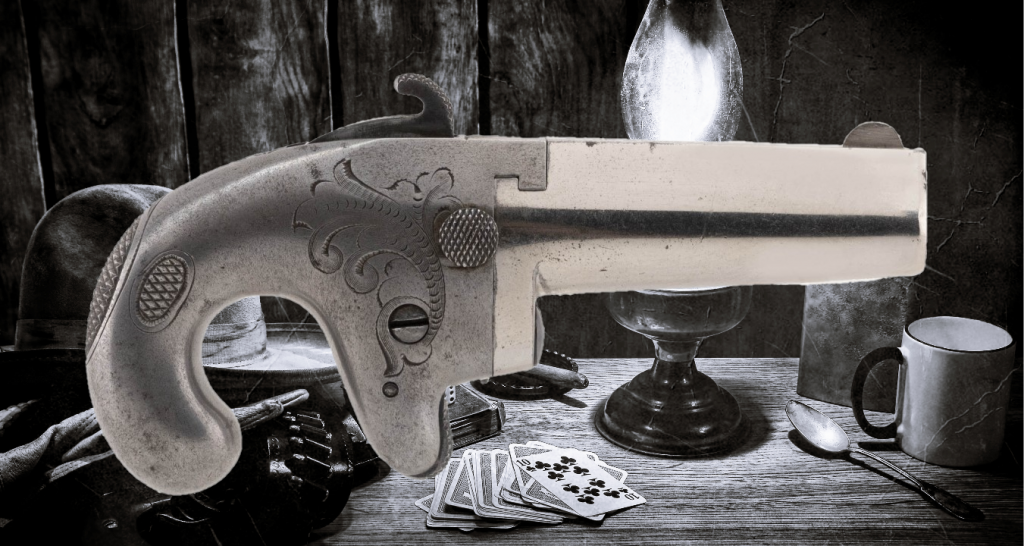
It could be highly expected that Colt Dragoons and the Colt Army Model 1860 were used in the ‘War of Northern Aggression (April 12, 1861 – May 9, 1865)”. The Colt Army Model 1860, incidentally, was the first Colt revolver to undergo formal changes by Colt to accommodate a new cartridge…the .44 Colt. However, this was not the only handgun chambered for a cartridge. That honor went to the Colt small, single-shot derringer called the Colt Derringer chambered for the .41 Colt Short cartridge that was followed by three Colt Derringer Models, all of them also chambered in a .41 rimfire unique cartridge.
Moving forward, but straying a bit from the intent of this article, the eventual conclusion of cap and ball revolvers for Colt ended in 1872 with the Richards-Mason conversions leading Colt into manufacturing the now famous 1873 Colt Single Action Army, which was originally chambered in .45 Colt. And, of course, there was competition.
In 1852, Horace Smith & D.B. Wesson partner-shipped to begin manufacturing a revolver that fired a self-contained cartridge. The “Volcanic” .41-caliber, lever-operated, magazine fed revolver was manufactured in 1854.
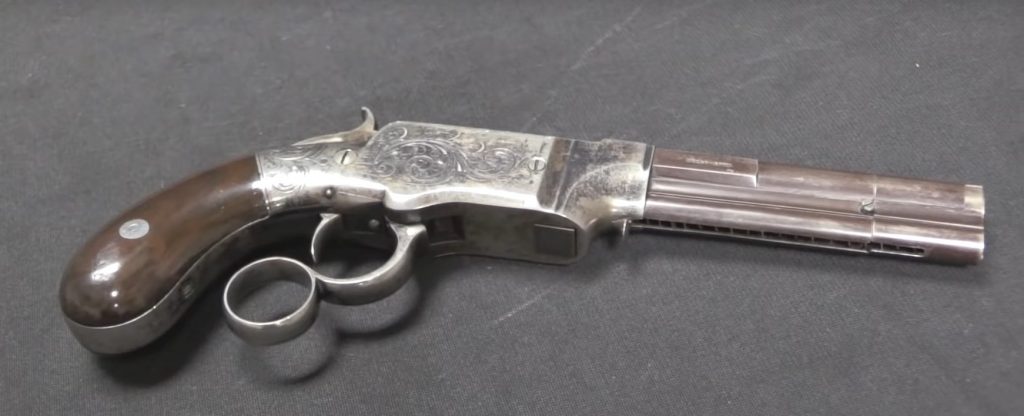
Prior to the Civil War, Remington was known for long arms, not revolvers. In 1858, Remington joined the fray with its Remington-Beals Model Revolvers, along with subsequent models and variations, of percussion revolvers manufactured by Eliphalet Remington & Sons in .31 (Pocket) .36 (Navy) or .44 (Army) caliber, used during the American Civil War. Meanwhile, the Colt 1851 Navy in .36 caliber was extremely popular among good and bad people alike. But, let’s get back to the “Dragoon.”
We know that the Third Model Colt Dragoon (the last full-size Dragoon) was manufactured up to 1860 and was replaced by the Colt Army Model 1860. This story is about the Colt Dragoons in general, the Uberti replicas of these Dragoons, and the Dragoon transformations that led us to the most popular single-action revolver extant…the 1873 Colt Single Action Army.
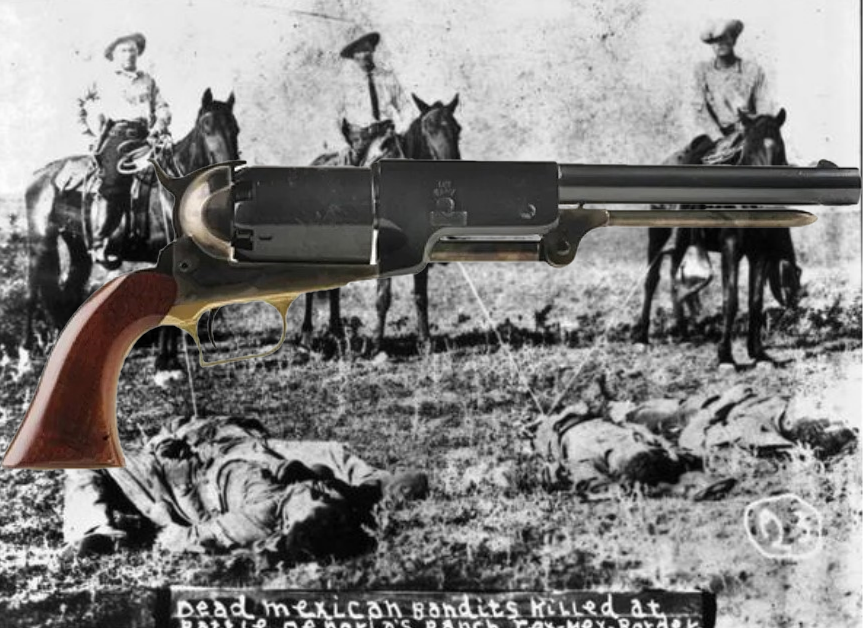
Disregarding the Colt Paterson, the Colt Walker (a.k.a., the Walker Colt) set the stage for many of the revolvers to follow. At 4.5 lb unloaded weight, and with a barrel length of 9”, the Colt Walker was one large handgun that was usually relegated to holsters slung across the pommel of a saddle, thus becoming known as “Horse Pistols.” A desire grew for a more compact and lighter revolver that did not have the concerns of the Colt Walker by those who used them…like blowing up and having the reloading lever fall into the cylinder chambers. Largely built from leftover Walker Colt parts, the Whitneyville-Hartford Dragoon became the first transitional model from the Walker to the Dragoon series.
Uberti Whitneyville Hartford Dragoon Revolver (The CD-X?) (1847 and 1848)
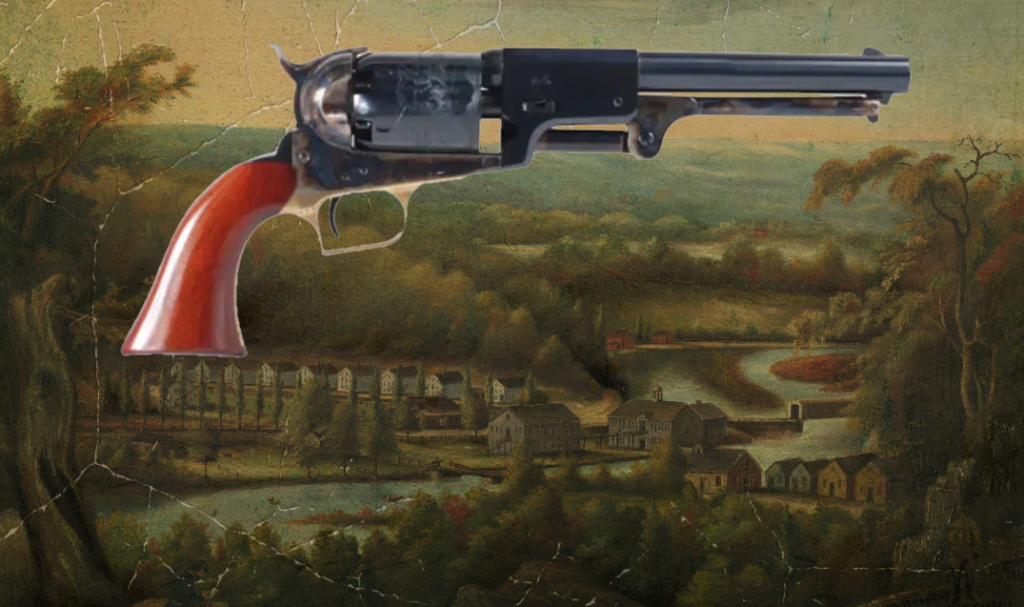
Sometimes called “Transition Walker” revolvers, the Whitneyville Hartford Dragoon (shown above with the Hartford, Connecticut Whitney-Hartfordgun factory in 1827) was made in two frame variations. The earlier pattern was a Walker carry-over with a cut-out in the back to accommodate the round contour of the grips and the second was straight-backed.
One addition to the Whitneyville-Hartford Dragoon was the loading lever latch at the front. The Colt Walker was notorious for the loading lever dropping under fire and binding up the action. The Colt Walker used a spring latch, which was very weak, at the rear of the loading lever to secure it in place. It has been known that users of the Colt Walker would tie a leather strap around the barrel and loading lever to keep it in place. Staying true to that initiative, the loading lever of my Uberti copy of the Colt Walker revolver is tied to the barrel with a leather lace.
The Colt Walker weighs 4 1⁄2 pounds (2 kg) unloaded, has a 9-inch (230 mm) barrel, and fires a .44 caliber (0.454 in (11.5 mm) diameter) conical and round ball. The Whitneyville-Hartford Dragoon’s barrel length is 7 1/2 inch with a cylinder diameter of cylinder 2 3/16 inch and still fires a .44 caliber (0.454 in (11.5 mm) diameter) conical and round ball. At 4 pounds 4 ounces (unloaded), the Whitneyville-Hartford Dragoon is still considered (in my opinion) has a ‘Horse Pistol”
The Colt Walker’s cylinder could hold up to 60-grains of black powder, which probably led to the demise of many Colt Walker revolvers when loaded to this capacity. Using a round-ball diameter of .454”, I normally run 25-grains (by volume) of Hogdon Pyrodex P Black Powder Substitute (Uberti lists 22-grains to 30-grains of black powder for the .44 caliber revolver. With the Whitneyville-Hartford Dragoon, the cylinder was shortened and was originally designed to hold up to 50-grains of black powder, 10-grains less than the Colt Walker. Depending on the powder and projectile, the Colt Walker muzzle velocity was 1,000 to 1,350 feet per second, whereas, the Colt Dragoon could send a projectile at 850–1,236 feet per second.
Unlike the original, the Uberti reproduction of the revolver has a color case-hardened frame and color case-hardened loading lever assembly. It, however, does retain the brass back-strap and brass square-back trigger guard. In addition, the slimmed down grip of the Uberti Whitneyville-Hartford Dragoon emulates that of the original. Also, and in keeping with the original design, the cylinder stops are oval in shape but not as oval as the original, which makes for better lock up over the original design.
Also keeping the original Colt Walker design is a scene on the cylinder that was based on Walker’s description of an 1844 battle.
The fit and finish on the Uberti reproduction Whitneyville-Hartford Dragoon is excellent, with the finish on the inside of the trigger guard being the exception (some polishing later inside the brass trigger guard will remove the rough finish). The action is positive and worthy of praise; the 3.2 pounds of trigger pull means that you had better be ready to shoot when you place the trigger finger on the trigger.
The sights consist of a post front sight with a notched rear sight as part of the hammer (viewed when cocked). The hammer is well knurled to allow for positive thumb cocking of the hammer.
Uberti First Model Dragoon (1848 – 1850)
“Second verse, same as the first” – Henry the 8th, Herman’s Hermits – 1965
The first descendant of the Whitneyville-Hartford Dragoon was the First Model Dragoon.
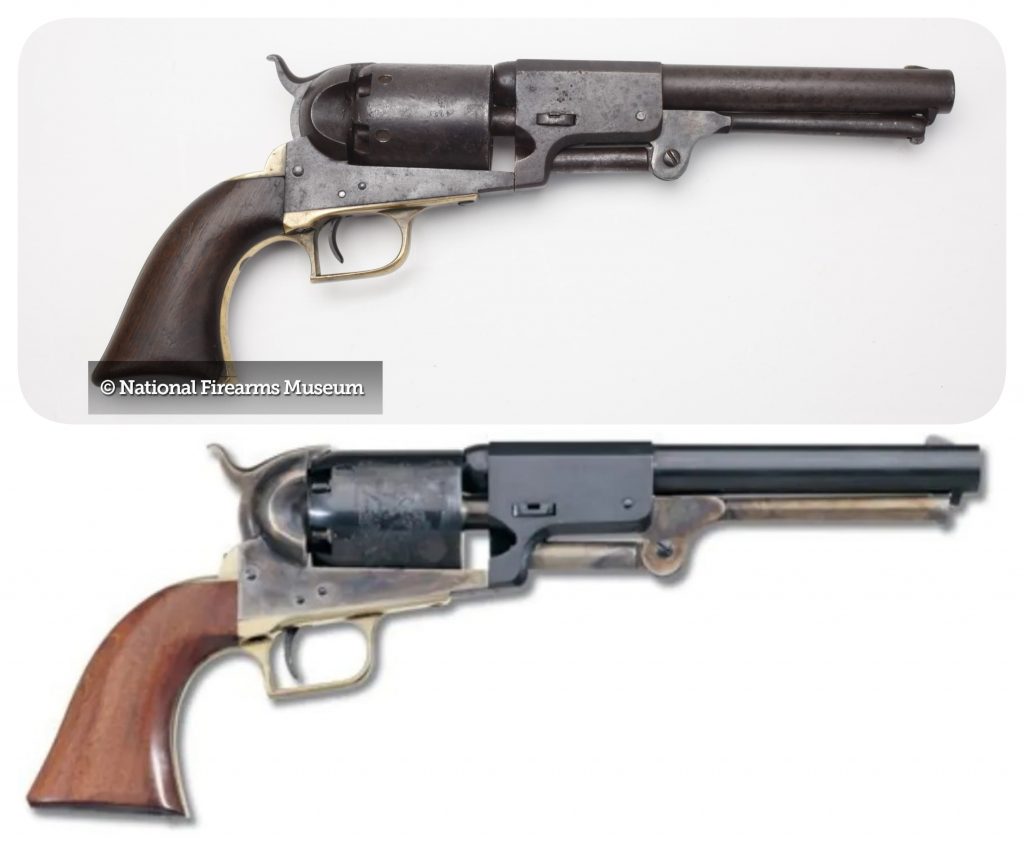
The First Model Dragoon retained the square-back trigger guard, oval cylinder stops, and the V-type mainspring of the Whitneyville-Hartford Dragoon.
As you can tell from the above image, the First Model Dragoon Uberti reproduction does not stray much from the original, although the loading lever assembly has been beefed-up over the original. A wheel on the hammer is used as a bearing on the mainspring, provides less wear, and smooths the action.
The external dimensions and weight remain the same throughout the ‘Dragoon’ series until the introduction of the 1848 Pocket Pistol (Wells Fargo Model). A weight reduction would not come to the full-size Colts until the introduction of the 1851 Navy, which weighed in at 2.6 pounds (unloaded) as compared to the 4 pounds + of the Dragoon.
I do like that Uberti chose not to lacquer the grips with its high-gloss finish. The treatment of the grip leaves them more natural looking with a very nice grain.
On the original, the loading latch lever was retained and unchanged and Uberti followed through with this on the reproduction as was the knurling of the hammer.
Uberti Second Model Dragoon (1850 and 1851)
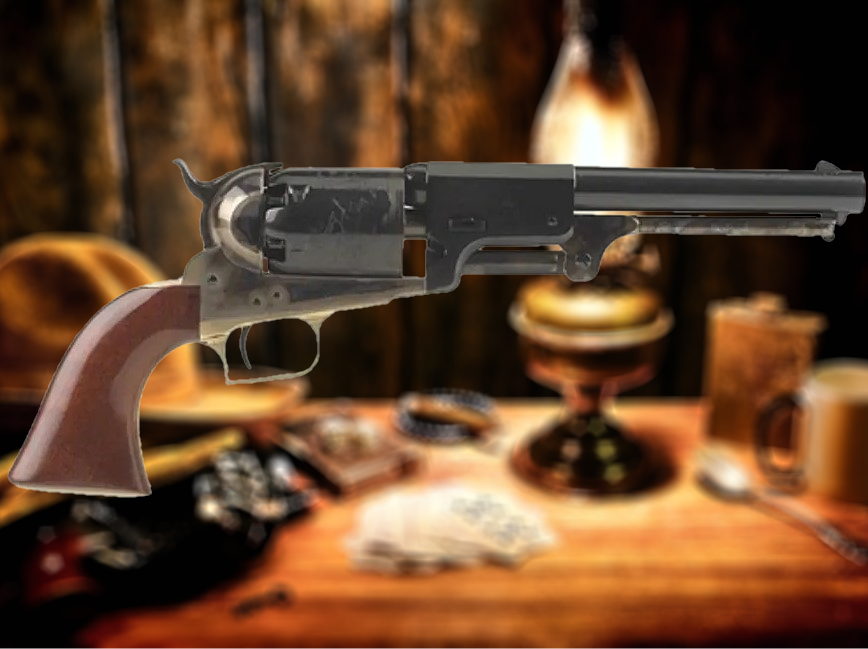
Significant changes were made to the original Second Model Dragoon, which Uberti has copied in its reproduction version. The Second Model has rectangular cylinder notches with leading edges rather than just a ‘drop-in’ notch…a feature that is carried forward into present day revolvers. A flat leaf mainspring replaces the V-shaped mainspring (Until the no. 10,000 the V-shaped mainspring was standard and then replaced with a flat leaf mainspring), and a wheel on the hammer is used as a bearing on the mainspring. As with the previous versions of the Colt Dragoon, all Second Model Dragoons have the square back trigger guard.
A color case-hardened frame and loading lever assembly is incorporated in the Uberti version, unlike the original.
Uberti Third Model Dragoon (1851 through 1860)
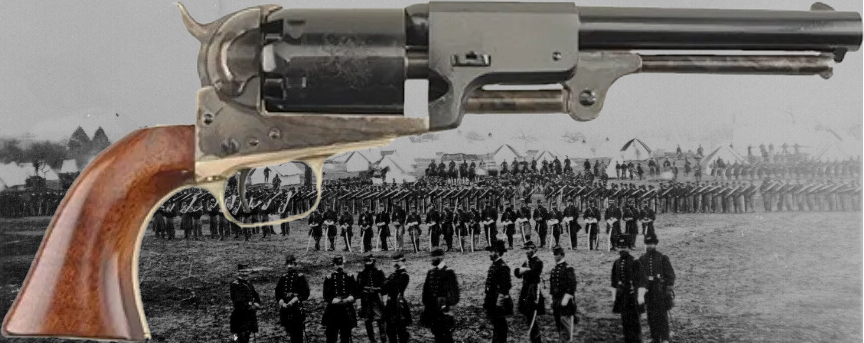
The Uberti Third Model was actually the first of my Dragoon collection, as I wanted the last (and best) of the Dragoon improvements. However, the collection of cap and ball revolvers could not be complete without the previous versions, and of course, the 1848 “Baby Dragoon.”
With few exceptions, the Uberti Third Model Dragoon is true to the original. One exception, of course, being the highly lacquered grips with the second being that the revolver is made of modern steel with modern manufacturing.
The Third Model Dragoon underwent variations as compared to earlier Dragoon model. Some third model Colt Dragoon Revolvers had frame cuts and attachment pins for detachable shoulder stocks, horizontal loading lever latches and folding leaf sights. Third Colt Dragoon Revolvers had a round trigger guard. The Uberti reproduction version, however, stays true to the original design in that it does not have frame cuts and attachment pins for detachable shoulder stocks, horizontal loading lever latches and folding leaf sight, but does incorporate the round trigger guard.
The fit and finish, as with other Dragoon models, is excellent.
The 3rd Model Colt Dragoon was replaced by the 1860 Colt Army (1860 through 1873)
Uberti 1848 Pocket Pistol Dragoon
At 1.625 pounds (26 ounces) in weight and a barrel length of 3-inches to 6-inches, I do not consider the 1848 Pocket Pistol Dragoon a ‘Dragoon’ but Wikipedia does, albeit, a variant. In my mind, the 1848 Pocket Pistol Dragoon was more of a transition between something that was difficult to carry to something that was easy to carry but didn’t qualify as a derringer. It should be obvious that the ‘Dragoon’ design was carried forward into the design of the 1848 ‘Baby Dragoon’, but that was to be expected from Colt at the time. As Wikipedia puts it; “It is a smaller brother of the more famous “Colt’s Revolving Belt Pistol of Naval Caliber” introduced the same year and commonly designated by collectors as the “1851 Navy Model” (and which was a basically a larger, .36 caliber of the Pocket Model, “belt pistol” referring to a weapon sized to fit into a belt holster, as opposed to the saddle holsters generally called for by Colt’s larger cavalry combat models).”
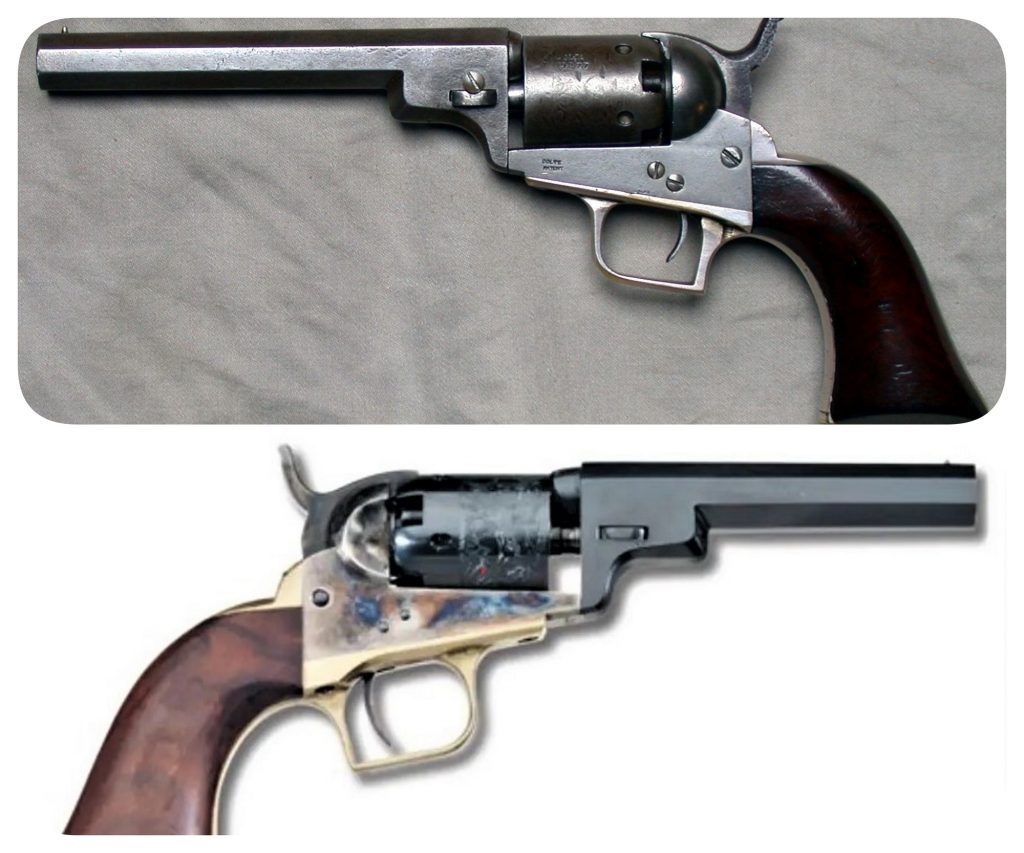
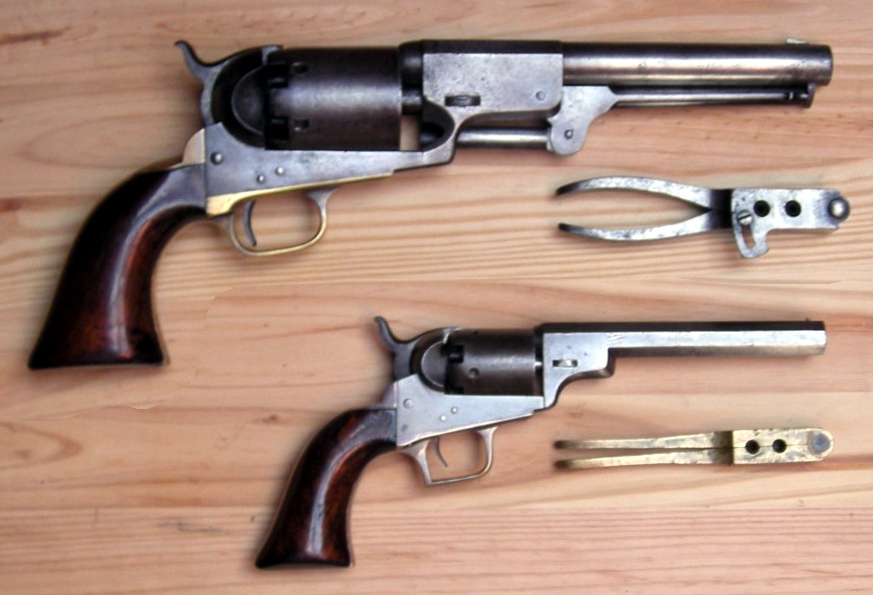
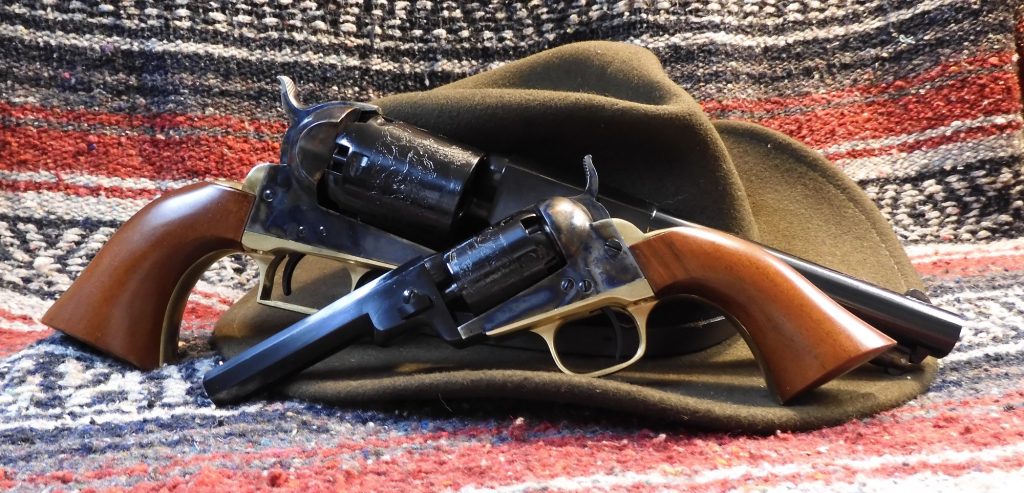
Colt “1848 Pocket Pistol” now known as the Baby Dragoon, was marketed in California with success during the gold rush days.
You can see, in the image above, how the Uberti reproduction mimics the original (to a degree). You may also notice the color case hardening of all Uberti Dragoon reproductions that the original did not have. A notable difference between the Uberti reproduction and the original is the cylinder stop. The original cylinder stop was round, whereas, the Uberti reproduction cylinder stops are oval in shape, which lends to a better lock-up of the cylinder.
One of more notable mentions is the lack of the loading lever assembly. The 1848 Dragoon Pocket Pistol is a .31 caliber, 5-shot revolver that requires complete disassembly of the revolver to load the chambers (the cylinder arbor was used to reload the chambers). A version of the Baby Dragoon, ordered with a rounded trigger guard by the Wells Fargo company, became known “unofficially” as the Wells Fargo Model. But in 1849 those pocket revolvers were updated and improved by adding the loading lever. That loading lever is, basically, the only difference between the Wells Fargo Models that did not incorporate a loading lever and the 1849 Colt Pocket Pistol that does incorporate the loading lever. (Author’s Note: The 1849 Colt Pocket Pistol is a subject for a different article.)
The frame and forcing cone were short. They were, in fact, much shorter than the Uberti replica.
From the previous image you may notice a substantial difference in the gap between the front of the cylinder and the rear of the barrel assembly. In the original, this gap was reduced as there was no requirement to allow for loading the chambers from the side, as was normal with revolvers with loading lever assemblies. I cannot answer the reason for the large gap with the Uberti reproduction, but I can speculate that that by retaining the gap with the reproduction of the 1848 and 1849, an 1849 Pocket Pistol barrel assembly, with loading lever, can be attached in lieu of the 1848’s non-loading lever assembly while keeping the frame the same for both. This was probably a production choice made by Uberti and not a mistake in historical accuracy. You can see what I am stating in the image that follows.
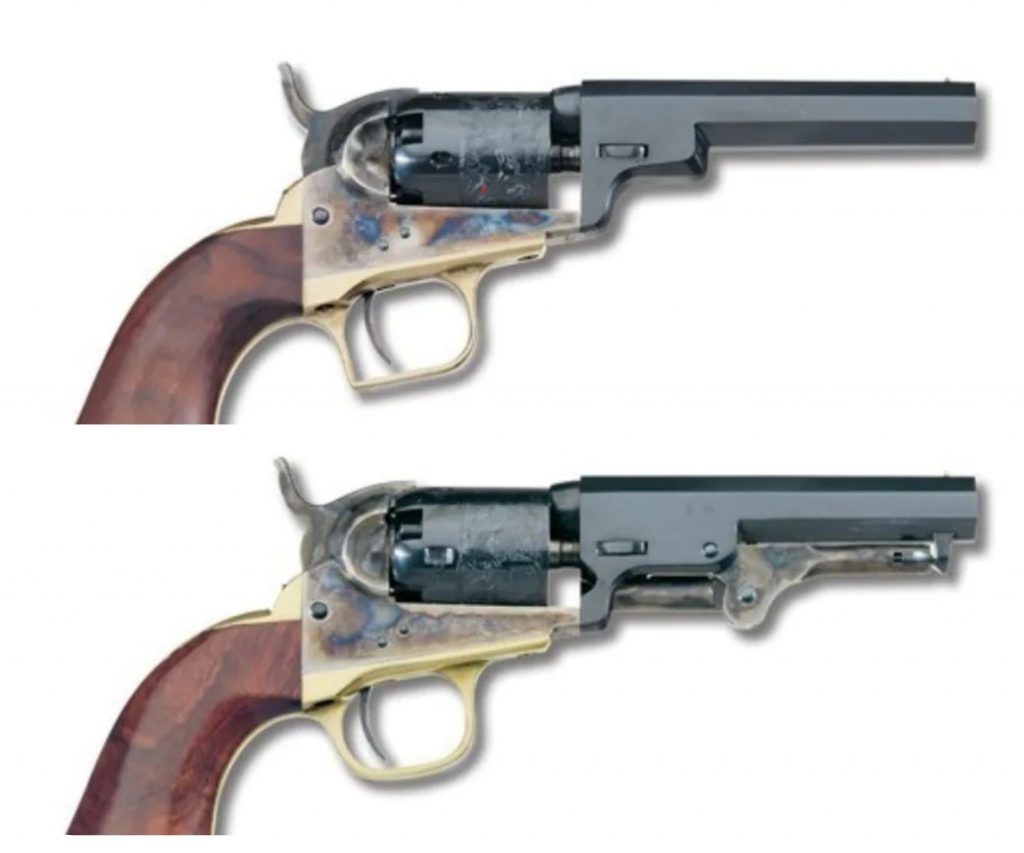
The .31-caliber Baby Dragoon had the square-backed trigger guard that was like the trigger guard on the Colt Walker and the first issue of the Dragoon, giving it a “look” that makes it stand out among other Colt pocket models.
The 1848 Pocket Pistol Dragoon weighs just 1½ pounds, or 24 ounces. With the 4-inch barrel, this gun has an overall length of about 9¾ inches. It isn’t a large revolver at all. Like other Colt-style percussion revolvers, this 1849 copy has the rear sight as a shallow notch in the top of the hammer.
There is another notch at the bottom of the striking face of the hammer and that notch engages a small pin in between the cylinder’s chambers, or nipples, that will keep the cylinder from rotating when the hammer is lowered over that pin. Additionally, with the cylinder removed you can see rather large threads around the base pin. Those threads are to be filled with grease, which will enable the revolver to keep working when the shooting is going on. Without that grease, the cylinder will quickly become very hard to turn because of fouling. (Author’s Note: I use White Lithium Grease.)
According to Uberti, a .31 caliber revolver should use between 9-grains to 15-grains of black powder while using a lead round ball with a diameter of .330-inch. See Shooting the Colt Dragoon for more information.
The grip of the 1848 Pocket Pistol Dragoon, as expected, is short; It is difficult to fit all four fingers onto the slender grip, even for a person with average-sized hands. But, getting a full-handed grip on the revolver is possible even for those with medium to large hands when getting a high as possible grip on the backstrap as possible.
You may have, or not have, noticed the difference in barrels from the 1848 Baby Dragoon and previous Dragoon revolvers. The short barrel of the 1848 Baby Dragoon has an octagon barrel rather than a round barrel. This was carried over into the 1849 Pocket Pistol and future Colt revolvers up until the 1873 New Action Army. However, the 1849 Pocket Police model did have a round barrel.
1851 Navy Colt
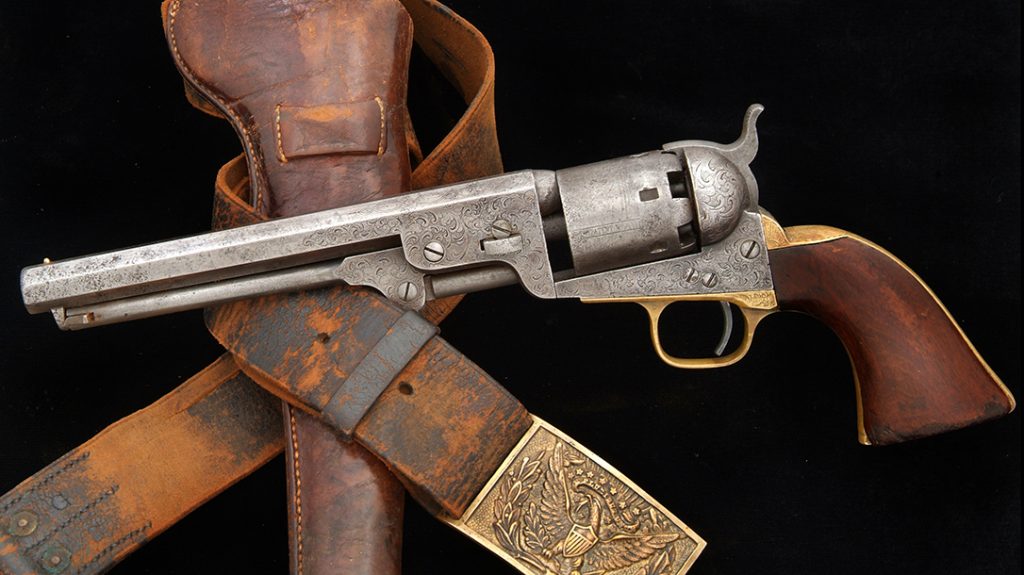
While not a Colt Dragoon, the 1851 Navy colt was heavily influenced by the improvements made to the Dragoon series. The 1851 Navy Colt was designed in 1850 and placed into service in 1851.
The six-round .36 caliber Navy revolver is much lighter than the 1848 Colt Dragoon Revolvers and is an enlarged version of the 1849 .31 caliber Colt Pocket Percussion Revolvers, that evolved from the earlier Baby Dragoon. The 1851 Navy Colt had heavily influenced the design of the 1860 Colt Army with its larger .44 caliber.
Inspecting the Colt Dragoon
Actually, this topic embraces all revolvers but I’ll concentrate on single-action revolvers like the Colt Dragoons.
If you have just received your new Uberti reproduction Dragoon (which is shipped directly to your door, incidentally) it will be boxed, plastic wrapped, and covered in oil that is necessary to protect the firearm during shipment. Remove the firearm from the packaging, wipe off the excess oil, and give the revolver a good ‘look-see’ for any obvious shortcomings.
It is just natural to pull the hammer back and pull the trigger to check the action. DO NOT let the hammer free fall! Allowing the hammer to free fall could damage the cones (nipples). Use the thumb to slow the descent of the hammer when you pull the trigger, thus avoiding damage to the nipples. At this point, you can check the revolver’s timing.
Secondly, ensure that you fully cock the revolver prior to pulling the trigger. Failure to do so can damage the lock-work.
Timing
TIMING is the sequence of revolver lock-work to unlock, rotate, and lock the cylinder in conjunction with manual cocking by pulling back the hammer (or pulling the trigger with a double-action revolver). Timing applies to both single and double action. The term covers all conditions.
Often, when a gunsmith or factory mechanic refers to “timing,” it means “out of time.” For the CHAMBER in a cylinder to lock in alignment with the bore requires precise placement of the STOP NOTCH on the opposite side of the cylinder. Ideally, to hammer cock or trigger cock the revolver rotates the cylinder enough for the next chamber to index slightly before FULL COCK in single action, or HAMMER FALL in double action. Very slow cocking may show full cock or hammer fall is reached before the next chamber locks into battery. In normal operation centrifugal force or the flywheel effect keeps the cylinder rotating until stopped by the CYLINDER STOP, a.k.a. BOLT or CYLINDER LATCH.
To understand timing, I invite you to view How Revolvers Work Part 1: Colt Beginnings. This video is an excellent showing of how early Colt revolvers work.
(Author’s Note: The following is far easier with the revolver’s barrel assembly removed from the revolver, as the cylinder is recessed into the frame. You cannot see the locking lug from the side of the revolver.) Look between the bottom of the cylinder and the frame while slowly pulling the hammer to the cocked position to watch the action of the locking lug, the piece that protrudes into the cylinder to lock the cylinder into place. There may be a slight delay in the locking lug lowering into the frame as the hammer is being initially pulled rearward. However, the cylinder locking lug must clear the cylinder before the hand can rotate the cylinder, otherwise, the cylinder would bind.
Just before the half-cock hammer position, the lug should clear the cylinder. (Author’s Note: This position before half cock allows the cylinder to be positioned so that hammer on a fully loaded and charged revolver can be placed on safety pins.) The locking lug should not even be touching the cylinder at this point. When the hammer reaches the half-cock position, the cylinder should be free to rotate for loading the chambers without binding or with excessive drag. Next, slowly pull the hammer rearward to the full-cock position while observing, once again, the locking lug.
Just prior to reaching the full-cock hammer position, the locking lug should raise. This should occur just before the full-cock position and just before the locking slot in the cylinder aligns with the locking lug. As the hammer achieves full-cock, the locking lug should fall into the cylinder locking slot, thus locking the cylinder into place.
The bolt must drop into the actual lock notch before or just as the hammer reaches full cock. (Note: The most common Colt mis-time situation is the hammer cocks before the bolt drops into the lock notch. In this condition, with the hammer fully cocked, you can push the cylinder slightly, and you will hear the “CLICK” as the bolt drops into lock.) The bolt should drop into “about” the middle of the ramp.
If the bolt drops late, missing the lock the revolver may do what is called “cylinder throw-by”. In this condition, during double action shooting the cylinder may rotate PAST the locking notch, and fire in an unlocked condition. (Author’s Note: The Colt trigger should be pulled with a smooth, even pull, with no sudden jerks at any point.)
There should also be no further movement of the hammer rearward, as this would force the hand up further, thus the hand would try to move the cylinder against the locking lug, which it should not do.
In the full cock position, there will be very slight side-to-side play of the cylinder (even with modern single-action and double-action revolvers) as it moves against the width of the locking lug (locking lug to locking slot tolerances). Ideally, there would be no movement whatsoever, however, a very slight amount play is considered normal. (Note: At this point the chamber of the cylinder should be perfectly aligned with the barrel. However, that perfection is hard to achieve. As the projectile leaves the cylinder, having a very slight amount of play in the chamber allows the cylinder to ‘self-align’ with the barrel as the projectile enters the forcing cone of the barrel.
What is not normal is if the cylinder continues to rotate and is not locked into place.
Each chamber should be checked for proper timing.
Barrel-to-Cylinder Gap (Flash Gap or BC gap)
The ‘flash gap’ (Barrel-to-Cylinder Gap) of the revolver, that distance between the cylinder face and forcing cone of the barrel, is very close and is generally taken as the maximum amount of gap with the cylinder held to the rear. With cap-and-ball percussion revolvers, the forcing cone gap is affected normally by the buildup of spent black powder, normal heating through firing, stretching of the frame, and the frame wedge depth into the frame. (Author’s Note: The Colt “open top” revolvers were more prone to frame stretch than the Remington revolvers that had a top strap.)
Cylinder End Play
End Play is not the same thing as Barrel to Cylinder gap. They are related measurements but are two very different things.
End play (or shake) is the difference between the maximum BC Gap and the minimum BC Gap. To determine end shake you measure the gap between the cylinder and the forcing cone (breach end of the barrel) with the cylinder held as far forward as possible AND THEN you repeat the measurement with the cylinder held to the rear. The amount of END SHAKE is the DIFFERENCE between those two measurements.
A little BC gap is required for proper functioning and acceptable limits are well defined. End Shake should be held to the minimum that allows proper functioning. Excessive Barrel to Cylinder gap will result in some small loss of velocity and maybe some flame cutting in extreme loading but excessive end shake will rapidly increase wear and damage to the gun.
Smooth Operation
As mentioned previously, the hammer should move to the cocked position smoothly and without binding, the cylinder should rotate smoothly and without binding, the trigger should release the hammer smoothly and without binding, and the hammer should fall smoothly and without binding.
Inspect the hammer for any signs of binding against the frame. The sides of the hammer should be free of any scratches, which could be an indicator of a burr of metal after machining. (Author’s Note: As in the days of original manufacturing, the Uberti reproductions are mass produced. While they may undergo a function check, these are not custom-fitted firearms although hand fitting of parts may be required to achieve full function.) I have had to do some minor fitting on many firearms, new or not and expensive or not, to sometimes clean them up before I shoot them.
PREPARATION BEFORE LOADING
Now that you have performed an inspection, the revolver must be dissembled, cleaned to remove the applied preservative, inspected further, and properly lubricated prior to loading.
- Remove the wedge, located just forward of the cylinder, by tapping it through the slot from the right side of the barrel.
- Place the hammer in the half-cock position (first audible “click”).
- Rotate the cylinder, so that the loading lever, when lowered, will hit the area between the cylinder chambers. This allows the loading lever to help in removal of the barrel from the frame and cylinder pin.
- Press the loading lever down against the face of the cylinder and continue pushing until the front assembly is free from the frame.
- From the front of the revolver, rotate the cylinder counter-clockwise and remove the cylinder.
One of the first things that I do after disassembling these reproductions is to check the cylinder ratchet and the face of the cylinder ratchet for burrs and smoothness. Only on one occasion have I had to remove a burr from a ratchet, but once was enough for me to check any cylinder ratchet.
- Place the cylinder so that the chambers face down for easy draining.
- Run a cleaning patch soaked with solvent through the barrel.
- Run clean and dry swabs and patches into the chambers and through the barrel for thorough cleaning.
- During reassembly, oil all moving parts and grease the grooves of the cylinder pin. (Note: If you are going to start shooting within the day, do not oil the inside of chambers or nipples.)
- Use a light gun oil to lubricate all moving parts. Do not apply oil heavily, in order to avoid additional fouling during shooting and more cleaning between shots.
- Optional: Remove all cones (nipples), clean then coat threads with an anti-seize compound, and install. (Note: It is best to use a properly-sized percussion cap remover/installer tool to perform this and the more heavy-duty the tool the better, as some cones can be installed tightly at the factory.) Do not over-tighten cones.
See Also, How To Prepare A New Gun For Black Powder.
Shooting the Colt Dragoon
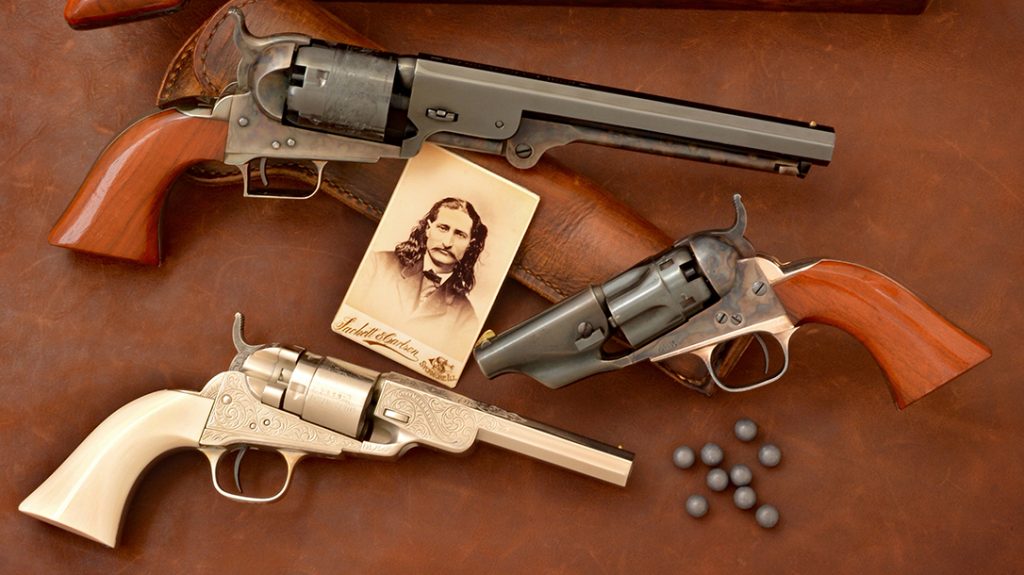
Shooting a black powder percussion revolver brings to your hands the same type of revolvers used in American history by good and bad alike. Shooting a black powder pistol, revolver, or long gun is more trial than error. As long as you stay within the confines of powder and ball limits for the caliber, the shooting experience will be positive.
The first time that I operated a single-shot, percussion-capped black powder pistol I did so with trepidation at first, not knowing what to expect. That trepidation soon went away after the first couple of shots. It is all about the basics: use the correct amount and type of powder (From Uberti: The proper charge for a black powder revolver is an efficient load, providing consistent ignition, consistent velocity and yields chamber pressure which is well below maximum safe levels. The full maximum charge is seldom used except for hunting or “showing-off”.), then use the correct diameter of ball with the correct thickness of patch (or wad), pack the ball and patch firmly against the powder, and install the percussion cap.
With shooting a percussion revolver, any percussion revolver, the process is similar but performed multiple times (one time per each cylinder). However, one additional step may be needed to prevent ‘flashover’ and a subsequent “chain-Fire” that does not exist with a single-shot pistol.
Hickok45 has an excellent video of shooting a Colt’s Dragoon with some of the challenges in shooting any ‘capper’ revolver.
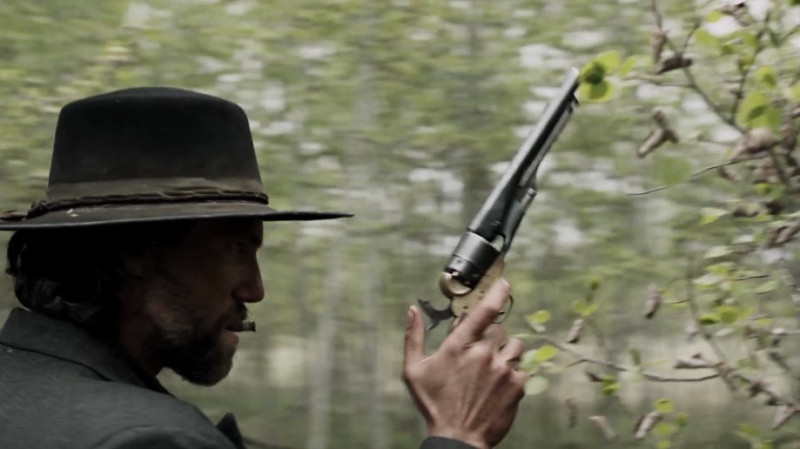
If you watch some movies involving black-powder revolvers, you may see the shooter point the muzzle to the sky after a shot is fired. This was not because of the recoil, but was to assist in removing the fired percussion cap from the revolver. Fired percussion caps tend to disintegrate when fired and can send fragments of the percussion cap into the action thus binding the action (you saw this in the Hickok45 video if you watched it). Raising the muzzle of the barrel in between cocking the revolver helped to rid the action of any fragmented percussion cap material while letting gravity do its thing.
Shooting black powder firearms is a dirty business. In the time consumed with loading five chambers of a black-powder percussion revolver, you could probably have shot off several high-capacity magazines in your favorite auto-loader, or even numerous chambers of your modern single-action or double-action revolver.
All Colt revolvers tended to shoot high and the reproductions are no different (in my observation). Aiming these reproductions are a “guess by golly’” affair. POI vs. POA at various distances is subject to many factors, with the powder charge being the predominant factor. The less the charge, the shorter the distance applies in most cases. However, effective firing distances have been (somewhat) established with the following:
- Colt Walker: .44 caliber – Effective firing range 100 yards (91 m)
- Colt Dragoons: .44 caliber – Effective firing range 80 yards (73.152 m)
- Pocket Percussion revolvers: .31 caliber/.36 caliber – Effective firing range 25 yards (accurate defense)
Caps, Ball, and Powder
With modern COTS (Commercial Off the Shelf) cartridge ammunition our selections are usually what’s in front of us and available at the local store or on-line. For cap-and-ball pistols and revolvers, however, obtaining the necessary ammunition components can be a daunting task. Powder can be black powder or a black powder substitute (modern revolvers can fire black powder, but smokeless powder should never be fired in a firearm intended for black powder). For my .44 caliber ‘Cappers’ I normally load 25-grains (by volume) of Hodgdon Pyrodex RS Black Powder Substitute, followed by a Muzzle Loader Originals Shooting Wads .125-inch thick pre-lubricated with Precision Lube 2000 Felt, which is then followed by a Speer Round Ball of .454-inch diameter. With this combination I have yet to experience a flash-over/chain fire from the chamber end. I have seen paper cartridges available on-line but have not experimented with them.
Lead (pure) ball weights vary, of course, according to diameter. For BP revolvers, you are looking for that thin ring of lead left behind on the face of the cylinder after loading the ball projectile that ensure a proper seal of bullet to chamber (you don’t want those little puppies moving forward upon recoil). When a bullet (ball or conical) is driven into the chamber it should shave a small ring of lead off. This tells you that you have a correct fit. This fit is essentially gas tight and will prevent chain fires from the front of the chamber.
Some general calculations reveal the following for .31 caliber through .44 caliber and common (highlighted in blue) lead ball diameters:
.310 = 45 grains
.315 = 47 grains
.321 = 50 grains
.350 = 65 grains
.360 = 71 grains
.375 = 80 grains
.395 = 92 grains
.400 = 96 grains
.433 = 122 grains
.437 = 127 grains
.440 = 128 grains
.443 = 131 grains
.445 = 133 grains
.451 = 138 grains
.454 = 141 grains
.457 = 144 grains
.490 = 177 grains
.498 = 180 grains
When loading cast lead balls, ensure that the sprue is on top facing the barrel. (Author’s Note: While Speer and others have cast lead balls, I have found one source that guarantees lead buckshot is swaged for near-perfect spherical shape and is free of sprue marks, flat faces, lines and creases.)
Some rely on using both a shooting wad and lubricating the end of the cylinder with Crisco (or some other lubricant) to custom-made to prevent chain fires.
To shorten loading time, paper cartridges can be substituted for individual component, albeit, at more expense. Six paper cartridges for the .44 caliber (.454″ lead round ball with 28 grains fffg black powder) and .36 caliber (.375″ lead round ball with 14 grains fffg black powder) black powder revolvers will run almost $15 dollars ($2.50/cartridge). You can also make/order component to roll your own.
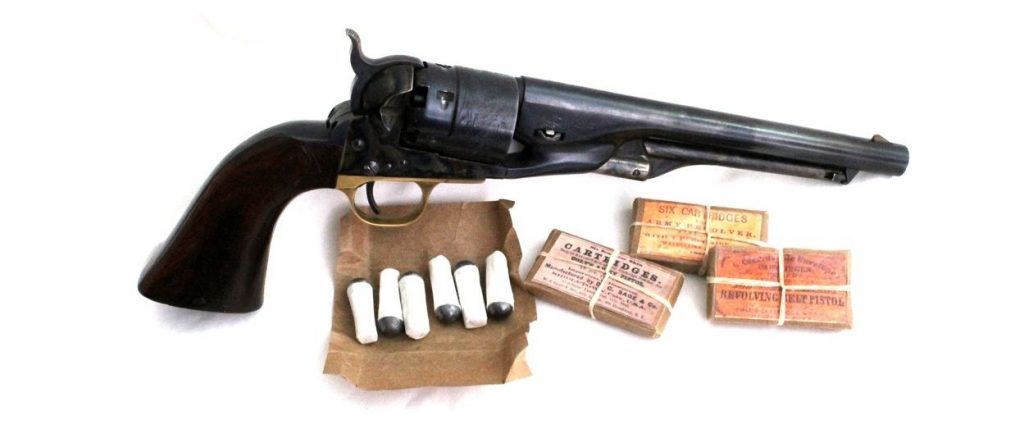
The Uberti revolvers usually take a #10 percussion cap on each loaded cylinder. Feel free to experiment with different brands of percussion caps. These days, the selection of percussion caps is limited to whatever you can find locally or on-line.
Although the Colt Dragoons are ‘six-shooters’ it is highly advised to load five and rest the hammer on an empty chamber for safety. Each Dragoon, however, incorporates the Colt ‘Safety Pin’ between each of the chambers.
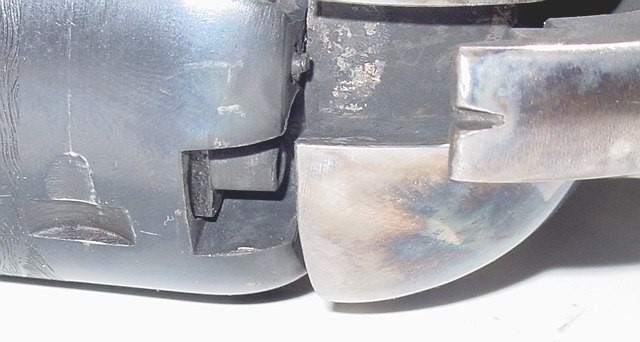
Pulling the hammer slightly to the rear, but not far enough to engage the loading notch (half-cock) position, allows the cylinder to rotate freely. Rotate the cylinder until a safety pin is aligned with the hammer and slowly lower the hammer onto the safety pin to ‘safe’ the firearm.
I can’t say that this was a practice at the time, but it does work (although I prefer the ‘load one, skip one, load four’ method myself). Of course, if you don’t ‘cap’ them until you are ready to shoot is another safety method.
Post-Firing Preparation (For Storage)
Just as important, and maybe more, is the cleaning and the preparing for storage any black powder firearm regardless of type.
Black powder and black powder substitutes are corrosive and black powder needs to be removed if only you fired the firearm once.
Rather than taking you through a long diatribe on how to clean a black powder revolver, it is so much simpler to provide a How to Clean a Cap-And-Ball Revolver video from Guns of the West where you get to learn about “Moose Milk”.
Original Dragoon Examples
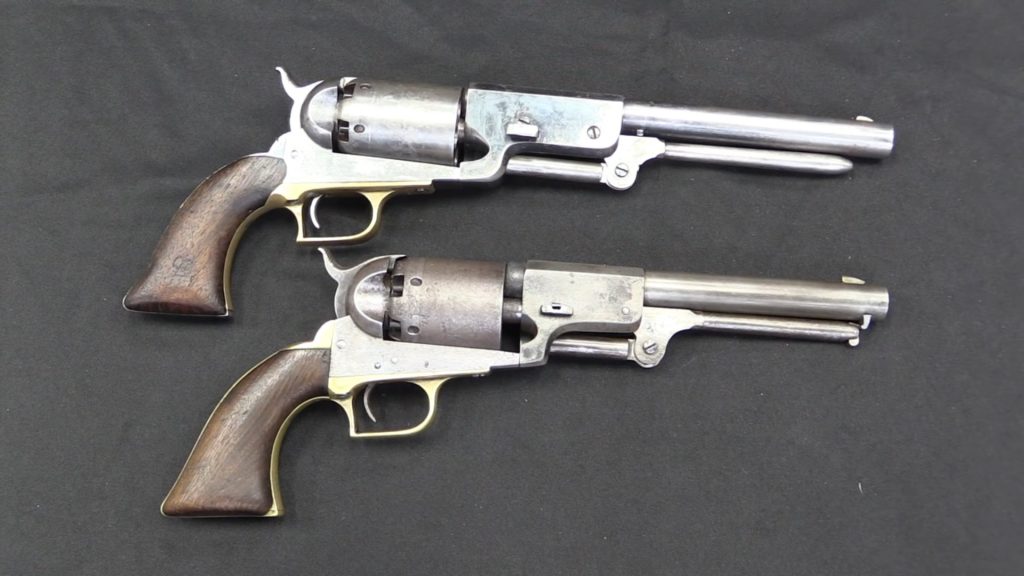
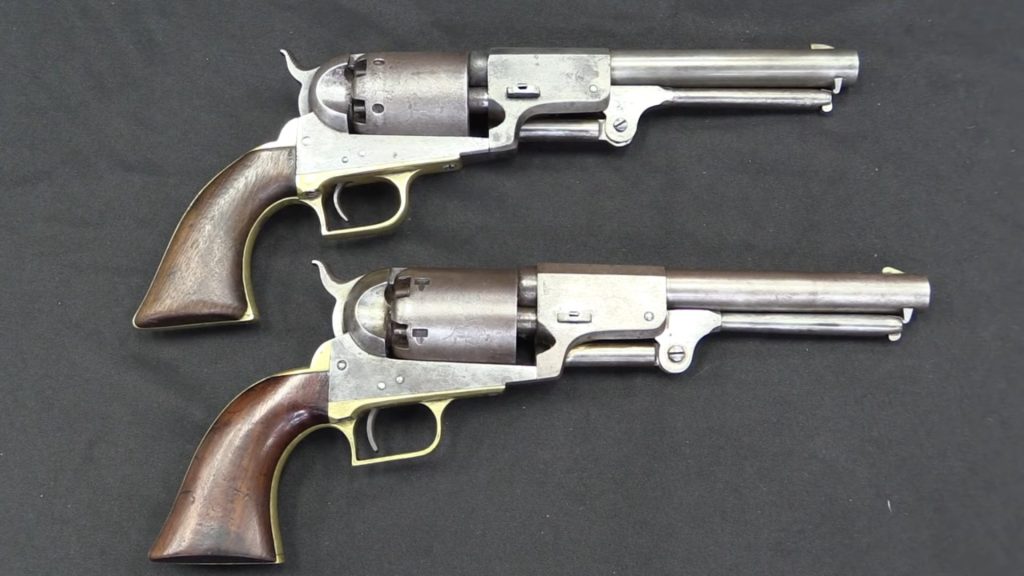
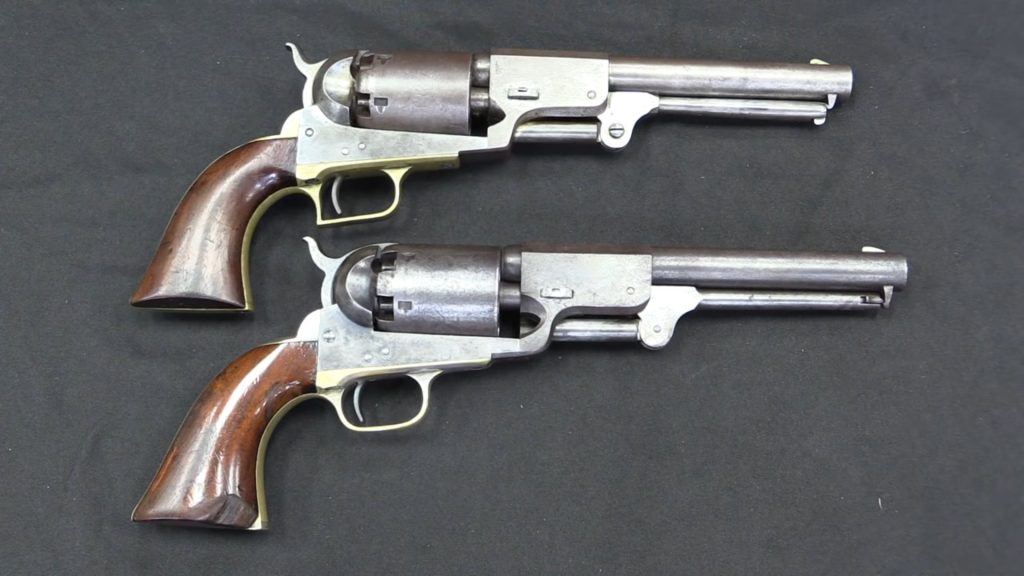
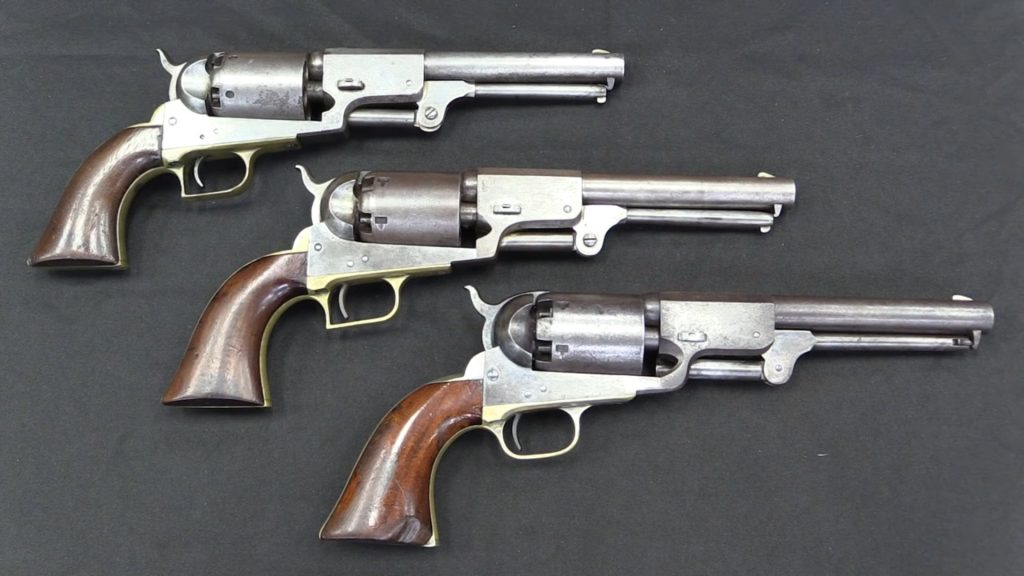
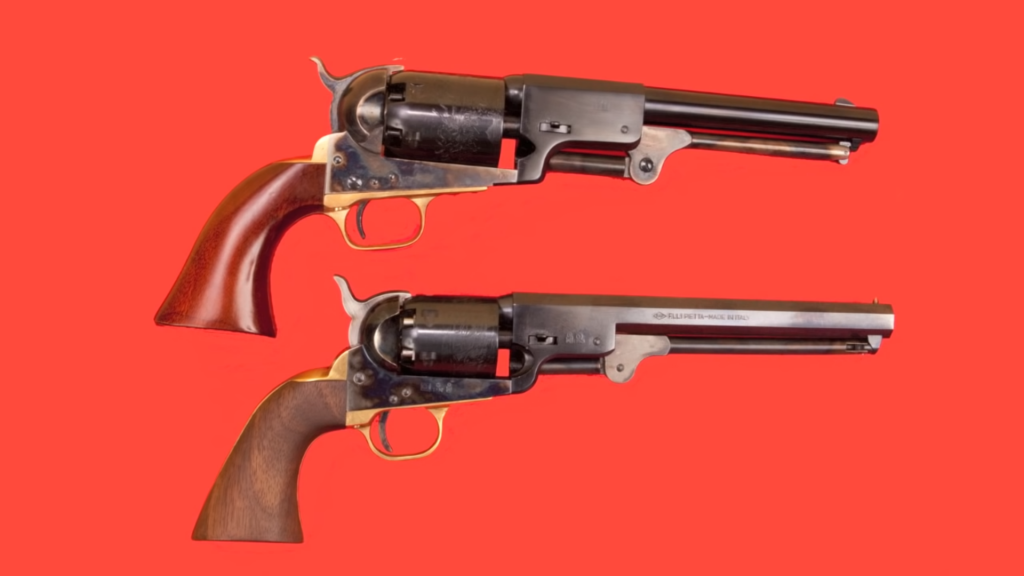
In Closing
Colt Dragoons were every bit the “Horse Pistol” the Colt Walker was, but did not have the failings. Collecting replicas of long-ago firearms, when you cannot find nor afford an original, is very satisfying. Uberti provides a look at the past without infringing on the originals and the value thereof. You step back into history just for a little bit of time, appreciate what the folks who carried these firearms had to go through to load but a single projectile in peacetime or during war, and develop an appreciation of modern firearms, their high capacity (not so much for revolvers), rates of fire, modern manufacturing processes, quality, etc.
The Uberti reproductions require more preparation before shooting than with modern firearms; Properly cleaning and lubricating these reproductions will ensure that your experience when shooting them is a positive one.
The Uberti reproductions of the Colt Dragoons, and other early American firearms, are excellent examples of what was, and you will hold in your hand firearm replicas of those used by many good and bad people in the past. From flintlock rifles and pistols, to percussion firearms, to cartridge firearms the past brought us into the present and will continue into future firearms and ammunition.
It is hard to argue that modern firearms are not steeped in history in some form or fashion.
References and Resources
I have included some references and resources regarding the Colt Dragoon and other related Cap & Ball things:
- Big Iron: Development of the Colt 1848 Dragoon Revolver (Ian McCollum)
- Colt 1849 Pocket Pistol (Hickok45)
- Dragoon Revolvers (Uberti)
- Shooting Uberti’s third model dragoon (dualist1954)
- Colt’s 3rd Model Dragoon (Guns of the West)
- Colt’s Dragoon: Accuracy (Guns of the West)
- Unboxing Colt’s 3rd Model Dragoon (Guns of the West)
- Unboxing The “Wells Fargo” Pocket Revolver
- Colt Pocket Percussion Revolvers (Wikipedia)
- Shooting Colts 1849 Pocket Revolver (dualist 1954)
- The Most Popular Percussion Colts: 1848 Baby Dragoon and 1849 Pocket (Ian McCollum)
For BP revolver tools, Tools for Cap & Ball Revolver Shooters by dualist1954 might help.
If you would like to learn how to tune a Dragoon (or any early Colt ‘Capper’), the following from dualist54 might be of help:
And for shooting the darn things, the following is a good place to start as it begins a series of articles:
- Shooting the Black Powder Revolver
- Revolver Chainfire Myth?
- Black Powder Lube: Is It Necessary? (Guns of the West)
- Black Powder Lube: Traditional vs. Wads (Guns of the West)
- How To Make Black Powder Lube (Guns of the West)
- Black Powder Lube: Traditional vs. Wads (Guns of the West)
- How To Prepare A New Gun For Black Powder (Guns of the West)
![]()

