You, like me, have probably pulled a few triggers in your time. Most of us go by the “feel” of the trigger rather than actually measuring it. We are looking at a new firearm and one of the first things that we like to do is to pull the trigger.
Some of us actually know the different types of trigger:
- Single-action
- Double-action/single-action
- Double-action only
- Release trigger
- Binary triggers (“pull and release”)
- Set trigger
- Single set trigger
- Double set trigger
- Pre-set (striker or hammer)
- Pre-set hybrid
- Variable triggers
- Double-crescent trigger
- Progressive/staged trigger
Most of us in the know also know that different triggers exhibit different characteristics and that each trigger is special in its own way. However different, each trigger exhibits three basic pull traits (or stages):
- Take-up
- Break
- Over-travel
If you want to know more about all of this stuff, I invite you to visit https://en.wikipedia.org/wiki/Trigger_(firearms) for the information.
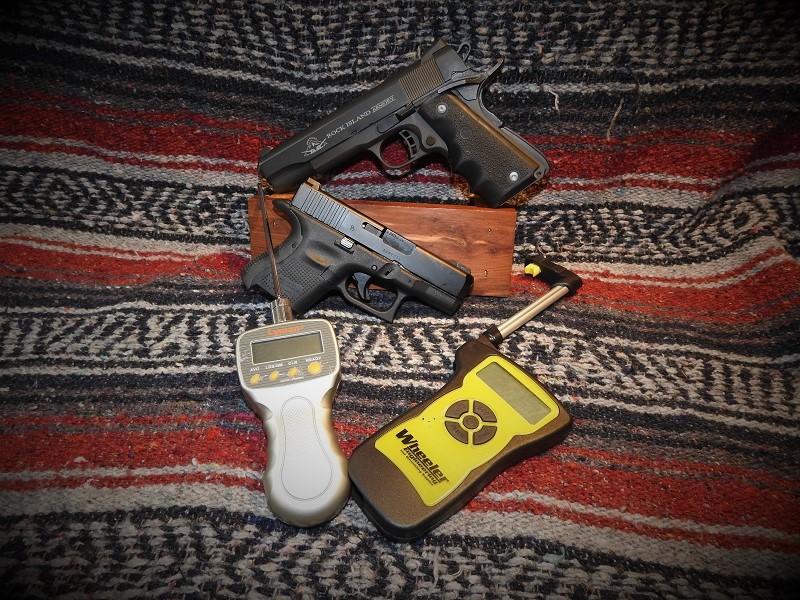
The purpose of this article; however, is to familiarize you with two Trigger Pull Gauges that are readily available; the Lyman’s Electronic Trigger Pull Gauge and the Wheeler Engineering Professional Digital Trigger Gauge.

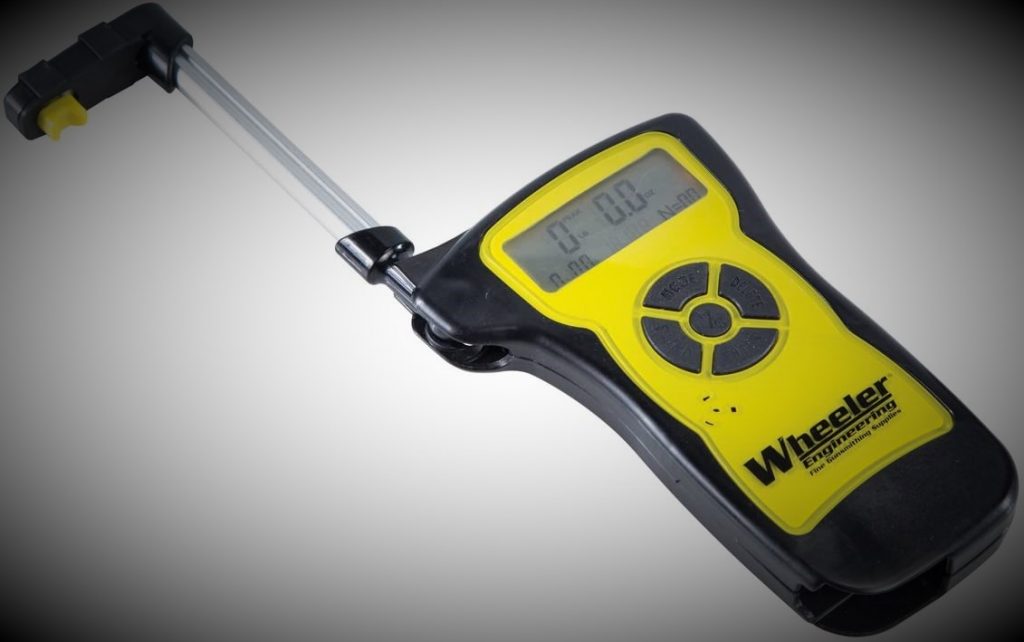
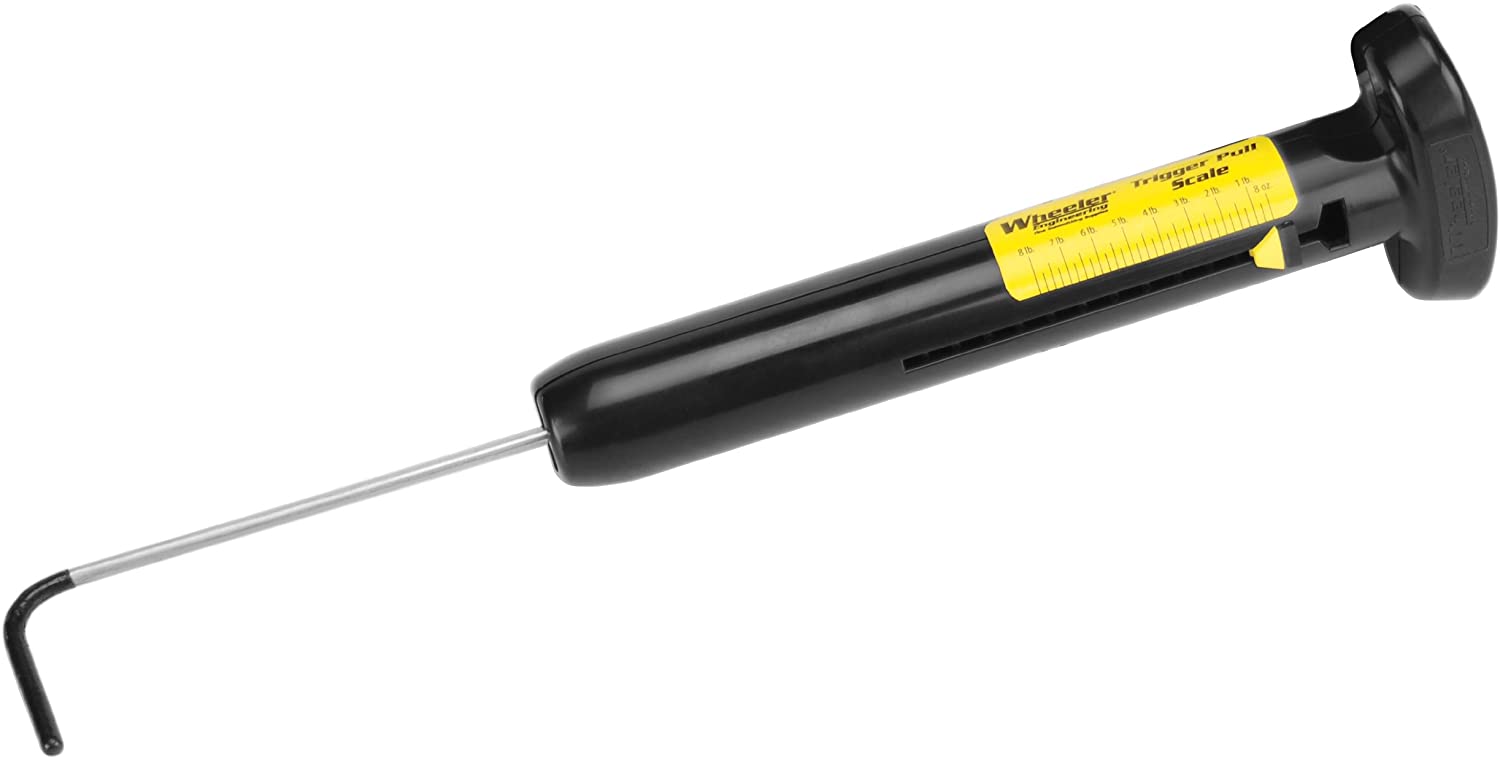
Of course, you can go the cheaper and less effective Wheeler Manual Trigger Pull Scale (see below) for general trigger pull measurements, but if you are really interested in precise (as possible) trigger pull measurement, then the digital types are the way to go.
In my firearm reviews, I always try to include trigger pull information and I have relied on Lyman’s Electronic Trigger Pull Gauge. Lately; however, I have been using the Wheeler Engineering Professional Digital Trigger Gauge. I thought that a comparison between the two would make for a nice article, which may help in your decision of which (or both) to purchase if you are interested in trigger pull gauges.
So, let’s get started.
! It should be obvious that any firearm upon which a trigger is to be pulled should be checked and double-checked to ensure that the firearm is unloaded and safe! It is recommended that the firearm be held securely in a padded rest or vise.
Before I get into each trigger pull gauge, I need to establish a test medium; a firearm (or two) if you will.
My Glock GEN 5 G26 and my Rock Island 1911FS Tactical pistol should serve as adequate test vehicles.
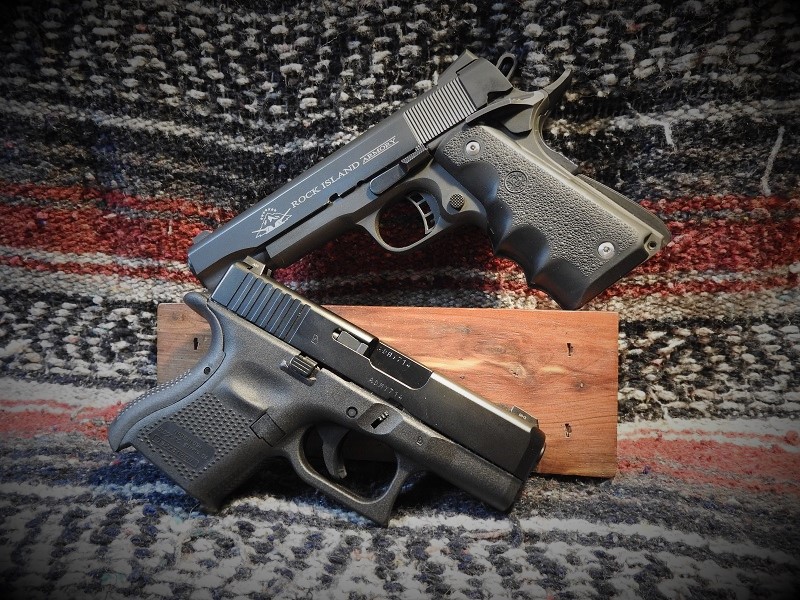
The Glock GEN 5 G26 pistol is, of course, a sub-compact 9mm pistol. It has become one of my favorite PDAs (Personal Defense Assistant) in the hot Georgia summer months, although a full-size Government Model 1911 is my preferred carry. And, in fact, I have included my Rock Island 1911 FS Tactical as a secondary test vehicle.
Before I get into the actual trigger pulls and determine readings and an average over five trigger pulls, I have to say that pulling triggers are subjective to personal habits. I use a trigger pull gauge as a substitute for my trigger finger and attempt to pull the trigger with a gauge as I would with my trigger finger…one smooth operation from start to finish. I’ll first establish the traits (Take-up, Break, and Over-travel) of each trigger, although these traits should not affect the actual pull weight of the trigger.
The Glock GEN 5 G26
The Glock GEN 5 G26, of course, has a trigger safety lever that must be pressed for the trigger to clear the housing and for the striker to be released.
The trigger of the Glock GEN 5 G26 has a bit of heavy take-up before heavier resistance is felt. Once this heavier resistance is felt, it is but a short but somewhat mushy pull until the striker is released. Over-travel is virtually non-existent.
Rock Island Armory 1811 FS Tactical
The RIA 1911 FS Tactical is, of course, a single-action only trigger and requires that a couple of safeties are set before the hammer drops. The first safety is that the grip safety must be fully pressed; whereas, the second safety if a thumb safety that must be pressed down into the FIRE position.
There is very little “free play” before the trigger encounters resistance. Pulling the trigger rearward against this resistance is very short until a point is reached where the hammer falls. As with the Glock GEN 5 G26, there is no over-travel and trigger break is crisp.
Lyman’s Electronic Trigger Pull Gauge
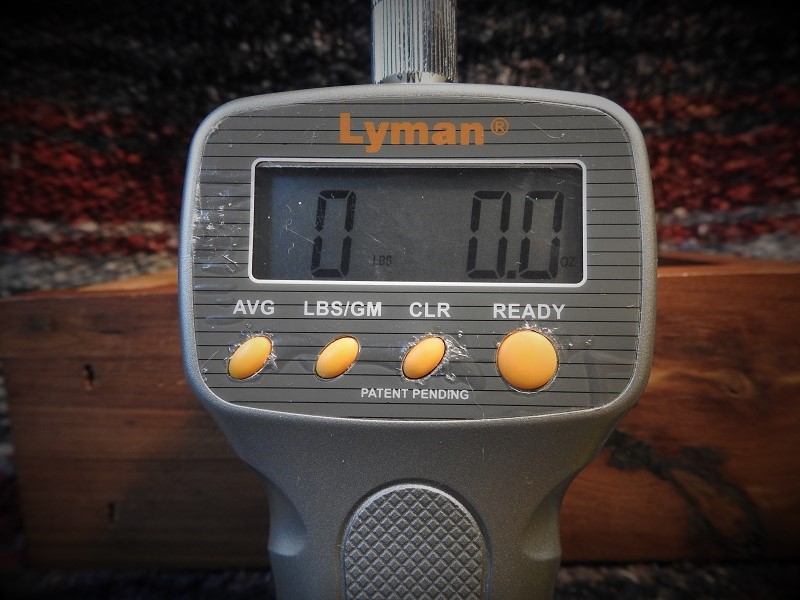
Note that there are two versions of the gauge; an early version and the later version. The early version, which I have, has a trigger rod that is screwed into the gauge and locked into place with a lock-nut; whereas, the later version has a retractable trigger rod, as shown below. Both units exhibit the same resolution:
Resolution:
- 0 – 5lbs: ± .1 oz
- 5 – 12lbs: ± .5 oz
- 0 – 2.2kg: ± 2g
- 2.2 – 5.4kg: ±10g

Technical Details
- Manufacturer: Lyman
- Part Number: 7832248
- Item Weight: 13.4 ounces
- Product Dimensions: 4.88 x 1.97 x 0.87 inches
- Item model number: 7832248
- Batteries: 2 AAA batteries required.
- Is Discontinued by Manufacturer: No
- Size: One Size
- Color: Multi
- Power Source: DC 9V
- Item Package Quantity: 1
- Number of Pieces: 5; gauge, case, battery, removable trigger hook, User Guide
- Batteries Included: No
- Batteries Required: Yes
- Battery Cell Type: Alkaline
- Maximum Pull Weight: 12 pounds
From the manufacturer: “Lyman’s revolutionary Digital Trigger Pull Gauge is designed to be the fastest and most accurate trigger pull gauge available. The state-of-the-art strain gauge technology allows for accuracy of 1/10 ounce/2 grams. The gauge will read to a maximum 12lb/5.4kg and features a large, easy-to-read LCD display. To operate, simply press the ready button, hook the roller around the trigger of your firearm and pull until the trigger releases. (Make sure firearm is not loaded.) The gauge will display and hold the exact trigger pull weight. For a new reading, just press the ready button and repeat. The gauge will also give you an average of up to the last 10 readings. Switch from ounces to grams with the push of a button. The fully adjustable rod works on any firearm. This is the perfect tool for target shooters, silhouette shooters, gunsmiths, hunters, or anyone who wants to adjust their trigger pull weight accurately and easily. Works with single 9V battery (not included). NOTE: Kindly refer the user manual before usage of the product.”
Lyman’s Electronic Trigger Pull Gauge comes with some precautions:
- Do not apply more than 12 pounds to the gauge or damage may result.
- Press the CLR button to clear all data.
- The gauge will automatically shut-off in three minutes if no buttons are pushed.
- The LCD will display LO when the battery power runs low.
- Remove the batteries when storing for extended periods of time.
- Do not use the gauge in temperatures below 32°F (0°C) or above 104°F (40°C)
The trigger hook has a Trigger Roller; a plastic piece that rides against the trigger. There is no provision for triggers that have a trigger safety. The trigger hook can be adjusted 360-degrees, as need to engage the trigger.
The LCD display is very clear and readable.
The unit fits in the hand well.
The storage pouch for the unit that I have has an integrated pouch for storing a spare battery. From the pictures I have seen of the newer unit, this pouch does not exist.
Operation is simple (from Lyman Products International User Manual):
- Press any button to activate the gauge. Press the LBS/GM button to select either pound/ounce readings or kilogram/ gram readings. Place the roller on the trigger rod just in front of the gun’s trigger but not touching. Press the Ready button and it will produce an audible “beep”, indicating that it is ready for use.
- Cock the firearm. Since the firearm needs to be dry fired when taking trigger pull readings, we recommend the use of snap caps such as Lyman’s A-Zoom brand. Pull the trigger with the trigger rod until the firearm dry fires. For best results, keep the trigger rod parallel with the bore of the gun while taking readings. A slow, steady pull is best. Small weight readings may appear as the gauge is moved into place. These are of no concern, as fluctuations up to 1 ounce will not be recorded. Once the trigger releases, stop pulling and the display will show the weight of that pull. The firearm will need to be re-cocked for each subsequent trigger pull test.
- The Lyman Trigger Pull Gauge will automatically calculate the average pull weight of up to 10 individual readings. Push the AVG button to display the average. If more than 10 separate readings are taken, the gauge will calculate the average of the last 10 readings. Press the CLR button to erase the memory before starting a new string. Be careful not to press the Ready button more than once when taking a string of pulls for an average. Pressing Ready twice will record a reading of zero into the string.
The table below show the trigger pull weight measurement results and average for the Glock GEN 5 G26 and the Rock Island Armory 1911 FS Tactical.
| Glock GEN 5 G26 | Measurement | Rock Island Armory 1911 FS Tactical | Measurement | ||
| Pounds | Ounces | Pounds | Ounces | ||
| Pull 1: | 5 | 8.0 | Pull 1: | 5 | 1.8 |
| Pull 2: | 6 | 5.4 | Pull 2: | 5 | 10.4 |
| Pull 3: | 5 | 10.0 | Pull 3: | 5 | 8.2 |
| Pull 4: | 5 | 14.7 | Pull 4: | 5 | 7.9 |
| Pull 5: | 5 | 11.4 | Pull 5: | 5 | 11.2 |
| Average: | 5 | 13.1 | Average: | 5 | 7.9 |
Wheeler Engineering Professional Digital Trigger Gauge
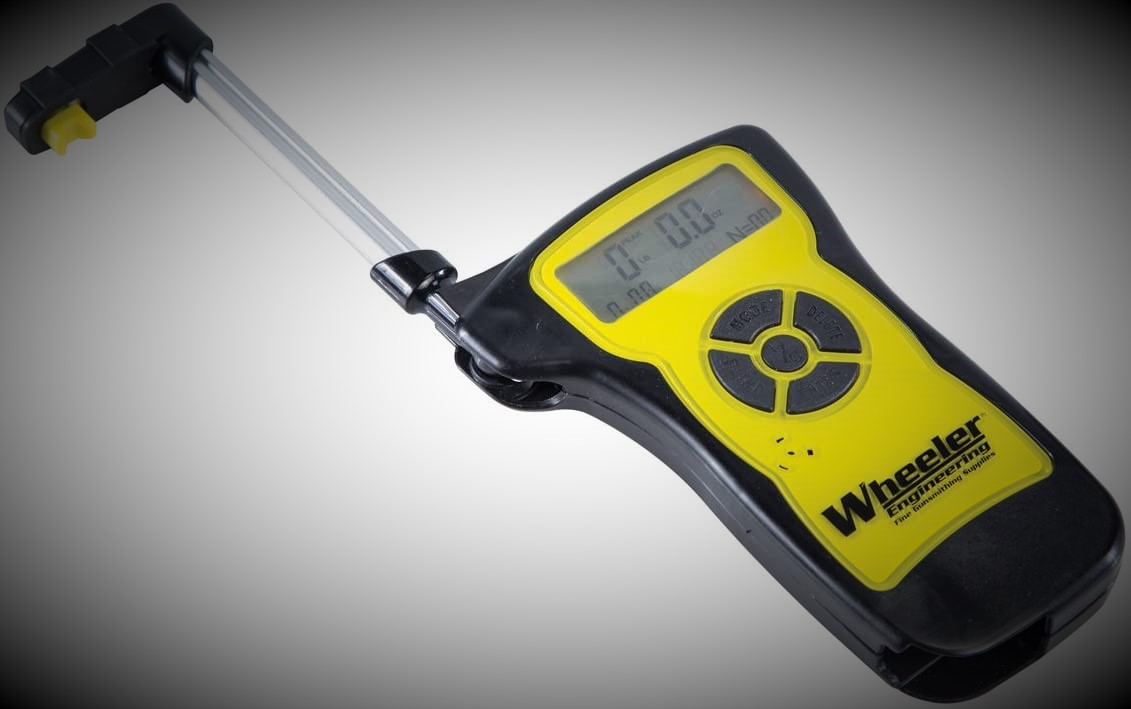
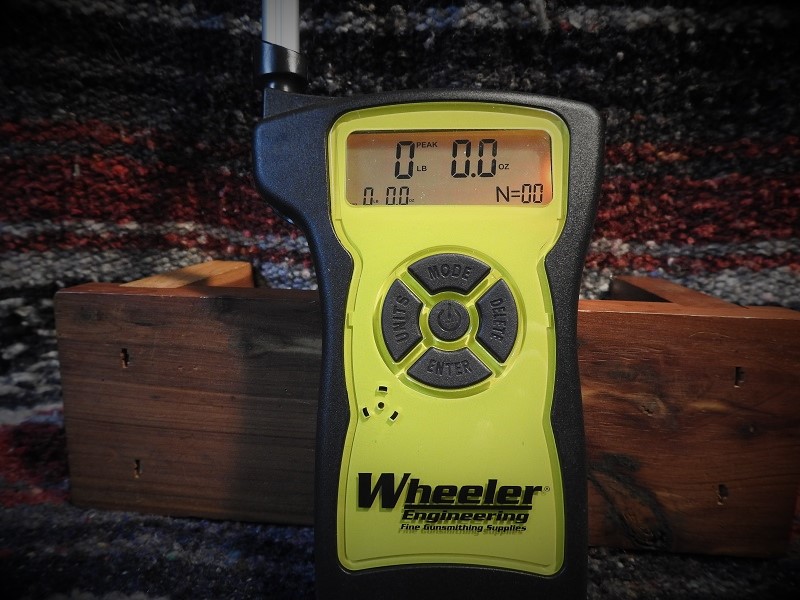
Features:
- 0-12lbs range
- Load sensor directly contacts the trigger
- Arm folds inside housing to protect the load sensor when not in use
- Feature max, min, average and live functions
- Audible indicator tone
- Power – 2 each AA batteries (not provided)
A Product Calibration sheet comes with the unit. Mine was calibrated on 2019-6-18 and showed respective nominal and test value weights of 3LB = 3.0.0, 5LB = 5.0.0, and 9LB = 0.0.1.
Description (from manufacturer):
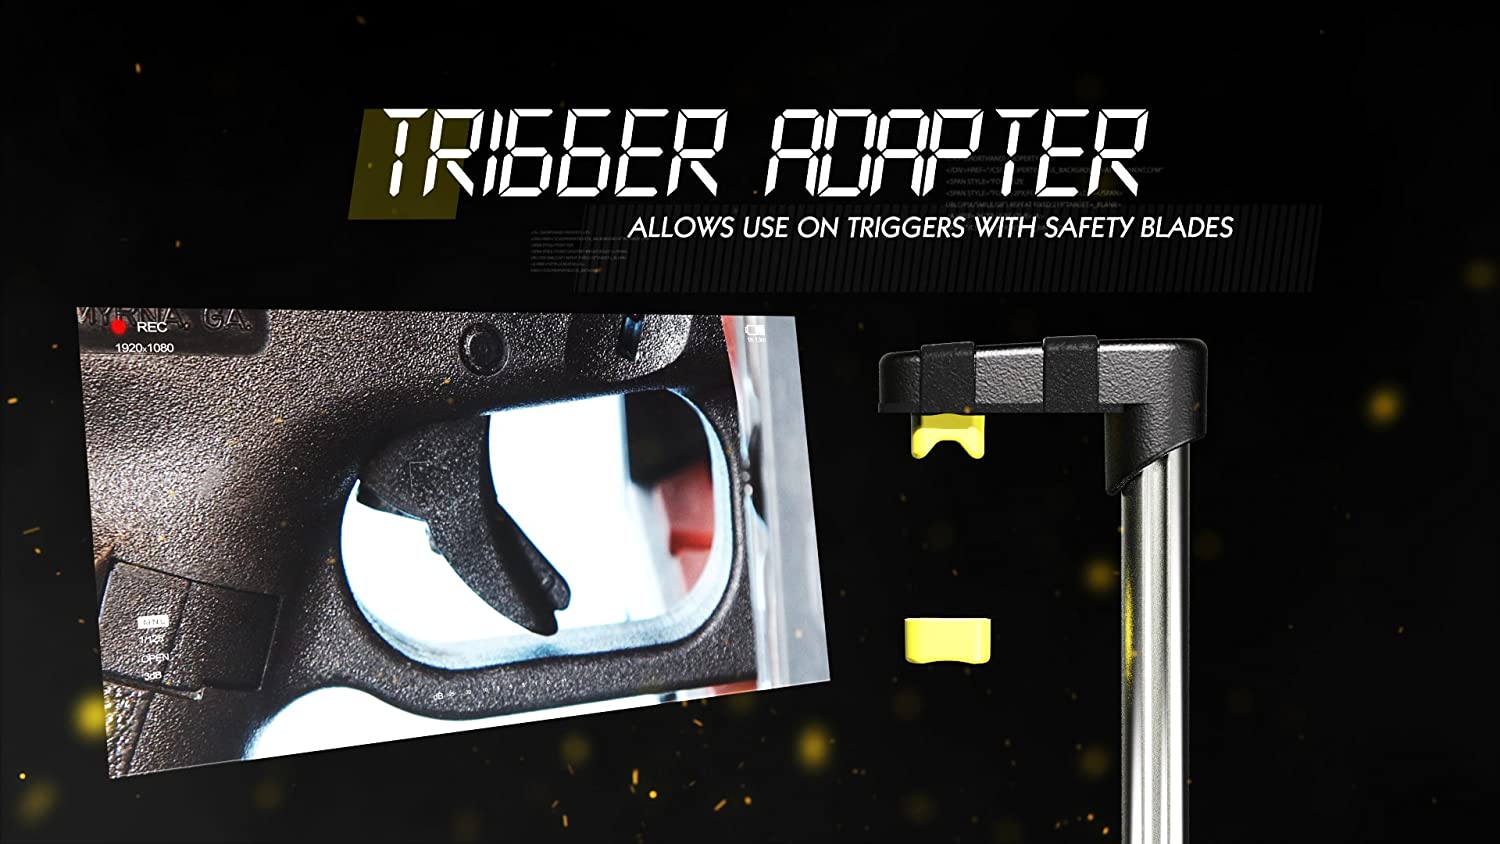
“Wheeler’s Professional Digital Trigger Gauge features an over-molded design and soft touch buttons for comfort and a consistent line of pull. Includes bladed trigger adapter to allow use with triggers that have internal safety blades such as: Glock®, Ruger®, Savage®. Also includes a foam lined storage case.”
Upon receipt, you must have on hand and install two AA batteries. The battery compartment is secured by a tiny Phillips-head screw. Do not lose the screw and ensure not to over-tighten after installing batteries. When the battery power is low, a low battery icon will display in the upper right corner of the display.
The display is backlit, unlike the Lyman unit.
Use
Wheeler’s Professional Digital Trigger Gauge is simple to use.
- Press the
button in the center to turn the unit on. The screen will light up and display all zeros.
Note
Avoid applying any force to the sensor when turning on the unit.
- Press the UNITS button to change between Pounds/Ounces and kilograms as desired.
- Rotate the arm 180-degrees out of the storage position until it snaps into the upright position. The arm may also be twisted 90 degrees to increase clearance around some gunstocks.
The gauge has two function settings; Peak and Live. Pressing the MODE button will switch the unit between the two as desired. The active mode will be displayed after the first zero on the LCD.
Peak Function
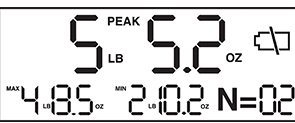
The PEAK function will hold the maximum force recorded during each pull and calculate the maximum, minimum, and average pull weights. These calculations are performed automatically and will constantly update and remain in memory until the unit is powered off, or they can be cleared by holding the DELETE button.
Press the MODE button until PEAK is displayed.
- In the bottom left corner of the display the AVG or MAX can be seen. Pressing MODE to change the display to show the other values but will not clear the readings or calculations.
- With all zeros displayed, cock the firearm and slowly pull the trigger until it trips. Placing your finger over the back side of the sensor housing allows you to precisely control the trigger pull.
- Pressing ENTER will accept the peak reading and enter it into the calculations. Pressing DELETE will void the reading and prevent it from being used in the calculations. Pressing and holding DELETE for 2 seconds will clear all calculations.
- After pressing either ENTER or DELETE, the scall will return to zero and be ready for a new reading. Simply cock the firearm again and repeat to get a new reading. The number of accepted readings is displayed as N=XX in the bottom right of the display.
Live Function.
The live function provides a real-time reading of the sensor. It will not hold a peak value.
- Press MODE until LIVE displays after the first zero on the LCD display.
- Applying force to the sensor (pulling the trigger) will show the live reading at all times and will return to zero when the load is removed.
The table below show the trigger pull weight measurements and average for the Glock GEN 5 G26 and the Rock Island Armory 1911 FS Tactical.
| Glock GEN 5 G26 | Measurement | Rock Island Armory 1911 FS Tactical | Measurement | ||
| Pounds | Ounces | Pounds | Ounces | ||
| Pull 1: | 5 | 4.4 | Pull 1: | 3 | 10.7 |
| Pull 2: | 3 | 15.6 | Pull 2: | 3 | 2.9 |
| Pull 3: | 4 | 10.1 | Pull 3: | 2 | 15.8 |
| Pull 4: | 5 | 3.0 | Pull 4: | 3 | 8.5 |
| Pull 5: | 4 | 2.1 | Pull 5: | 3 | 9.9 |
| Average: | 4 | 12.3 | Average: | 3 | 5.4 |
More to What Has Been Said.
Each unit automatically turns off after 10 minutes of non-use.
No more than 12 pounds should be exerted, as permanent damage can occur to the units.
As you can see in the two tables, there is a marked difference in pull weights between the Lyman’s Electronic Trigger Pull Gauge and the Wheeler Engineering Professional Digital Trigger Gauge. Why would that be? It may be the method that is used to pull the trigger.
With the Lyman’s Electronic Trigger Pull Gauge I am pulling on the unit itself and I can see the Trigger Rod bending under the pressure of the pull. The sensor is in the base unit and not the Trigger Rod. Perhaps if the contact of the trigger and rod were closer to the unit, the rod might not bend as much
With the Wheeler Engineering Professional Digital Trigger Gauge, I am using the recommended method of placing my trigger finger on the base of the sensor housing and then pressing the sensor (as shown below), and the trigger, in a more natural fashion. Note that I did have to change out the trigger shoe adapter with the bladed trigger adapter to work with the Glock GEN 5 G26 trigger with its trigger safety lever.

Summary
There are many times that, if you have watched some firearms reviews or have read firearm specifications, that the trigger pull weight will be included in some form or fashion. Most often the Lyman’s Electronic Trigger Pull Gauge is referenced in the videos while manufacturer specifications do not state what device was used. Let’s just say that Lyman’s Electronic Trigger Pull Gauge does measure a trigger’s pull weight. Resolution is 5 – 12lbs: ± .5 oz. that simply states that the reading is within .5 ounces of the actual measurement, and that is probably sufficient for most folks.
I like the Wheeler Engineering Professional Digital Trigger Gauge better than the Lyman unit. I like the direct feel against the trigger rather than a remote feel as I get with the Lyman unit. I also like that the Wheeler unit automatically calculates the average pull weight rather than having to press a separate button to obtain the same.
Overall, both units will measure trigger pull weight and are good enough for general use. Without having a truly scientific setup to compare the accuracy of both units, and a known calibrated resistance, which would remove the human aspect of testing, I have to take the displayed readings at their face value. But I still have to wonder at the difference in readings between the two trigger-pull gauges.
The other part of this is if it really matters to you. If you like the feel of a certain trigger, does it really matter what it weighs in at? Where it would matter; however, is if the trigger had been modified and does the trigger pull fall under an acceptable, court-defensible trigger. Otherwise, trigger pull weight is nice information to know.
Resources:
- Lyman’s Electronic Trigger Pull Gauge: https://www.amazon.com/Lyman-7832248-Electronic-Digital-Trigger/dp/B00162QGLS/ref=sr_1_1?dchild=1&keywords=lyman+electronic+trigger+pull+gauge&qid=1598032840&s=sporting-goods&sr=1-1
- Wheeler Engineering Professional Digital Trigger Gauge: https://www.amazon.com/Wheeler-Professional-Digital-Trigger-Gauge/dp/B01B7OYTNQ/ref=redir_mobile_desktop?ie=UTF8&aaxitk=dP4qi5QboPyVWQLs72-krw&hsa_cr_id=9010140730801&ref_=sbx_be_s_sparkle_mcd_asin_1
- Batteries: You are on your own
![]()

