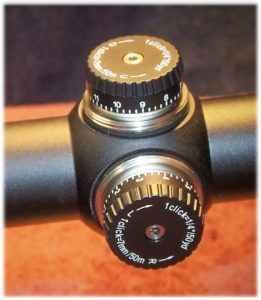
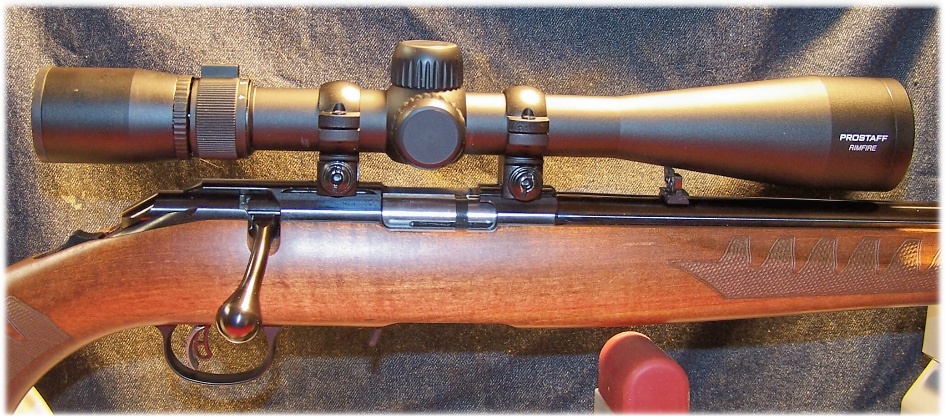
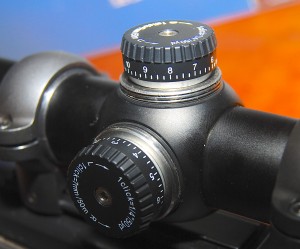
 Before deer hunting season hit here in Georgia, there were many hunters bringing their hunting rifles to the indoor range that I frequent for “zeroing” prior to the actual season, or to initially zero the rifle prior to taking it to an outdoor range for final zeroing. Most of the rifles were .308 and .30-06 rifles and well as a .300 Winchester Magnum that one gentleman thought to bring just to annoy the rest of us.
The indoor range has a maximum shooting distance of 25 yards and one can reasonably get their selected ammunition “on paper” at 100 yards if they know what they are doing. Then, when they have the opportunity to get to a 100 yard (or longer) range, they can fine tune things.
Now, most hunters and long-range marksmen understand their magnified options (otherwise know as scopes), but quite a few don’t. There were some first time hunters coping with trying to establish zero at this indoor range, and it was obvious that they did not understand the dynamics of their ammunition let alone the dynamics of their chosen optic.
This topic is about short distance zero adjustments that can affect your long range shooting. It is also for those, like me, who actually want to “zero” at twenty-five yards. Case in point is some friendly competition with a shooting buddy. He consistently knocks the centers out of playing cards with his .22 rifle at a distance of twenty-five yards. I wish to do the same with my .22 rifle. This means that the rifle must be “zeroed at twenty-five yards and not at fifty, seventy-five yards, or even 100 yards. With that said, I can mount a scope on my .22 rifle, take it to the indoor range, and within a few minutes have the rifle and scope working as one.
With the chosen rifle and a new scope (or vice-versa), the impact of the bullet on the target will, no doubt, not be where I want it, which results in my removing turret caps and cranking turret until I can get the darn projectile to impact where I want it to. Mostly, this is done in an un-scientific manner; try to hold the scope reticle at my original aiming point and annoying myself with a lot of clicking noises. But, there is a scientific (and mostly-proven) means of annoying myself less that I am going to try and pass on to you.
Personally, I like to zero a rifle at one-hundred yards, which seems to be a common practice with most, and is within reason considering the normal shooting environments and distances in my state of Georgia. Your zeroing requirement may vary according to the type of shooting that you are engaged in. There may be some that need to zero at two-hundred and fifty yards, or even longer. But, I think that the most common distance is about one-hundred yards for most of us, and it is the distance at which most scopes are calibrated in regards to adjustments.
Some of us will have a scope calibrated in MOA, or inches, or even MILs. Regardless, knowing what each click of windage or elevation adjustment does to the impact of the projectile downrange must be understood for us to become successful shooters. Hopefully, what follows will help in that respect.
To begin with let’s make an assumption; first, we have a magnified optic. The elevation and windage adjustments have cute little knobs with numbers on them. Those numbers are immaterial, at this point. What we do need to know is what each division (click) of adjustment represents. Let’s say, for the sake of discussion, and to make things easy, that each click (elevation or windage) represents ¼” inch of bullet displacement at 100 yards. To move the bullet’s impact one-inch at one-hundred yards, we need to turn the adjustment knob four clicks. So far, so good!
If your rounds are impacting 3 inches to the left at 100 yards, you have to do 12 ‘clicks’ to the right (¼ x 3=12 ‘clicks’). However, as distance increases, the incremental adjustments increase in value. For each increment adjustment, the space of the adjustment grows. Just multiply the distance by the click adjustment. At 100 yards, each click adjustment is ¼ inch. It will then double at 200 yards to ½ inch (2x ¼). At 300 yards it will triple to ¾ inch (3x ¼ inch). At 400 yards it will be 1 inch (4 x ¼). But, what happens at distances less than one-hundred yards? This question perplexes those who are trying to establish an impact point at, say, a distance of twenty-five yards for a one-hundred yard zero. To establish the “relative” bullet impact point at a distance of twenty-five yards for a one-hundred yard zero is actually pretty simple and can be found from the ammunition manufacture, many web sites, and even with applications for a phone with more intelligence than the user of that phone.
I am going to use some information from GunData.org (http://gundata.org/ballistic-calculator/) to get some ballistic data on a .308 Winchester (7.62mm NATO), Federal Sierra GameKing BTSP, 165gr cartridge, which is a popular hunting cartridge. From that data, I can establish a probably zero point at twenty-five yards that will get me close to the actual zero point that I want at one-hundred yards. In this case, if I am shooting at twenty-five yards, I need to place the bullet’s impact at 0.06381-inch below the “X” of the bulls-eye, which is roughly between 1/16-inch (0.0625-inch) and 5/64-inch (0.0781-inch). For practical purposes, I would place my marker at 1/16-inch (0.0625) below the “X”, which would be close enough for practical use and the fact that I could not shoot with that degree of accuracy. If you can, I applaud you.
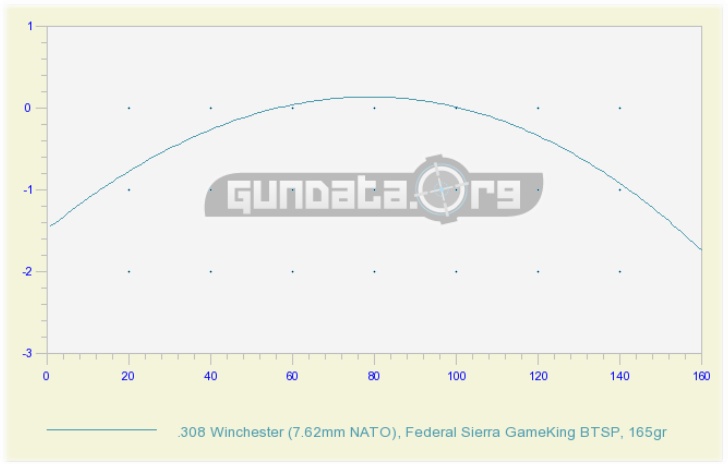
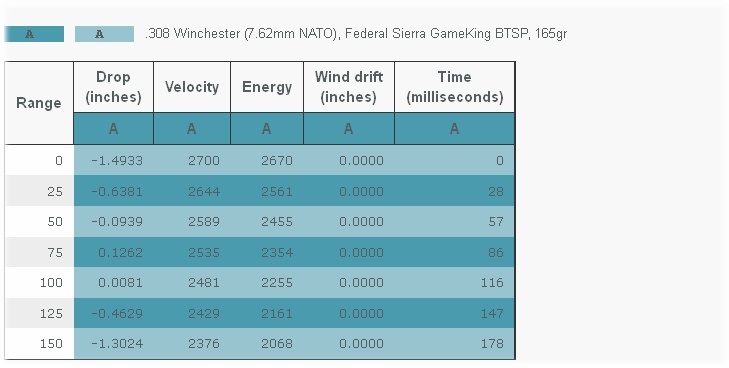 I place a marker at 0.625-inch below the “X”, bench rest my rifle, load my desired cartridge, and pull of that first cold-bore shot. The bullet’s impact on the target is about two-inches high and three-inches right from my aiming point. Here is where the confusion sets in, and which requires knowledge of mathematics to clear up the confusion.
Remember that any distance beyond the scope’s calibrated settings, the value of each click increases. Well, it would only seem probable that with distances inside of the scope’s calibrated settings that each click should decrease in value – and that is exactly what happens. At seventy-five yards, each click is only worth three-quarters of its value. At fifty yards, each click is only worth half of its value. And, at twenty-five yards, each click is only worth one-quarter of its value. At our twenty-five range distance, one click of elevation or windage only accounts for a 0.0625 inch shift in the bullet’s impact rather than 0.25 inch at one-hundred yards. Rather than 4 clicks to move the impact one inch, you now need 16.
With my “two inches high and three inches right from my aiming point” example, I would have to dial in thirty-two clicks of “down” elevation and forty-eight clicks of “left” windage to shift the bullet’s impact point to my aiming point. With that in mind, let’s talk about this “Up-down and left-right” thing with scopes.
As most scopes have a universal direction of adjustment, one needs to realize that a scope’s adjustment is relative to the impact point of the projectile – not the reticle. Some turrets are marked for only one direction while others are marked with both directions. Here is a simple guide to put elevation and windage adjustments into the proper perspective:
For Elevation Adjustments:
- Turn the elevation knob (counter-clockwise) in the direction of the arrow marked “U” for up, if the bullet impacts below the aiming point.
- Turn the elevation knob (clockwise) in the direction of the arrow marked “D” for down, if the bullet impacts above the aiming point.
For Windage Adjustments:
- Turn the windage knob adjustment (clockwise) in the direction of the arrow marked “l” for left, if the bullet impacts to the right of the aiming point.
- Turn the windage knob adjustment (counter-clockwise) in the direction of the arrow marked “R” for right, if the bullet impacts to the left of the aiming point.
In summary, clockwise for moving the bullet’s impact down and left, and counter-clockwise for moving the bullet’s impact up and right.
In my previous example of With my “two inches high and three inches right from my aiming point” example, I would have to turn the elevation knob clockwise thirty-two clicks and turn the windage knob clockwise forty-eight clicks to shift the bullet’s impact point to my aiming point.
Regardless if a scope is set up for inches, MOA, or MIL, the basic principles presented here apply, but you must know what MOA and MIL is in order to do the math.
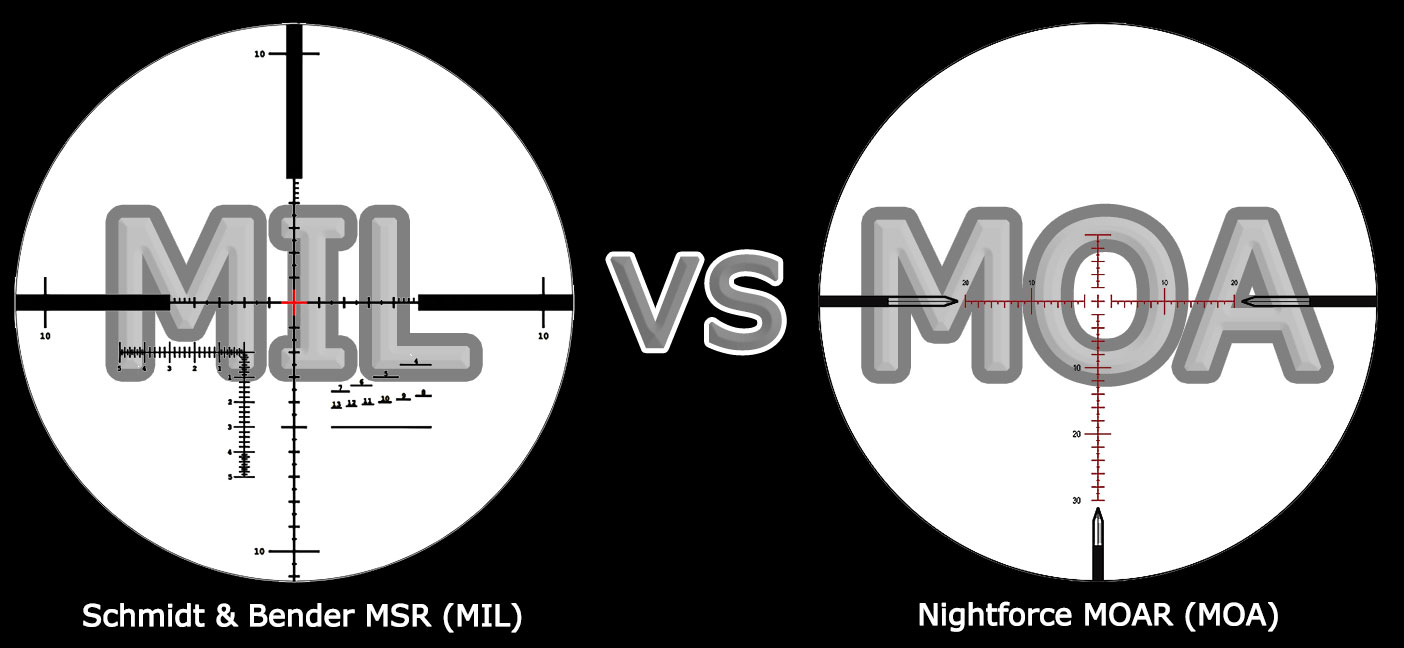 A MOA is actually 1.047 inches. If your scope has an incremental adjustment of 1 ‘click’ is equal to ¼ inch MOA (0.26175 inch) at 100 yards, this means that if your rounds are impacting 3 inches to the left at 100 yards, you have to do 12 ‘clicks’ to the right (¼ x 3=12 ‘clicks’) to get in the ballpark. Just remember that as distance increases, the incremental adjustments increase in size. For each MOA increment adjustment, the space of the adjustment grows. Just multiply the distance by the MOA adjustment. At 100 yards, its ¼ inch, then it will double at 200 yards to ½ inch (2x ¼). At 300 yards it will triple (3x ¼ inch). At 400 yards it will be 1 inch (4 x ¼).
The “Mil” in “Mil-Dot” does not stand for “Military”; it stands for “milliradian.” One milliradian = 1/1000 (.001) radians. So, type .001 into your calculator and hit the “tangent” button. Then multiply this by “distance to the target.” Finally, multiply this by 36 to get inches subtended at the given distance. With the calculator in “radian” mode, type: tangent (.001)*100*36 = 3.6000012″
So, one milliradian is just over 3.6 inches at 100 yards. With this in mind, then ¼ MIL is approximately 0.9 inch of shift per click.
For all practical purposes, and for shooting at twenty-five yards, I only try to remember two numbers, 8 and 16. If I need to adjust for a 2.5-inch shift, I know that it is 2×16 or 32 + 8, or 40 clicks total. If the shift is 2.25-inches, it is 2×16 for 32 + 4 or 36 clicks total. Keeping it simple is best for me. If I need to go beyond multiplying by two at twenty five yards with a new scope, I need to do some shim work and remount the scope.
So there you have it – my take on zeroing at short distances to shoot long distances and zeroing at short distances to shoot at short distances using a scope. The next time that you go to a twenty-five yard range to zero a rifle for one-hundred yards, and you are counting clicks, your shooting companions are either going to figure you for a ballistic-wise and educated shooter or chalk you up as a raving lunatic. To tell you the truth, either one works for me.
It should be noted that the principles that I have applied here also apply to dot sights, magnified pistol scopes, or other scopes where the designed zero distance may be other than 100 yards; for example, a small bore rifle scope where the zero distance is seventy-five yards and each click represents a ¼-inch shift at seventy-five yards or a scope where one click will equal a ¼-inch shift at fifty-yards. With the latter scope, I would only need 8 clicks of adjustment to move the bullet’s impact one inch at twenty-five yards, rather than 16 clicks, as would be necessary with a scope designed for a one-hundred yard zero.
REALITY CHECK:
I had mounted a new scope to my Ruger American Rimfire 22LR; a Nikon Prostaff Rimfire II 4-12×40. Each click of elevation and windage adjustment is equal to 1/4 MOA at fifty yards; it takes four clicks to move the point of impact 1″ at fifty yards; therefore, each click represents 0.250-inch. I would be setting up a twenty-five yards zero.At twenty-five yards, each click is one-half the value as it would be at fifty yards. According to theory, each click then represents 0.125 inch movement in POI.
My first, cold bore shot impacted 2.25-inches below the POA and 0.25 inch right of POA. Doing the math in my head, I needed sixteen + two clicks of up elevation and two clicks of left windage to bring the POI to my POA. I counted off the clicks for both elevation and windage, leveled the scope to my POA, and commenced to place a dime-sized group of ten rounds around my POA. The theory worked in practice!
Below is a summary of the setting for fifty yards and a twenty-five yard zero with a scope set for 1/4 MOA @ fifty yards:
|
TURRET CLICK VALUE |
DISTANCE (YARDS) |
MULTIPLIER |
IMPACT SHIFT (INCHES) |
|
0.250 |
50 |
4 |
1.000 |
|
50 |
2 |
0.500 |
|
|
50 |
1 |
0.250 |
|
|
0.125 |
25 |
8 |
1.000 |
|
25 |
4 |
0.500 |
|
|
25 |
2 |
0.250 |
IN SUMMARY:
 With all of this being said, I recommend that you refer to your scope, or to the literature provided with the scope, to determine what each click of adjustment does to the impact point of the projectile downrange at the scope’s intended zero distance.
Of course, selecting a magnified optic is an adventure in itself, and far beyond what this article can provide. You may need a high-magnification 1/8 MOA scope for competition use, or a low-power variable or fixed magnified optic for hunting or tactical work. Regardless of the type of scope, understanding the scope’s controls is as important as the firearms platform upon which it is mounted.
![]()


