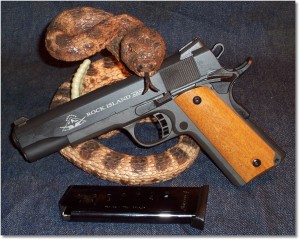
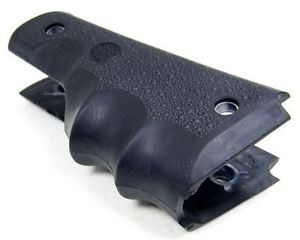
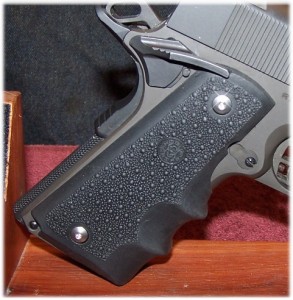
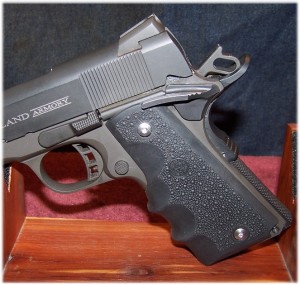
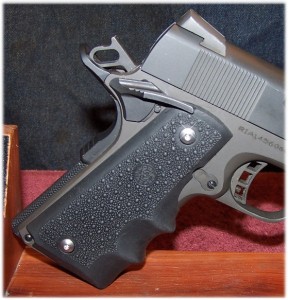
Lately, I have been carrying the RIA 1911A1 FS tactical as my EDC that, of course, has an ambidextrous thumb safety and a set of Uncle Mike’s rubber grip panels. Ever since I began using the Hogue Monogrip Wraparound with Finger Grooves on my 1911 carry pistols, I realized how attached to these grips I have become. The Hogue Monogrip Wraparound with Finger Grooves fills in the front of the grip below the trigger guard, the finger groove depth and spacing are perfect for my fingers, the girth of the pistol is increased slightly, felt recoil seems less, and I feel that I have a lot better control of the pistol as compared to not using them. With these grips, my hand is forced as high on the back strap as possible from the draw-stroke and the pistol feels like it has better balance – possibly due tot eh leverage the grip affords to the hand. Obviously, I had to try and install the Hogue Monogrip Wraparound with Finger Grooves one more time (I am a bull-headed sort of fellow).
Taking cues from the relieving of the VZ grip panels, I ordered another Hogue Monogrip Wraparound with Finger Grooves and a set of Hogue Stainless Steel Grip Mounting Screws.
Configuring the Hogue Monogrip Wraparound with Finger Grooves to the RIA 1911A1 FS Tactical does take some surgery. For surgery work, you will need a good X-Acto knife of small and medium varieties and something to mark the areas to be relieved. Also, the Hogue Monogrip Wraparound with Finger Grooves may take some effort to get them secured, but that is not the first concern. Fitting the grip around the frame can be a challenge and I’ll cover that a little bit later.
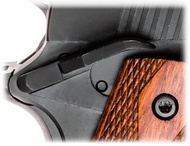
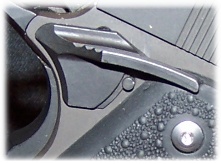
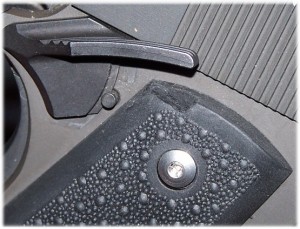
The issue with compatibility with the Hogue Monogrip Wraparound with Finger Grooves and the RIA 1911 pistol with ambidextrous thumb safety stems from two differences between the RIA and pother 1911-based pistols; the angle of the thumb safety levers and how the thumb safety is mounted on the frame.In quite a few ambidextrous thumb safeties on pistols other than the RIA series, an arm on the right side safety lever keeps the right side safety in place by being covered with the right side grip panel. A recess is cut into the right side grip panel to accommodate the arm. The Hogue Monogrip Wraparound with Finger Grooves does, in fact, have a recessed area in the right grip panel to accommodate “standard” ambidextrous thumb safeties.
The RAI series of 1911 pistols has a pin that holds the right side safety lever in place; the recess is not needed to hold the safety in place. The issue is with the safety lever itself; it will not clear the grip at the top of the grip – on either side.The top end of the left side grip panel is such so that it partially covers the Plunger Tube housing. Besides adding a finished look to the Hogue Monogrip Wraparound with Finger Grooves, it also prevents the plunger tube from flying off the pistol should it decide to do so.
THE BEGINNING:
Unload the pistol and remove all ammunition from the immediate area. Ensure that the pistol is safe.
To start with, you will need to field strip your RIA 1911 pistol and remove both of the grip panels. Your existing grip panel mounting screws will also work with the Hogue Monogrip Wraparound with Finger Grooves, but I opted for the grip panel mounting screws from Hogue in stainless steel to add contrast to the pistol and somewhat match the silver ROCK ISLAND ARMORY bill board on the slide of this particular pistol.
CHECKING INITIAL SAFETY-TO-SLIDE CLEARANCE:
With the grip panels removed, and a disassembled slide, install the slide on the frame and position it at the disassembly/assembly notch.
Measure the clearance between the highest point of the thumb safety assembly (the part that engages the slide when pushed into the “Safe” position) using a set of feeler gauges (automotive type is fine). Record the clearance measurement for later use.
LEFT SIDE GRIP PANEL MODIFICATION:
The easiest grip panel to modify is the left side and that is the place to begin.
- Place the thumb safety in the up position (safe).
- Place the left side grip panel in place on the frame.
- Push the thumb safety down to the “fire” position.
- Using a fine-point marker (I used a Pilot Precise Extra Fine Rolling Ball pen), simply mark the top of the grip panel where the safety lever meets the top of the grip. This is the portion of the grip panel that extends over the plunger tube. All you want to do is to remove this portion of the top of the grip panel.
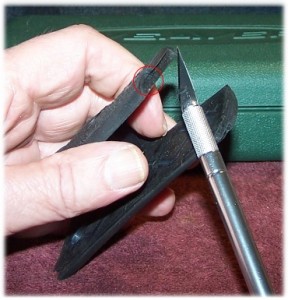
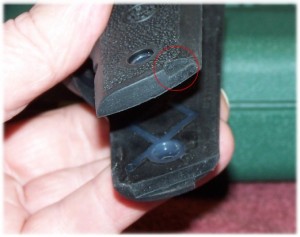
- Using the X-Acto knife, make a downward cut at your mark only as far as the top of thick part of the grip panel. Cut along the top of the grip only as far as your previous vertical cut to remove this section of the panel. This is all that you need to do for the left panel.
- You can now remove the grip from the frame.
RIGHT SIDE GRIP PANEL MODIFICATION:
The right side grip panel is where the majority of surgery is going to take place.
- Place the safety in the “Safe” position.
- Place the right side grip panel in place over the grip mounting bushings and hold in place.
- Push the safety lever down against the grip panel.
- With your marker, mark the point at which the tip of the safety lever contacts the top of the grip panel.
- Make a second mark along the top of the grip panel and inside of the safety lever. This will provide the second relief mark.
- Remove the grip from the frame.
- Complete marking the area to be relieved. Note that you are not cutting all the way through the grip panel. You are only inletting the area where the right side safety lever will slide up and down.
- Place the empty slide on the frame and position the slide over the left–side thumb safety.
- Place the right side grip panel in place over the grip mounting bushings and hold in place.
- Push the safety lever down in the “Fire” position.
- Check the clearance of the left-side safety lever and the slide with the safety in the “Fire” position using the feeler gauges that you used in CHECKING INITIAL SAFETY-TO-SLIDE CLEARANCE at the highest point of the thumb safety assembly (the part that engages with the slide). With my particular pistol, there was a clearance a clearance of 0.029-inches. Compare your previous measurement with your current measurement to determine if any further “relieving” of material is needed. If further “relieving” is need, it will probably on the right side grip panel. Remove only that material that will provide the proper clearance between safety assembly and frame.
It might seem that, at this point, you are finished. However, the entire grip needs to be installed and (hopefully) final clearance measurement completed before you can call it a successful install.
GRIP INSTALLATION AND TEST FITTING:
The Hogue Monogrip Wraparound with Finger Grooves can be quite frustrating to install. I have read numerous reviews where the purchaser could not get the Hogue Monogrip Wraparound with Finger Grooves installed because they were, seemingly, too small. I have installed these grips on all sizes of 1911 pistols and if the correct size Hogue Monogrip Wraparound with Finger Grooves was ordered, they will install. It does not matter what side is installed first, but before you attempt the install, try this:- Take a grip panel in each hand.
- Gently flex the center of the grip in several directions to loosen up the grip. I advise against using a hair dryer or heat gun. Simply, use your hands to warm up and massage the rubber.
- Apply a very thin coat of oil on the frame where the grip will contact the frame (around the grip frame opening). This will help seal the grip to the firearm and prevent corrosion.
- Place the bottom of either side grip panel on the grip bushing.
- Fold the grip around the front of the grip to position it as close to the opposite side grip bushing as possible.
- Knead the grip panel with your thumbs toward the grip mounting bushing. This may take some thumb strength, removing the grip for some more flexing of the rubber, and then re-trying a couple of time. Eventually, both bottom panels will click into place around the bushings. At this point, you can partially install the bottom grip screws if you desire.
- Place the top mounting hole (either side will do) onto the grip screw bushing.
- Push the opposite side grip panel at the top with your thumbs (you may also have to pull the top with the other hand) until the grip panel snaps into place over the top grip screw bushing.
- Partially install the remaining top grip mounting screw.
- Starting with the bottom grip screws, push the grip panel rearward while tightening the grip screw. Tighten, but do not over-tighten. Note: the backing of each panel is plastic. It prevent the panel from popping out and over the grip screw bushing before installing the grip screws and also presents a solid surface on the backside of the grip to seal out environmentally-related foreign matter.
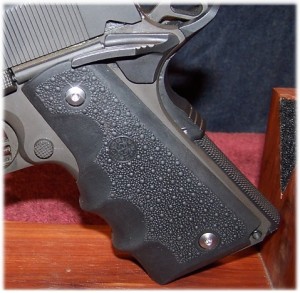
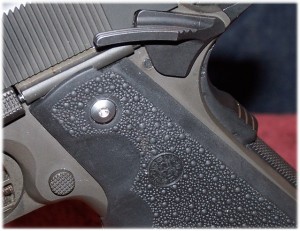
- Once all grip screws have been installed and tightened, recheck the safety assembly-to-slide clearance. If the clearance is to your satisfaction, assemble the pistol as you normally would. If the clearance is not adequate, well, you know what must be done.
Congratulation! You have now installed the Hogue Monogrip Wraparound with Finger Grooves on a Rock Island Armory 1911 with ambidextrous thumb safety.
SUMMARY:
While I would like to see Hogue come out with a RIA-compatible 1911 Wraparound Grip with Finger Grooves, I also realize that the majority of 1911 pistols are not Rock Island Armory and that Hogue must cater to the masses. However, with a little patience and a sharp X-Acto knife, the Hogue Monogrip Wraparound with Finger Grooves can be made compatible with RIA ambidextrous safety 1911 pistols. They are really worth the effort, in my opinion.Fitting the grip took about an hour out of my otherwise mundane day. In fact, writing this article took me longer than to install the grip.
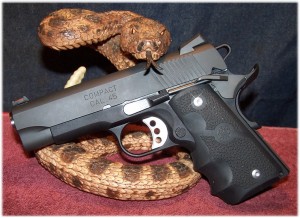
Warm weather will soon be upon us and some of us have to begin considering a switch out from cool/cold weather carry to our warm/hot weather carry. For me, I will probably be going to the Springfield Armory Range Officer Compact, which also has the Hogue Monogrip with Finger Grooves installed. The Springfield ROC is more like the “Officer Model” in the 1911 line and is a whole lot easier to conceal in the hot, Georgia climate.The Springifeld ROC is a lightweight pistol and the Hogue Monogrip with Finger Groove grip definitely helps to tame the felt recoil of this pistol.
![]()


One Response to Hogue Monogrip Wraparound with Finger Grooves for 1911 Rock Island Armory Pistols – Solving the Compatibility Issue