Discovery is a wonderful thing. It is funny how you discover stuff that has been around for awhile, While known to others, the ”discovery” is new to you and when you do discover something you wonder why you did not discover it before now. Usually, it is because you did not need to discover what you discovered until you were meant to discover what you discovered. Such, it seems, to be the case with the Weigand Extractor Adjusting Tool and the companion Weigand Extractor Tension Gauges for the 1911-Based pistol that I recently discovered.
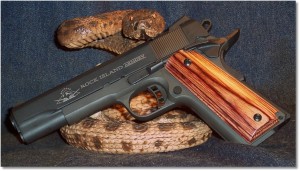
I have a Rock Island Armory Standard FS 1911 Tactical pistol that needed a little tweaking when first new. Specifically, the recoil spring was too soft. Regardless of the method used to manually chamber a round, whether by using the slide lock lever or a “slingshot” method, rounds did not want to be chambered. In fact, rounds did not like to be chambered when actually firing the pistol. I removed the recoil spring that came with the pistol and installed a Wilson Combat #18 recoil spring and life was good; the pistol would chamber a door knob if it were sized to the chamber. One minor issue still plagued the pistol, however. The expended cases were ejecting up, out, and to the front of the pistol. Now, that is a not a bad thing. I experienced no further FTFs with the new recoil spring, and I did not experience many FTEs, but I did experience a few. So, I started doing some research.
I found out that the issue with spent case ejection angle could be caused by a weak extractor. I knew that extractors had tension (or were supposed to have tension) in them, but I never really had an extractor problem in any of the 1911-based pistols that I own – but there is always a first time.
Being somewhat of a tool junkie, I have a propensity to buy a tool with the full intention of using it sometime later; sometimes way later – like years. Sometimes, I buy tools just to give me an excuse to use them. Perhaps, the Weigand Extractor Adjusting Tool was one of those tools.
According to Weigand Combat Handguns, Inc., the extractor tension should be around 25-ounces to 28-ounces (1.5-pounds to 1.75 pounds) to properly work in the 1911-based pistol using their system. It would seem that the extractor is a simple drop-in part, and for the most part it is. However, some tuning of the extractor may be necessary to ensure proper performance of the pistol in regard to feeding, extraction, and ejection. I am sure that many extractors have seen a vise and a pair of pliers once or twice in their lifetime while in the incapable hands of the home gun smith, and perhaps also in the capable hands of a gun smith who knows what is what with the 1911-based pistol. While I like to do my own work as much as I can, I also know when to turn things over to a professional. But, I though that I would give tweaking the extractor in my RIA Standard FS 1911 Tactical pistol a try. The worst case scenario was that I would have to replace the extractor. Not to worry, I have spare extractors as running spares should one break. Regardless, I would still be in the same position of trying to tune an extractor myself or turn things over to my favorite and more-than-qualified certified armorer that does most of my not-for-me-to-do-it work. Besides, it also gave me an excuse to purchase a digital trigger pull gage that would provide a more precise means of measuring the extractor tension as compared to a non-digital trigger pull gage.
The Weigand Extractor Adjusting tool is intended to be used with the Weigand Extractor Tension Gauge. Imagine that!
THE WEIGAND EXTRACTOR TENSION GAUGE:
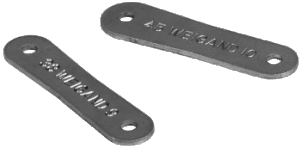
The Weigand Extractor Tension Gauge is actually two pieces that are used to slide between the extractor hook and the opposite side of the chamber. The extractor is supposed to hold the case in place until it is freed from this position by the ejector. The diameter of the gauge used is dependent upon the caliber of 1911-based pistol being worked on; .45ACP, 9mm, 10mm, or .38 Super.
Note that the breech face should be clean and free of any remnants of firing the pistol before using the tension gauge.
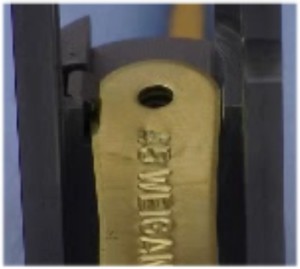
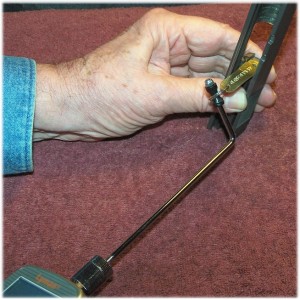
The gauge that is proper to the caliber of the pistol is slid over the firing pin hole, which is centered with the .125-inch (1/8-inch) diameter hole that is in the gauge. The gauge is then simply pulled from the breech face using a trigger pull gage that is capable of measure in ounces. The point at which the gauge pulls free from the breech face is noted. A good range of tension for an extractor was mentioned previously at between 25-ounce to 28 ounces. In other words, the tension gauge should pull free from the breech face within this limit.
If the extractor tension is between 25-ounce to 28 ounces, you are good to go. If the extractor tension is above or below this limit, some tuning is in order, and thus enters the Weigand Extractor Adjusting Tool.
As a side note, the holes in the Weigand Extractor Tension Gauge are too small to fit the pull hook of the Lyman Electronic Trigger Pull Gauge. I found a small key ring in my office and threaded that through the hole that was to be used to pull the gauge free from the breech face.
WEIGAND EXTRACTOR ADJUSTING TOOL:
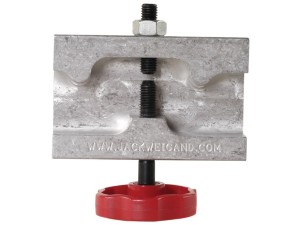
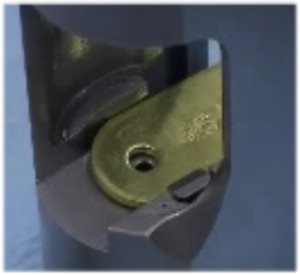
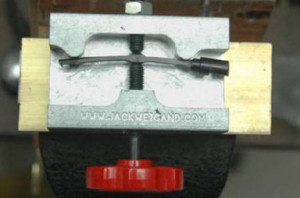
Essentially, the Weigand Extractor Adjusting Tool is a portable press that is used to bend the extractor to achieve the proper extractor tension. The Weigand Extractor Adjusting Tool is used to increase the extractor tension by increasing the bend (or arc) of the extractor and to decrease extractor tension by decreasing the bend (or arc) of the extractor. A stop feature, in the form of a screw and locknut, keeps you from over-bending in either direction. There is a place in the tool where the extractor sits with the head of the extractor always pointing right regardless of the direction of tension adjustment.
If the extractor tension is less than desired, the extractor is positioned in the jig with the head of the extractor facing to the right and the hook of the extractor facing away from the stop screw. If the extractor is greater than desired, the extractor is positioned in the jig with the head of the extractor facing to the right and the hook of the extractor facing toward the stop screw.
THE TRIAL AND ERROR METHOD:
Adjusting the extractor tension is not an exact science; it does take some trial and error – and patience, lots of patience.
To remove the extractor, after determining that the extractor tension is incorrect, or perhaps you are replacing a damaged extractor, means that you must field strip the 1911-based pistol. Of course, you want to ensure that the pistol is unloaded first and all live ammunition is put away before beginning any field stripping,
Removing the extractor is quite simple, actually. However, there are some things to think about beforehand.
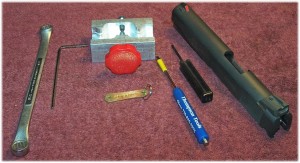
The firing pin and firing pin stop must be removed. I find that the Glock Tool is perfect for the job. The firing pin is under spring tension and care must be taken to prevent the firing pin and spring from flying outward when the firing pin stop is removed. I normally cover the firing pin opening with my thumb as I pry the firing pin stop out from the pistol.
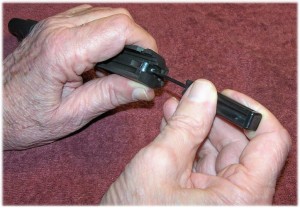
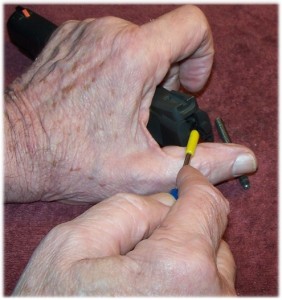 Once the firing pin and firing pin stop is removed, the next step is to remove the extractor from the slide. I use a small flat-tipped screwdriver that has a tip of .125-inch wide (1/8-inch). A small length of electrician’s tape or rubber tubing on the shaft of the screwdriver will prevent marring of the end of the slide as the extractor is pried loose from the slide. Locate the head of the screwdriver in the slot in the head (what the firing pin stop slide through) and slowly pry the extractor from the slide. There is a point where you can simply grab the extractor with your fingers to completely remove the extractor. This would be a good time to clean the extractor and the extractor channel.
Use the Weigand Extractor Adjusting tool to add or decrease extractor tension as desired (the Weigand Extractor Adjustment Took comes with a set of instructions – follow them).
Install the extractor back into the slide. Install the firing pin stop into the slide. This ensures that the extractor is properly aligned with the breech face for properly measuring the extractor tension.
Use the proper Weigand Tension Gauge, as mentioned previously, with the trigger pull gage to measure the extractor tension. Like before, if the extractor tension is too little or too much, it is back to using the Weigand Extractor Adjusting Tool to obtain the proper range of tension. Then, it is back to the Weigand Tension Gauge, as mentioned previously, with the trigger pull gage to measure the extractor tension. There may be several of these back and forth operations until you are satisfied with the results.
Once the correct tension is achieved, it is time to reinstall the firing pin. At this point, you can simply remove the firing pin stop, install the firing pin and spring, and then re-install the firing pin stop. Again the Glock Tool is very useful when performing this operation. As with removing the firing pin and spring, the firing pin is under spring tension until the firing pin stop is completely installed.
So, now you have a properly tensioned extractor and all you have to do is assemble the pistol (I assume that you will properly clean and lube the pistol a this point), go to the range, and enjoy the fruits of your labor.
Let me end this kind of where I started. The extractor tension in the RIA Standard FS 1911 was 3.5-ounces. In short, there was no extractor tension. This was a brand new pistol for all practical purposes. After using the Weigand Extractor Adjusting Tool and the companion Weigand Extractor Tension Gage, the extractor tension was right at 25-ounces (1.2-pounds) and was where I decided to leave it until I went back to the range for evaluation.
The question to me was, “Did I notice a difference from before the extractor tension adjustment and after the extractor tension adjustment?” I ran 50-rounds with absolutely no FTFs or FTEs as I had before the extractor tension adjustment. Maybe, I fixed something after all. If I did, then the effort was worth it. Even if I did not fix the problem, at least I knew the condition of the extractor and could probably rule it out as causing the problem.
SUMMARY:
The Weigand Extractor Adjusting Tool is a machined block of aluminum that measures 2.75-inches wide by 1.75-inches high and consist of a tensioning knob and screw and a stop screw and nut (7/16-inch hex head). Coupled with the Weigand Extractor Tension Gauge and a good trigger pull gage, the system allows the 1911-based pistol owner and operator a great means to keep extractors tuned and well-maintained. It is not something that you are going to use every time you shoot your 1911-based pistol (well, maybe you would), but it is a system that you can use for periodic, preventive maintenance to keep your baby humming. In fact, I would advise using it if you have to replace a broken extractor and you are not sure what tension the replacement part is. Let’s face it, I don’t envision extractors being tuned before they leave the manufacturer, but some may be. Do you know which ones? I don’t either.
By the way, when I returned to the range to test shoot my “new” extractor, the Weigand Extractor Adjusting Tool, the Weigand Extractor Tension Gauge, and my Lyman Digital Trigger Pull Gage went with me. I had not doubt that I could correct any problems with the extractor tension in a matter of minutes – including replacing it and tuning it with very little down time. I like that.
I give the Weigand Extractor Adjusting Tool and the Weigand Extractor Tension Gauge thumbs up.
UPDATE 03/13/2016:
Today, I ran seventy-five rounds through the RIA 1911A1 FS Tactical as a follow-up to some other work that I had performed on the pistol such as; repainting the front sight and adding the Hogue Monogrip with finger grooves.
My expended shell recovery rate went from about 10% to 90% due to adjusting the tension on the extractor. Out of the seventy-five rounds fired, about twenty-five of them were “geezer loads” that are really on the light side. Expended shells were bouncing off the lane wall and to my rear instead of to my front. The “Geezer loads” were bouncing off the lane wall and landing virtually at my feet Quite an improvement over before the extractor tension adjustment.
In short, the extractor did its job due to the increased tension made during the tension adjustment. The Weigand Extractor Adjusting Tool, the Weigand Extractor Tension Gauge, and my Lyman Digital Trigger Pull Gage made it all possible.
My job here is done.
RESOURCES:
- Weigand Extractor Adjusting Tool: http://www.midwayusa.com/product/931460/weigand-extractor-adjusting-tool-1911
- Weigand Extractor Tension Gauge: http://www.midwayusa.com/product/733842/weigand-extractor-tension-gage-set-semi-automatic-pistol-with-exposed-extractor
- 1911 Extractor Adjustment (Weigand Instruction Video): https://www.youtube.com/watch?v=3nnqKKWk2ig
- Lyman Digital Trigger Pull Gage: http://www.midwayusa.com/product/220725/lyman-trigger-pull-gage-electronic-digital-0-to-12-lb
- Extractor Tuning Tips: http://www.m1911.org/technic2.htm
![]()


