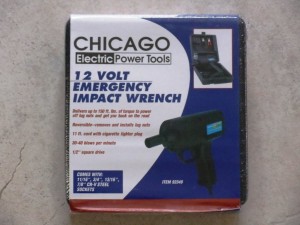
If you have ever changed a flat tire on a busy highway, you can relate to the fact that the job has to be done as quickly and as safely as possible. People have been killed while simply trying to change a flat tire on a crowded expressway during rush hour. One of my objectives was to have, available to me at a moment’s notice, the complete means to either fix or change a flat tire in the minimal amount of time. One of the tools that I have on-board is the Chicago Electric Power Tools 12 v Impact Wrench and I am going to expound on its pros and cons in this write-up.
While I also have a wheel lug speed wrench, it now serves as a back-up unit. The Chicago Electric Power Tools 12 v Impact Wrench has become the primary tool for quickly removing and installing a flat tire from my vehicle. At first skeptical about the tool, as was a few mechanic friends of mine, we were actually amazed that it worked as well as it did.According to the product description; “This emergency impact wrench is a lifesaver when a flat occurs while on the road! The impact wrench plugs right into your vehicle’s cigarette lighter plug to power up to 150 ft. lbs. of torque, allowing you to remove most lug nuts! Includes a convenient storage case that conveniently stores in your trunk or hatch for easy access in case of emergency. Change out your tires and get back on the road in minutes with this impact wrench! 1/2” square drive 30-40 blows per minute Shipping Weight: 5.75 lb.”
Note that a key issue is that the tool will remove ‘most’ lug nuts. If your ride is like a Chevrolet 2500HD diesel-em-up truck, don’t even try this tool. For most vehicles, it will work fine and for others, its use is totally ineffective and lug nuts will laugh at your feeble attempt to loosen them. Note that you may have to use a lug wrench to initially loosen a lug nut or two, and then use the impact wrench to spin them off. Note that you may use the tool to initially spin the lug nuts on, and then use a lug wrench or torque wrench (like you carry one of those in your vehicle) to tighten the lug nuts.
Note that this impact tool is unlike those found at automotive repair facilities, which (in most cases) use compressed air to operate and which is usually supplied by a mammoth two-stage air compressor that no one in their right mind would carry in their vehicle. Not being in my right mind, I DO carry a small 12 VDC air compressor (and a can of compressed air) just for filling tires, but it is not nearly adequate enough for air-gun operation. This tool uses inertia for its operation and is most effective when the engine is running so that the battery is at full charge when the tool is in use. With that said, there are some safety issues to contend with that I will address later. Changing a flat tire on the side of the roadway is fraught with safety issues and the use of this tool adds a few more issues.
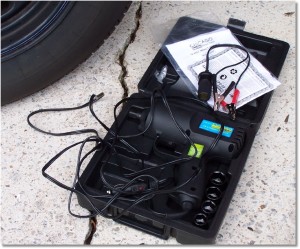
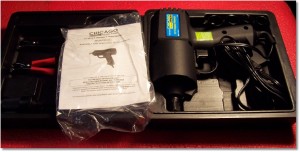
The tool itself is trigger-operated and incorporates a directional lever that allows for the removal (lefty-loosey) and installation (righty-tighty) of the lug nuts. Power is provided by a length of electrical cord terminated with a 12-volt connector. Accompanying the tool is an adapter that allows you to clip the tool directly onto your battery terminals. If, by the end of this article, you decide to purchase the tool, I would recommend that you also buy an extension cord with an automotive 12 VDC socket and plug. The provided cord and extension adapter may not be long enough to reach the furthermost tire on your vehicle. The provided power cord is 11’ in length and the battery adapter adds another foot or so. The 12 VDC plug in adapter incorporates a 12A-250V barrel-type fuse for circuit protection. You do carry spare fuses, right? In most cases, using the accessory socket in your vehicle provides enough cable length to reach all tires.
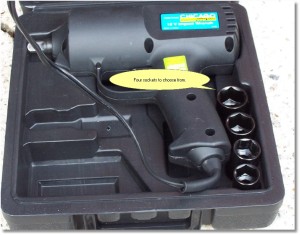
The tool comes with four sockets to fit most vehicle lug nuts (7/8”, 13/16”, ¾”, and 11/16”). Each socket simply snaps onto the tool’s anvil – a ½” drive shaft. The tool also incorporates an LED for night use. An instruction manual is also included in the package that provides more information than I am going to include in this write-up.Operating the tool, as mentioned previously, the tool operates at its finest when the engine be running. However, that does not mean that the engine must be running for the tool to operate. If the tool is to be operated with the engine running, this means exercising caution when attaching and removing the 12 VDC connectors (if this option is chosen over the cigarette lighter receptacle). Caution must also be exercised since you may have a vehicle on a jack and the vehicle must be supported properly, chocked and blocked and parking brake applied to prevent rolling or otherwise moving off of the jack. You must also be aware of carbon monoxide. Only run the engine in an open, well-ventilated space.
If you use the battery clamping option, and when the engine is running, you must also be aware of the placement of the cables, your hands, your clothes, hair, or any other appendage in close proximity of moving parts.
Another consideration when deciding if the engine is to be running while operating the tool is what type of transmission your vehicle has; manual or automatic. Most modern-day manual transmissions require that the clutch pedal be pressed before the engine can be started. With the vehicle on a jack, this could be a sticky-wicket situation, as any movement of the vehicle could cause the vehicle to slip off of the jack. Some vehicles with automatic transmission require that you press the brake pedal before attempting to start the vehicle.
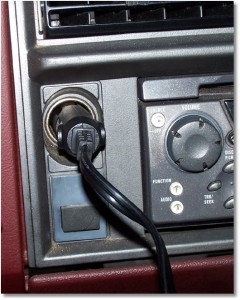
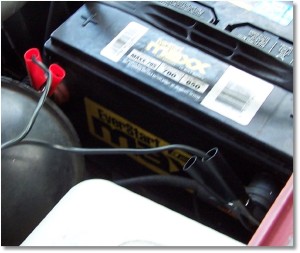
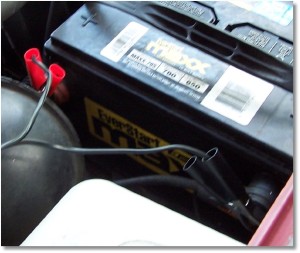
When connecting the battery clamps, always connect the positive (red cable connector) cable first. The red cable connects to the positive side of the battery, which is commonly (but not always) a red cable fastened to the positive (+) terminal of the battery. Connect the ground (black cable connector) to a clean, grounded part of the vehicle such as the engine block or frame. The battery clamp adapter has a red LED that will illuminate when the adapter is connected properly.If you decide to use the 12 Volt plug-in, simply insert the plug into a 12 VDC accessory outlet.
To operate the tool, perform the following:- Select the appropriately-sized socket for the lug nuts on your vehicle.
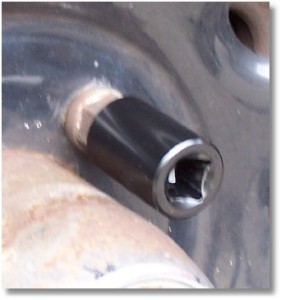
- Slide the socket onto the anvil of the tool.
- Place the direction lever in the correct direction.
- Left for loosening the lug nut
- Right for tightening the lug nut
- Press the trigger firmly to the rear. An LED will illuminate when the tool is in operation. The tool will build up inertia (free-spin) before the lug nut is impacted. You will hear and feel when the tool is impacting the lug nut.
When removing a lug nut, loosely cup your off hand under the socket to catch the lug nut as it clears the lug bolt. This will help prevent loosing lug nuts. - To tighten lug nuts, screw on the lug nuts by hand a few turns before using the tool.
- Place the direction lever to the ‘R’ position.
- Place the socket over the lug nut
- Press the trigger firmly to the rear.
The lug nut will spin onto the lug. When tension is detected, you will hear and feel the tool impact with the lug nut. One or two ‘impacts’ is usually sufficient to tighten the lug nut.
WARNING!:
Do not use the impact gun to tighten lug nuts on aluminum wheels. Aluminum wheels require the proper torque to prevent warping of the wheel or rotor. If you do use the tool to tighten lug nuts on aluminum wheels under emergency conditions, check and adjust (if necessary) the torque setting with a calibrated torque wrench as soon as possible. The tool can produce a maximum of 150 Ft. Lbs. of torque, which could damage some wheels.
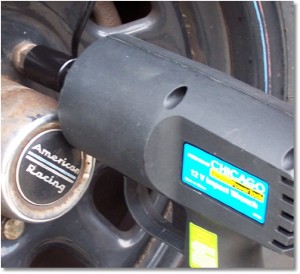
Recently, I had the opportunity (under shop conditions) to rotate the tires on my Chevrolet S10 Blazer. Since I do not have a working accessory outlet, I used the battery clamp option. For evaluation purposes, the engine was not running. I was able to remove and install all 20 lug nuts (steel rims) for a tire rotation. The tool did not overheat and (in my opinion) performed well.
The Chicago 12V Impact Wrench is only one of the few tools that I carry with me for working on flat tires. I also carry a small, portable 12 VDC air compressor, a tire repair kit for plugging flat tires, a wheel lug speed wrench, spare valve cores, and a can of ‘Flat-Proof’. Of course, I also have a spare tire, a wheel chock, and scissors jack in the vehicle.Before I began using the Chicago 12V Impact Wrench, I would first loosen the lug nuts while the tire was still on the ground with a lug wrench. After the vehicle was lifted and secured, I would then remove the lug nuts with the speed wrench. Conversely, after the tire was replaced, I would run the lug nuts in until finger tight, snug them with the speed wrench, lower the vehicle, and then fully tighten the lug nuts with the speed wrench. With the Chicago 12V Impact Wrench, I don’t have to loosen the lug nuts when the tire is on the ground and I can tighten the lug nuts with the tire raised off of the ground.
The Chicago 12V Impact Wrench can also be used for maintenance task other than removing tires. For example, the tool was heavy-duty enough to remove all of the bolts fastening the intake manifold to the heads of the 4.3 liter engine on my S10 Blazer for a recent intake manifold gasket repair job. I don’t; however, use it to install bolts, as I like to follow torque specifications and tighten with a suitable torque wrench.
The Chicago 12V Impact Wrench is a worthwhile tool to have in your vehicle or to use for general shop use. Mine has come in handy on several occasions. Visit your local Harbor Freight retail outlet or the Chicago 12V Impact Wrench can be ordered from Amazon.com (http://www.amazon.com/Chicago-Electric-Emergency-Impact-Wrench/dp/B006ZBD2E4/ref=sr_1_1?ie=UTF8&qid=1408284871&sr=8-1&keywords=Chicago+12V+Impact+Wrench) and other on-line sources.
![]()


2 Responses to Chicago 12V Impact Wrench