

 I recently completed a writing contract where I was updating many safety and environmental requirements. One of those documents was on hazardous energy and I got to thinking about firearms and the handling of hazardous energy contained within and without firearms. Hence, the purpose of this article; an attempt to bring to light the forms of hazardous energy associated with handling, working with, and shooting firearms.
Remington 700 Firing Pins. Note the Captive Firing Pin Return Spring
If the firing pin strikes a primer of a chambered cartridge or shot shell, the primer (once a source of potential energy) is now the kinetic energy source that ignites the gunpowder that is contained within the cartridge or shot shell. The potential energy of the gunpowder is then converted to kinetic energy as the gunpowder begins its burn rate. Pressure builds within the cartridge or shot shell and the once static bullet, pellets, or slug is forced from the case or shot shell down the barrel and is followed by all of the gases expelled from the case or shot shell. As the bullet, pellets, or slug clears the barrel, spent powder, gases, and debris follow shortly thereafter. The projectile (bullet, pellets, or slug) continues downrange until the kinetic energy is expended, which can be any number of means.
Once the projectile (bullet, pellets, or slug) leaves the case holding the projectile(s), another kinetic energy moment occurs – initial recoil of an equal and opposite force. Secondary recoil (again kinetic energy) occurs when the projectile(s) leave the barrel of the firearm. Depending on the type of firearm, this recoil may be used directly for automatic extraction and ejection of the spent cartridge or shot shell case, and then subsequent re-cocking of the firearm and then load a new round into the chamber. For a gas-operated firearm, a portion of the expended gases is bled off from the barrel into a gas tube. The gas tube may feed directly onto the bolt (direct impingement) or be used to push a rod that then contacts the bolt (gas piston). More detailed information regarding gas-operated firearms can be found at http://en.wikipedia.org/wiki/Gas-operated_reloading.
Most semi-automatic pistols use a simple “blowback’ principle to cycle the firearm. There are different types of blowback and more information can be found about these systems at http://en.wikipedia.org/wiki/Blowback_operation.
If the firearm is a semi-automatic, another energy source comes into play – the magazine. The spring tension of the magazine holds the rounds contained in the magazine against a set of ‘feed lips’. As the bolt begins its forward energy, it strips a fresh cartridge from the magazine, continues forward under spring pressure, and pushes the cartridge into the chamber.
In most semi-automatic long-guns and pistols, the energy released from firing a cartridge or shot shell is not contained, but controlled. In locked-breech designs (for example; lever-action, bolt-action, pump-action, and single-shot firearms) the kinetic energy of a fired round does not unlock the breech of the firearm, as it does in a semi-automatic firearm; the breech must be unlocked manually by the firearm operator.
Bridging the Gap:
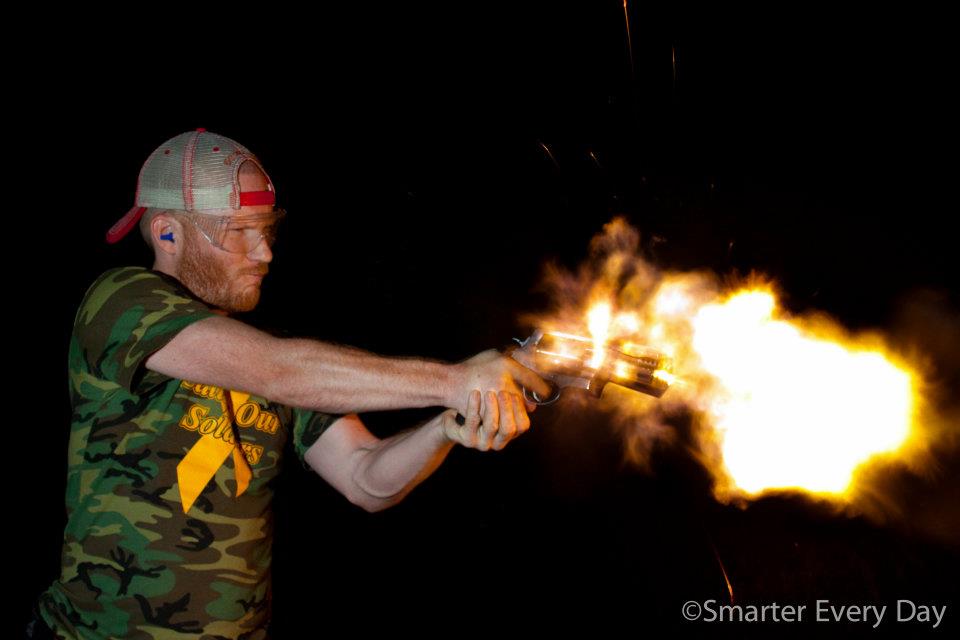
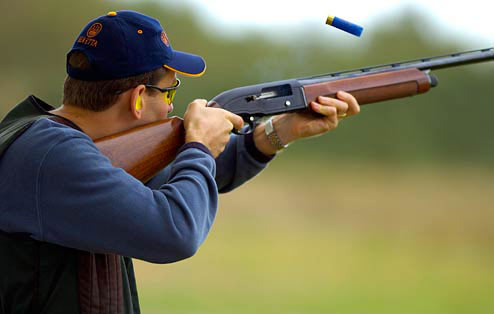
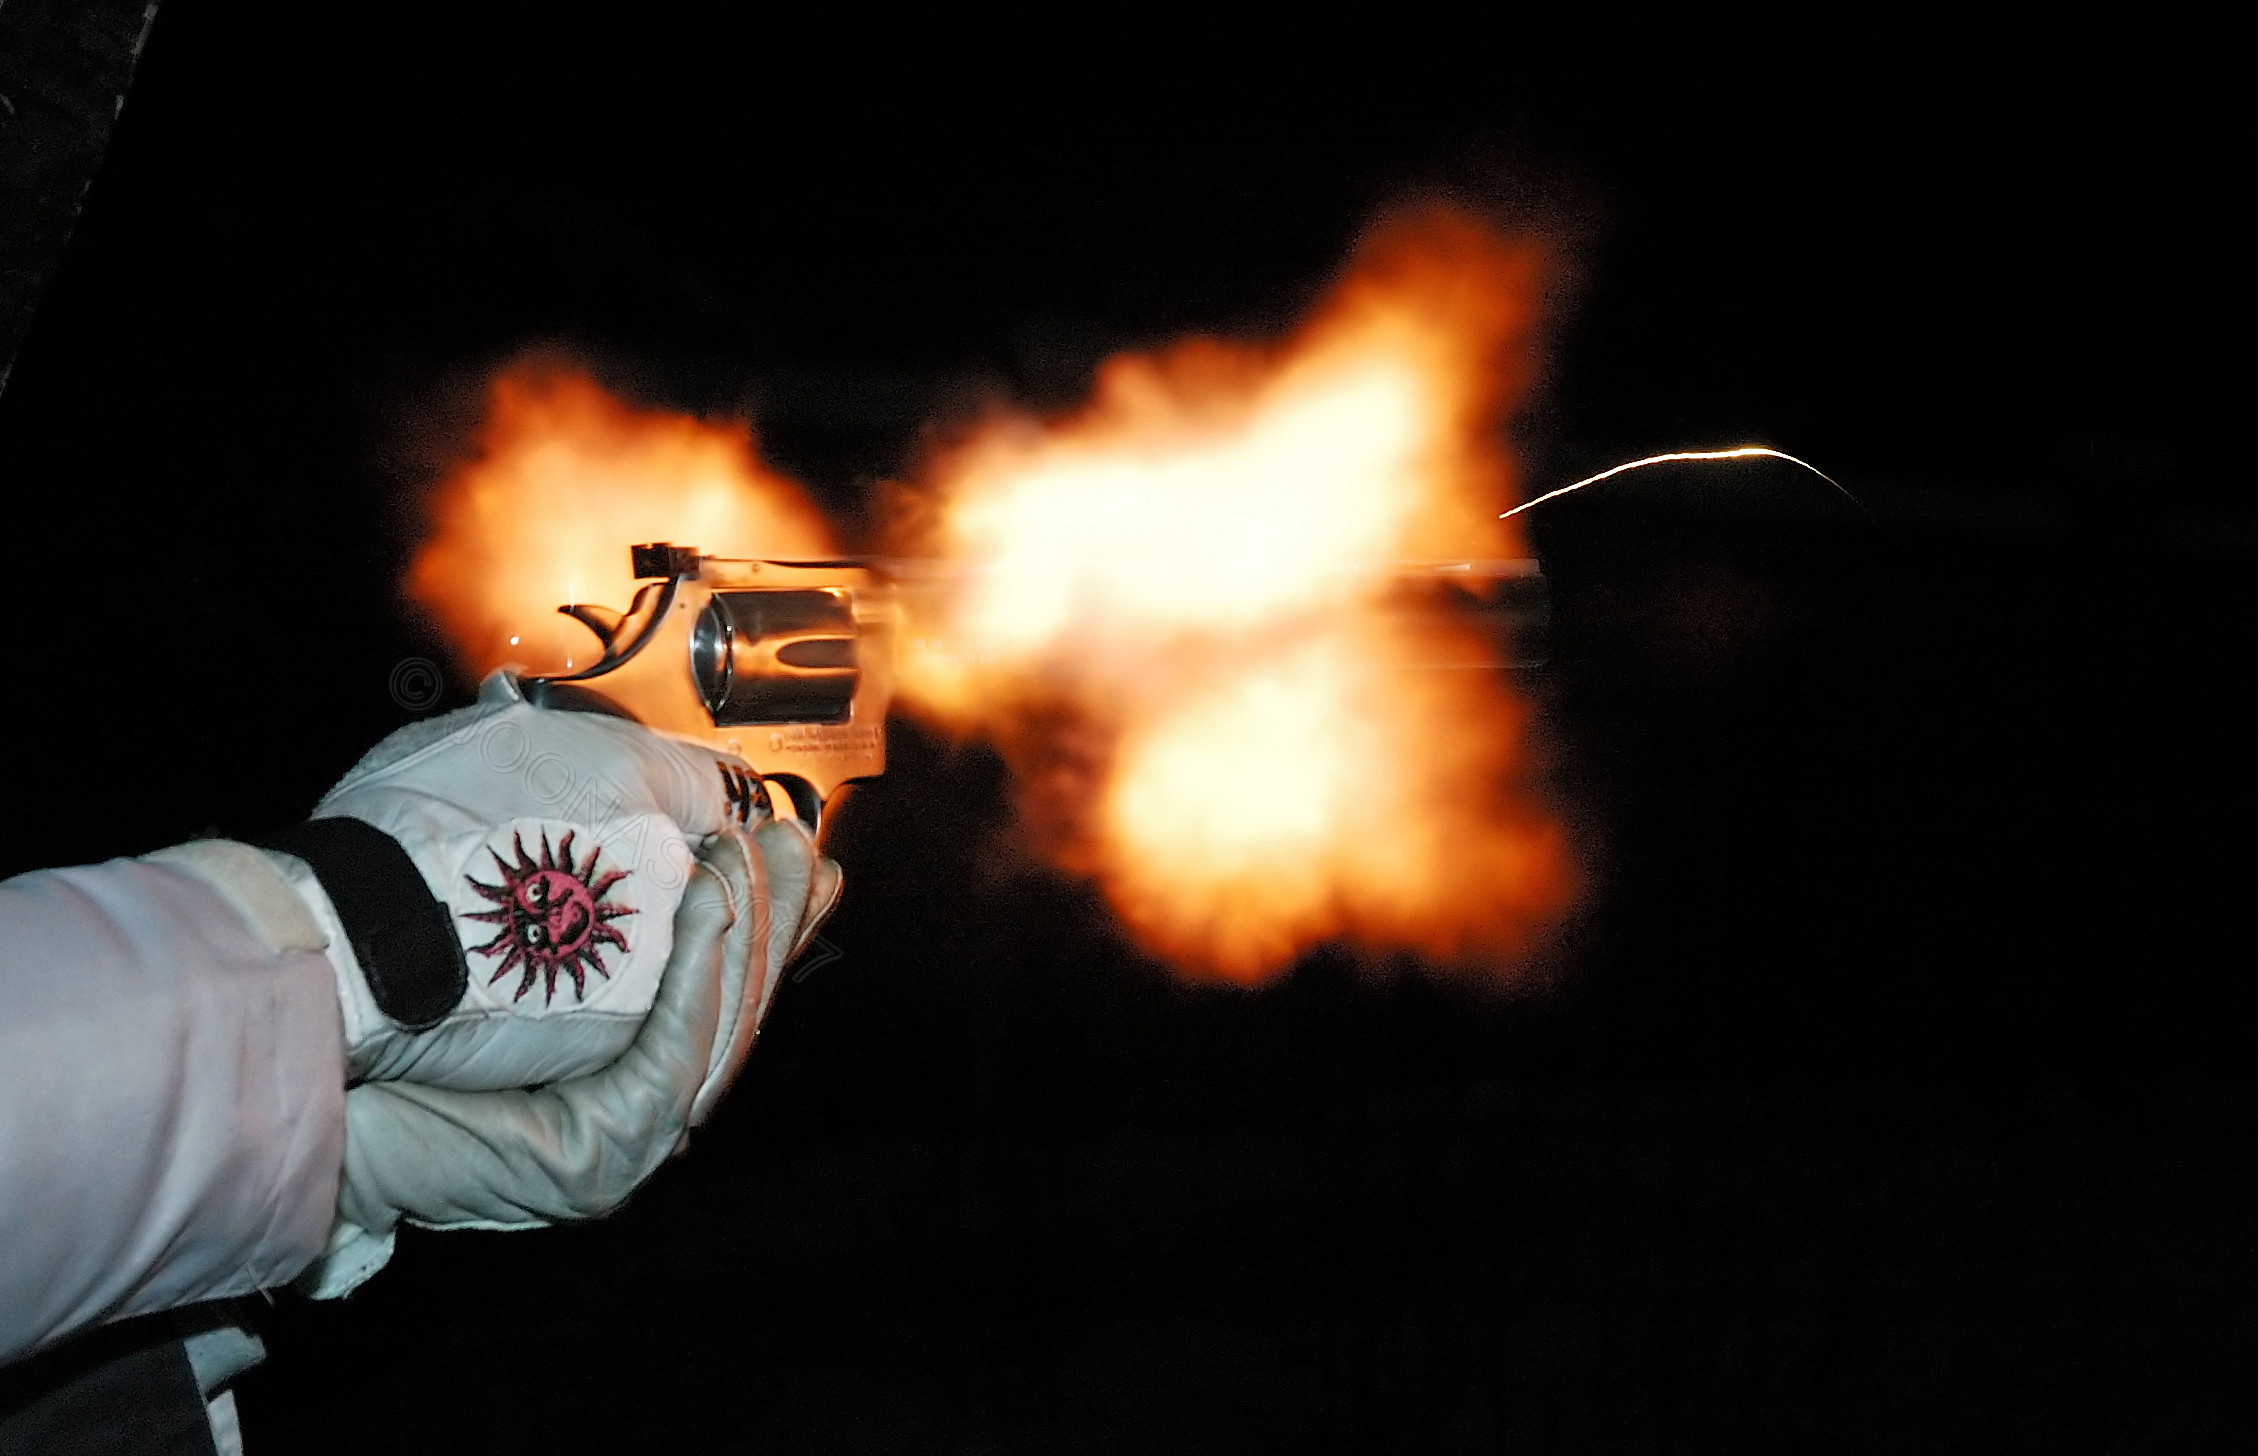
A Fine Example of Cylinder Gap Flash
All manufactures of revolvers are aware of the gap between the face of the cylinder and the forcing cone of the barrel, There does have to be a gap between these two points in order for the cylinder to rotate. Too little cylinder gap and the cylinder may not rotate after burnt powder and debris coats the cylinder face. Too great a gap and there is excessive ‘cylinder gap flash’ that effects bullet performance, excessive wear on the forcing cone, and danger to the operator and those standing anywhere alongside the firearm. A nominal barrel/cylinder gap is between .006 inches to .008 inches. I have seen as little as .004-inch and up to .012 inches on production revolvers. With that said, it has been reported that new Smith & Wesson revolvers have a cylinder gap of .015-inches. There is no getting around ‘cylinder gap flash’ in most modern revolvers – unless the revolver is designed like the Russian Nagant M1895 (http://en.wikipedia.org/wiki/Nagant_M1895). Mythbusters has demonstrated the effects of ‘cylinder gap flash’ on one of the segments of their show. If you doubt the energy that exists between the face of a revolver’s cylinder and forcing cone (barrel), watch https://www.youtube.com/watch?v=nucg5VAff4c
Many folks new to the handgun world, especially revolvers, are not aware of the cylinder gap and its potential hazardous energy effects. Sales be damned! A seller of a firearm has a duty to inform potential buyers of the hazards associated with a firearm beyond the obvious “end of barrel” discussions. Even the .22 caliber revolver exhibits cylinder gap flash and it only gets worse as the caliber increases.
The long and short of this article is that whenever we hold, operate, or perform maintenance on a firearm (or magazines) we are dealing with hazardous energy in one form or another; we are managers of hazardous energy. How well we manage this energy helps to mitigate the effects of the energy once it is released.
Note that this article is not about the safe gun handling – you should know those rules by heart. If not, got to http://en.wikipedia.org/wiki/Gun_safety before reading further. This article is, in fact, the why safe gun handling rules are in place in an abbreviated form.
It can be said that most firearm manufactures go to the nth degree to warn the operators of firearms of the various dangers contained within the firearm. It is also safe to say that the basic firearm rules for firearm handling provide protection for us (and others) should we decide to heed those rules. While the rules of safe gun handling are ‘standards’, there are those who choose to ignore them. I do not need to be around these people – nor do you.
Most firearms have inherent safety provisions incorporated into their designs in an attempt to make the firearm as safe as possible. Ultimately, it is up to us to play by the rules of engagement in regards to firearms safety.
Pass the Lord, and Praise the Ammunition:
Absolutely Know What Ammunition Your Firearm is Designed to Chamber
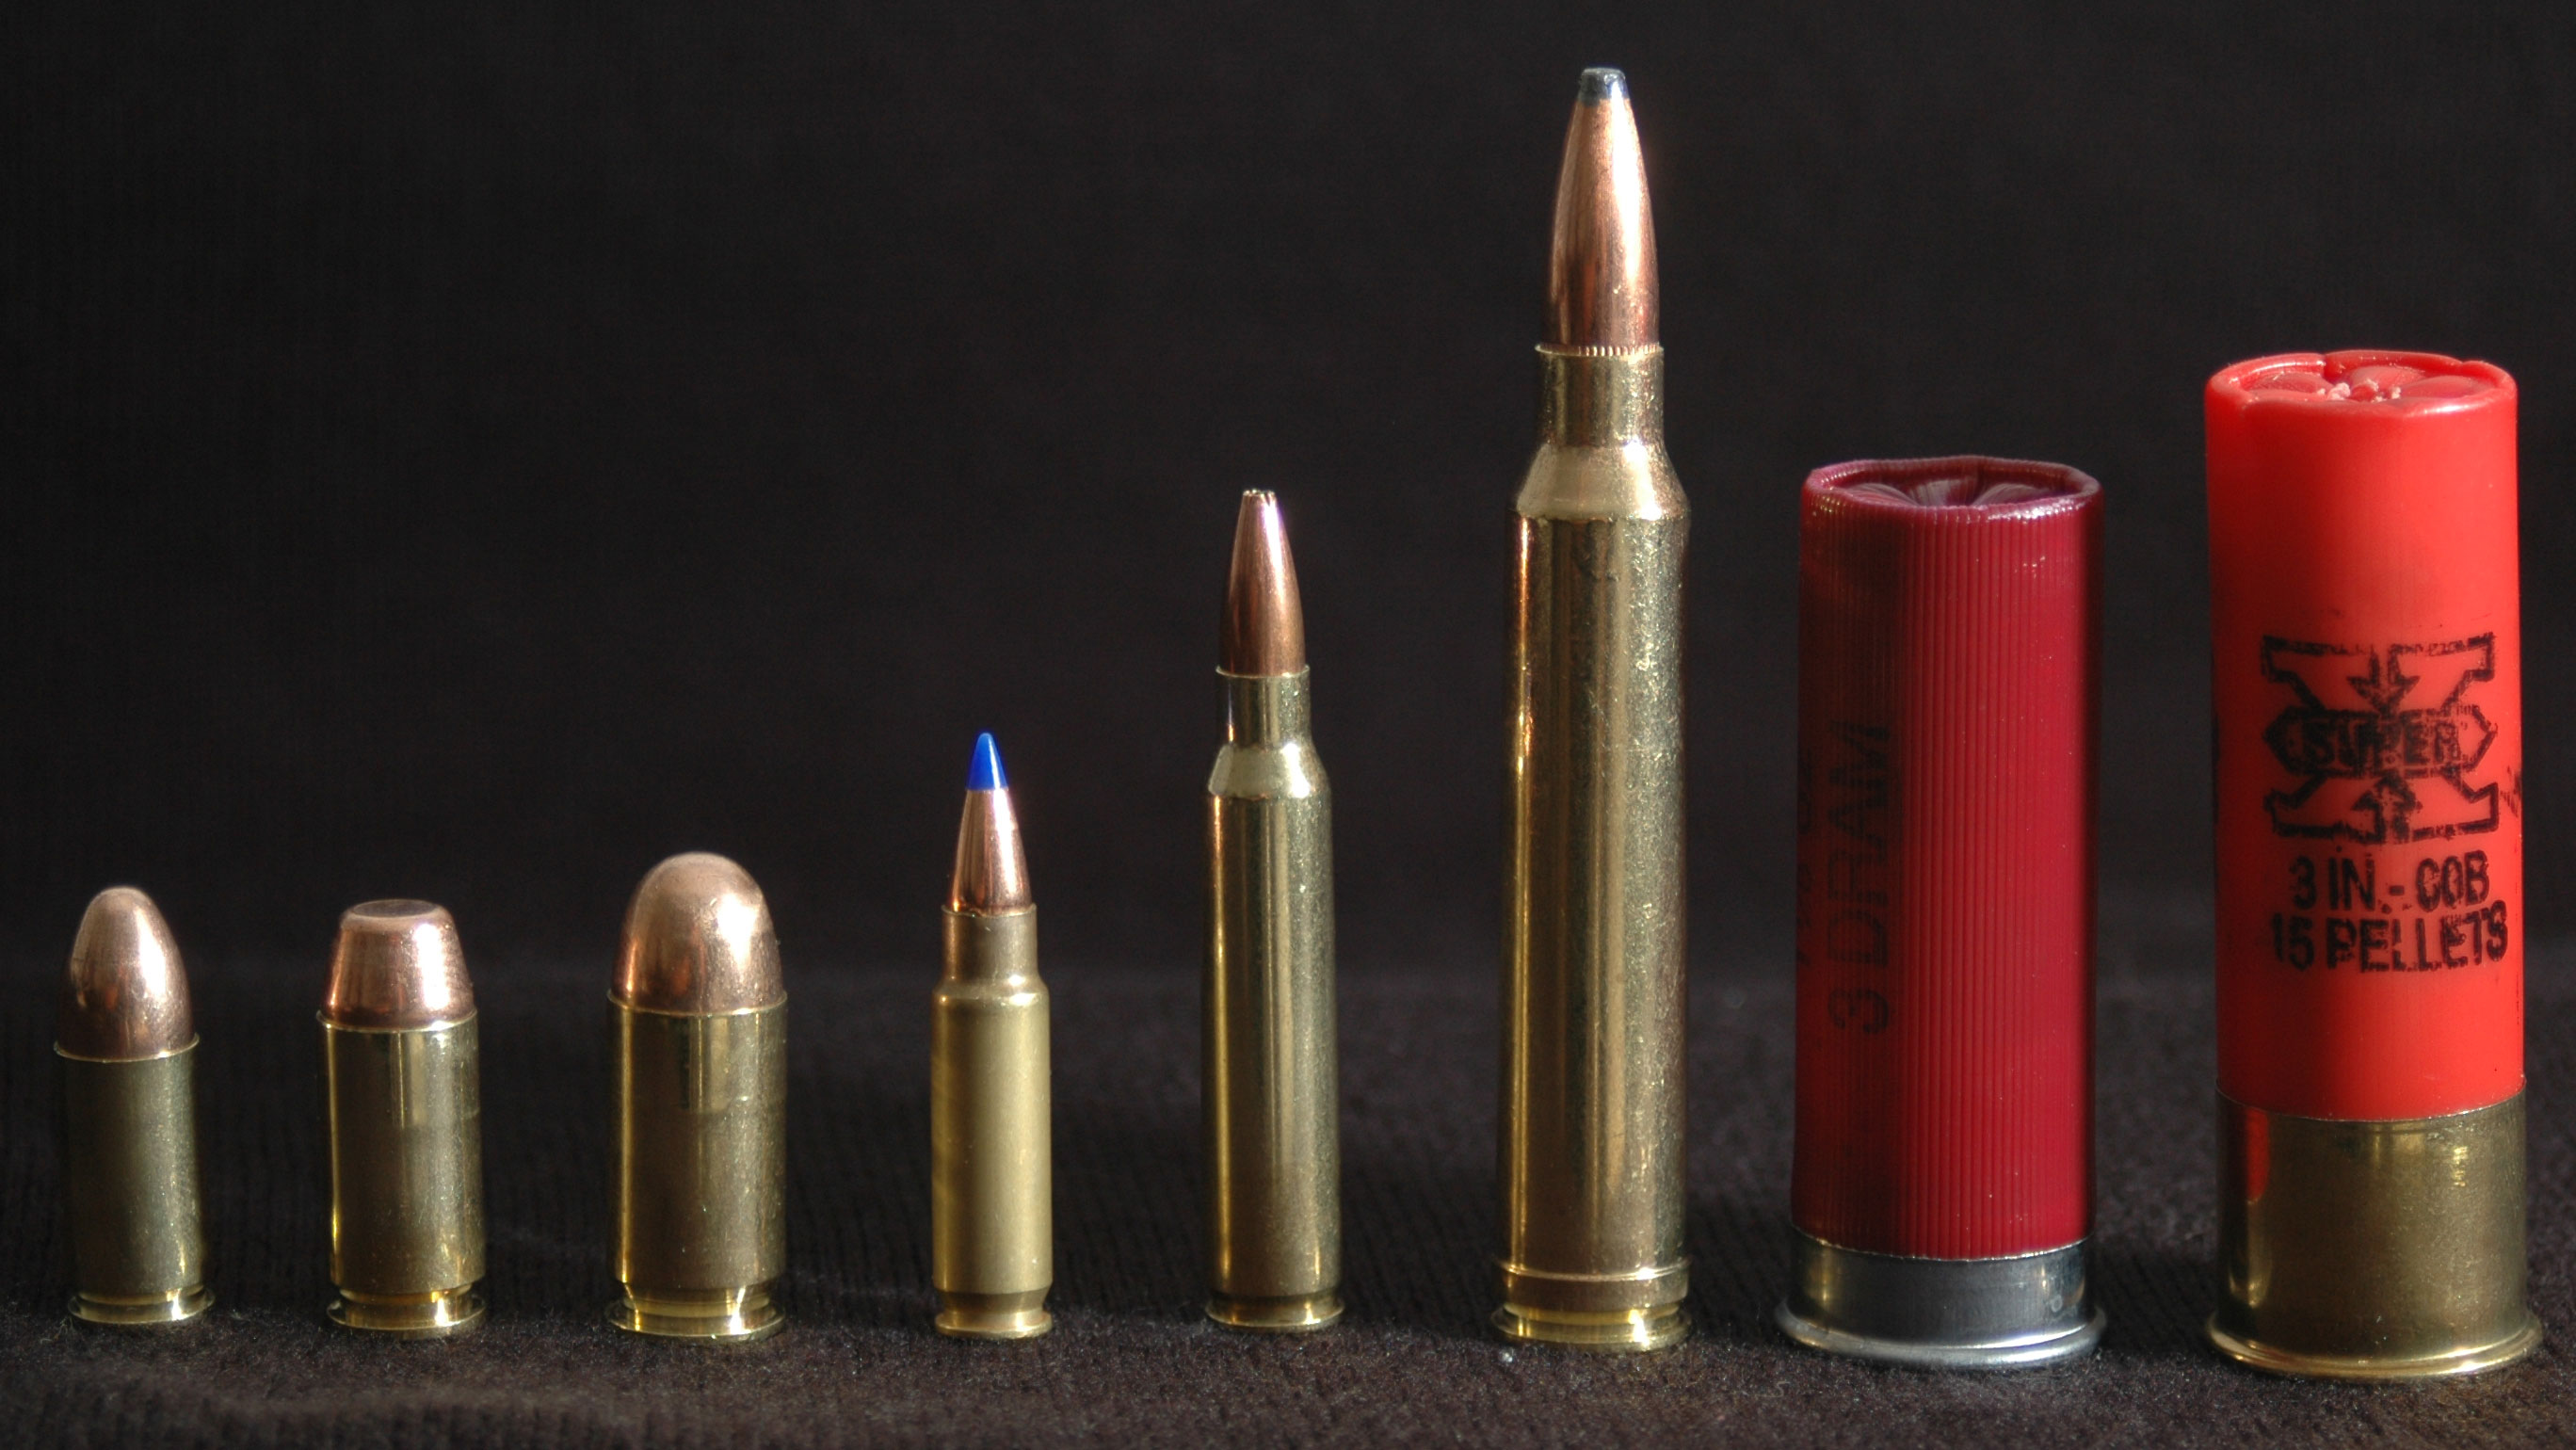
A cartridge or shot shell contains the potential hazardous energy of a firearm, and one must be assured that the ammunition is safe to fire through the firearm and that the firearm is capable of using the ammunition fed into it.
There are reasons why a .357 magnum cartridge cannot be physically chambered in a .38 Special revolver, as there are reasons why a .44 magnum cartridge cannot be physically chambered in a revolver chambered in .44 Special. There is also ammunition that is manufactured in +P and +P+ that should not be chambered in firearms that are not rated for this ammunition. It is a safety issue.
The 5.56×45 NATO should not be fired in firearms rated only for the .223 Remington, but the .223 can be fired in a rifle chambered for 5.56×45 NATO.
The controversy of .308 vs. 7.62×51 NATO is a complicated one. According to Springfield Armory, I can shoot .308 Winchester safely from my M1A since the headspace allows such. However, it is not recommended to shoot soft point ammunition through any semi-automatic rifle due to the possibility of the tip being broken off during high speed chambering and possibly damaging the firearm. That limits the bullet selection to FMJ, hollow-point, and ballistic tip ammunition. I’m not going to complain about that. Again, it is what can be safely fired through the firearm.
My semi-automatic pistols will never see a +P round, but my revolvers have. Different animals these two are. Obviously +P and +P+ ammunition has more energy than standard ammunition in the same caliber. All of my revolvers are .357 Magnum and all would safely support .38 Special in +P or +P+. However, I see no reason to do so when there are light loads for .357 magnum that would duplicate that of .38 Special +P ammunition, would lessen the ‘bullet jump’ from chamber to forcing cone, and lessen the wear on the gun.
Spring, Sproing, Sprang:
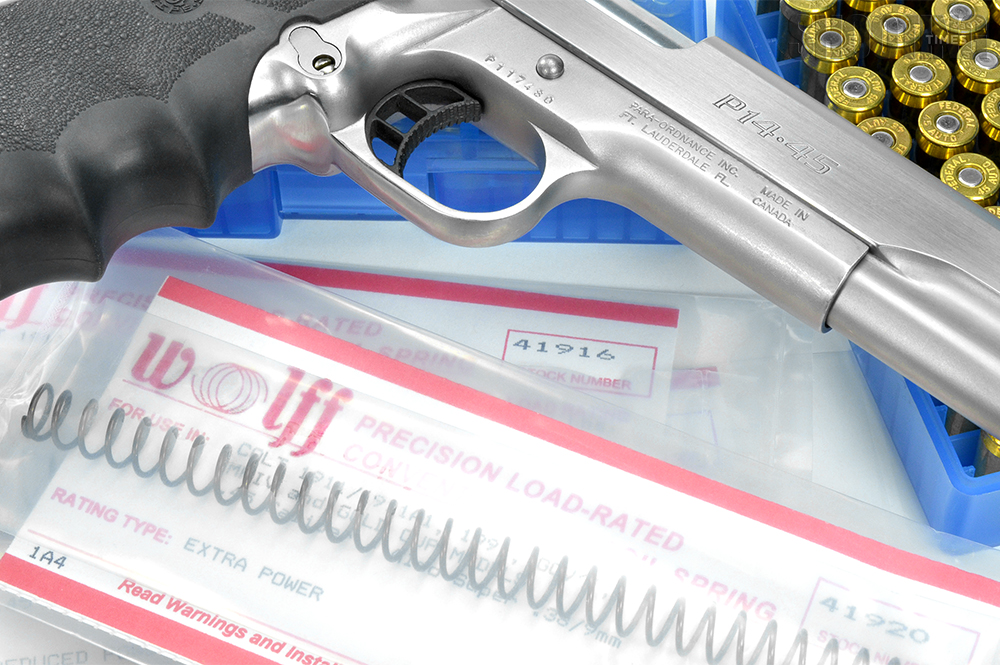
Pistol Recoil Spring Example
Recoil spring rate must be balanced with the ammunition in order to keep the gun running reliably and to prevent excess wear from battering. Spring rate affects timing during the recoil and feeding cycle. If the recoil spring is too strong, the gun won’t cycle reliably and can cause failures in extraction and ejection, and feeding malfunctions by not going far enough to the rear or by cycling so fast that the round in the magazine hasn’t been pushed up far enough for proper engagement.
The 1911-based pistol is very versatile as different recoil springs can be changed quickly to accommodate the ammunition being fired. For light range loads, a lighter recoil spring can be installed and for more powerful defense loads, a heavier recoil spring is installed. It is a balancing act and quite a few 1911-based pistol operators keep multiple springs on hand just for that reason.
A recent case in point demonstrates my point. I had purchased a Rock Island Government ‘Tactical’ pistol. The first trip to the range highlighted the pistols inability to properly chamber a cartridge under any circumstance. The recoil spring was simply too weak from the factory (a 16.5 pound spring was, supposedly, the spring weight sold with the pistol – or so I understand). Although I did not have the means the measure the spring rate, I ordered a recoil spring with a rate of 18.5 pounds. After installing the spring, as trip to the range was much more positive and all ammunition chambered properly; the additional spring weight was enough to improve the cycling of the pistol and no ‘battering’ of the pistol was taking place. The answer to my problems was that the weaker recoil spring had less resistance to recoil force and allowed the slide to recoil faster; albeit, weakly. It had less force to push the slide forward to return to battery resulting in a slower total cycle time and failure to push fresh round into the chamber. It is just the opposite for a stronger recoil spring. Since that time, I now have several recoil springs with ‘known’ spring rates from 16.5-pounds to 20-pounds.
Read more: http://www.shootingtimes.com/gunsmithing/recoil-spring-rate-affects-timing/#ixzz3Q7dbwDPz
Leave the buffering to Aspirin:
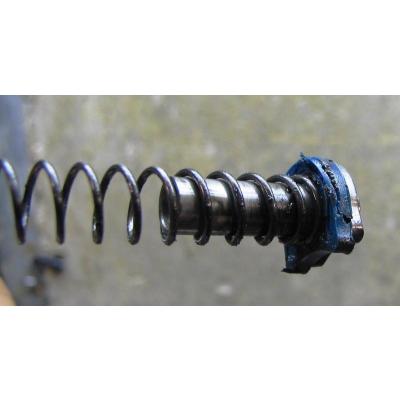
Recoil Buffer for 1911-Based Pistol
A ‘H’ Buffer Mounted in the SKS Rifle.
The second point that I want to make is that recoil buffers do seem to lessen the felt recoil – depending on the firearm in which it is installed. When you look at a pistol’s design, you might come to understand that adding a recoil buffer to a recoil spring lends little to the operation of the pistol except to shorten the “stroke” of the pistol, which affects timing. The recoil spring is under constant tension. When the pistol is fired the barrel disengages from the locking point (with the exception of fixed-barrel pistols. For example; all .22 LR pistols, nearly all .25 SCP’s, most .32 ACP’s, some .380 ACP’s and 9mm Makarovs, a very few 9 mmP’s, and I don’t know of any larger caliber fixed barrel pistols). In a 1911-based pistol, once the barrel is disengaged from the locking slots in the slide, a swing link pivots the chamber downward slightly and places the chamber in the proper position to accept a new cartridge from the magazine. The slide assembly continues rearward during recoil until the energy of the rearward movement is overcome by the spring tension of the recoil spring. The recoil spring guide rod; therefore, is also under constant recoil spring tension. In the 1911-based pistol, the recoil guide rod’s base rest against the base of the swing link assembly. The recoil spring and guide rod assembly prevents the slide from over-traveling.
In a Glock (and similar-designed pistols), the recoil spring assembly rests against a protrusion of the barrel. When the pistol is fired, the barrel is unlocked by the force of the slide moving rearward. The barrel assembly drops down into a locking recess that stops the rearward movement of the barrel and positions it to receive the next round from the magazine. As with the 1911-based design, the slide is prevented from over-travel by the recoil spring and recoil spring guide rod assembly.
The key point here, you may surmise, is the recoil spring. A properly sized recoil spring will prevent battering of the slide and frame. A recoil buffer only hides the true problem, a weak or inappropriately sized recoil spring.
Install the correct recoil spring for the ammunition that you are using and leave the buffering to aspirin.
The Laying On of Hands:
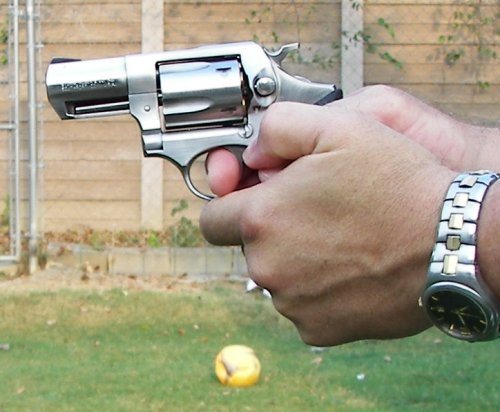
Example of a Good Grip for the Revolver – All Fingers Away from the Cylinder Gap
Heed This Well!
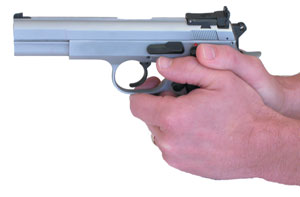
Example of Good Semi-Automatic Pistol Gripping
A proper grip on a firearm is essential to managing the hazardous energy unleashed at the muzzle of the firearm. The proper grip is an essential ingredient in ensuring the projectile reaches the designated target.
The old adage, “Gun Control is Both Hands on Your firearm” is a true adage, because the use of two hands on a handgun garner more control over the handgun. The grip method used on semi-automatic pistols and revolvers are; however, different. But, the grip method used on pistols and revolver do share one thing; get the shooting hand as high on the back strap (as near to the centerline of the bore) of the handgun grip as possible. This helps to reduce muzzle-flip and forces the recoiling pistol into the web of the hand.

Ann Margaret would probably had to undergo facial reconstructions should she have really shot this single-action revolver! Nice pose – no reality check!
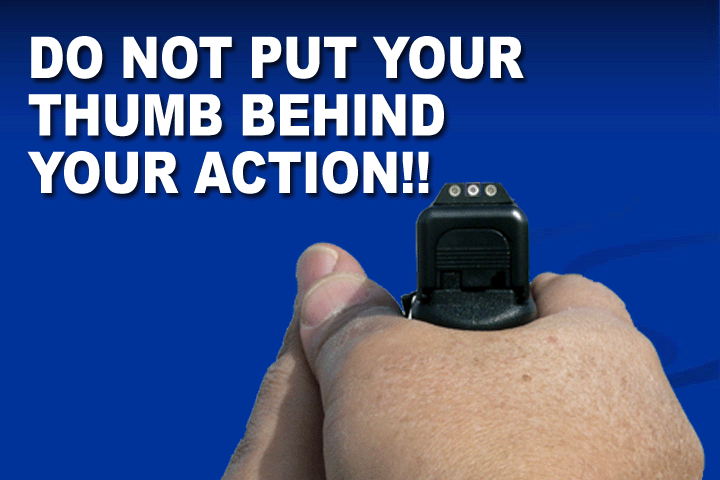
With revolvers, it is all right to place the support hand thumb over top of the shooting hand to help control the firearm. Do not use this gripping method with a semi-automatic pistol; the slide of the semi-automatic pistol moves rearward with high energy. The slide is normally constructed of metal. The support hand thumb is constructed of flesh, blood, bone, sinew, and muscle. Guess what wins out when the slide moves rearward and your thumb is in the way of it doing so. While the handgun needs to be an extension of your arm, I see no reason to remove parts of the body while acting as such.
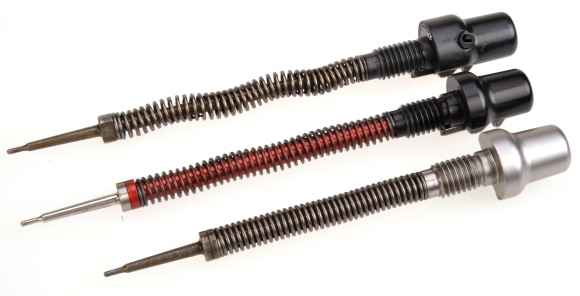
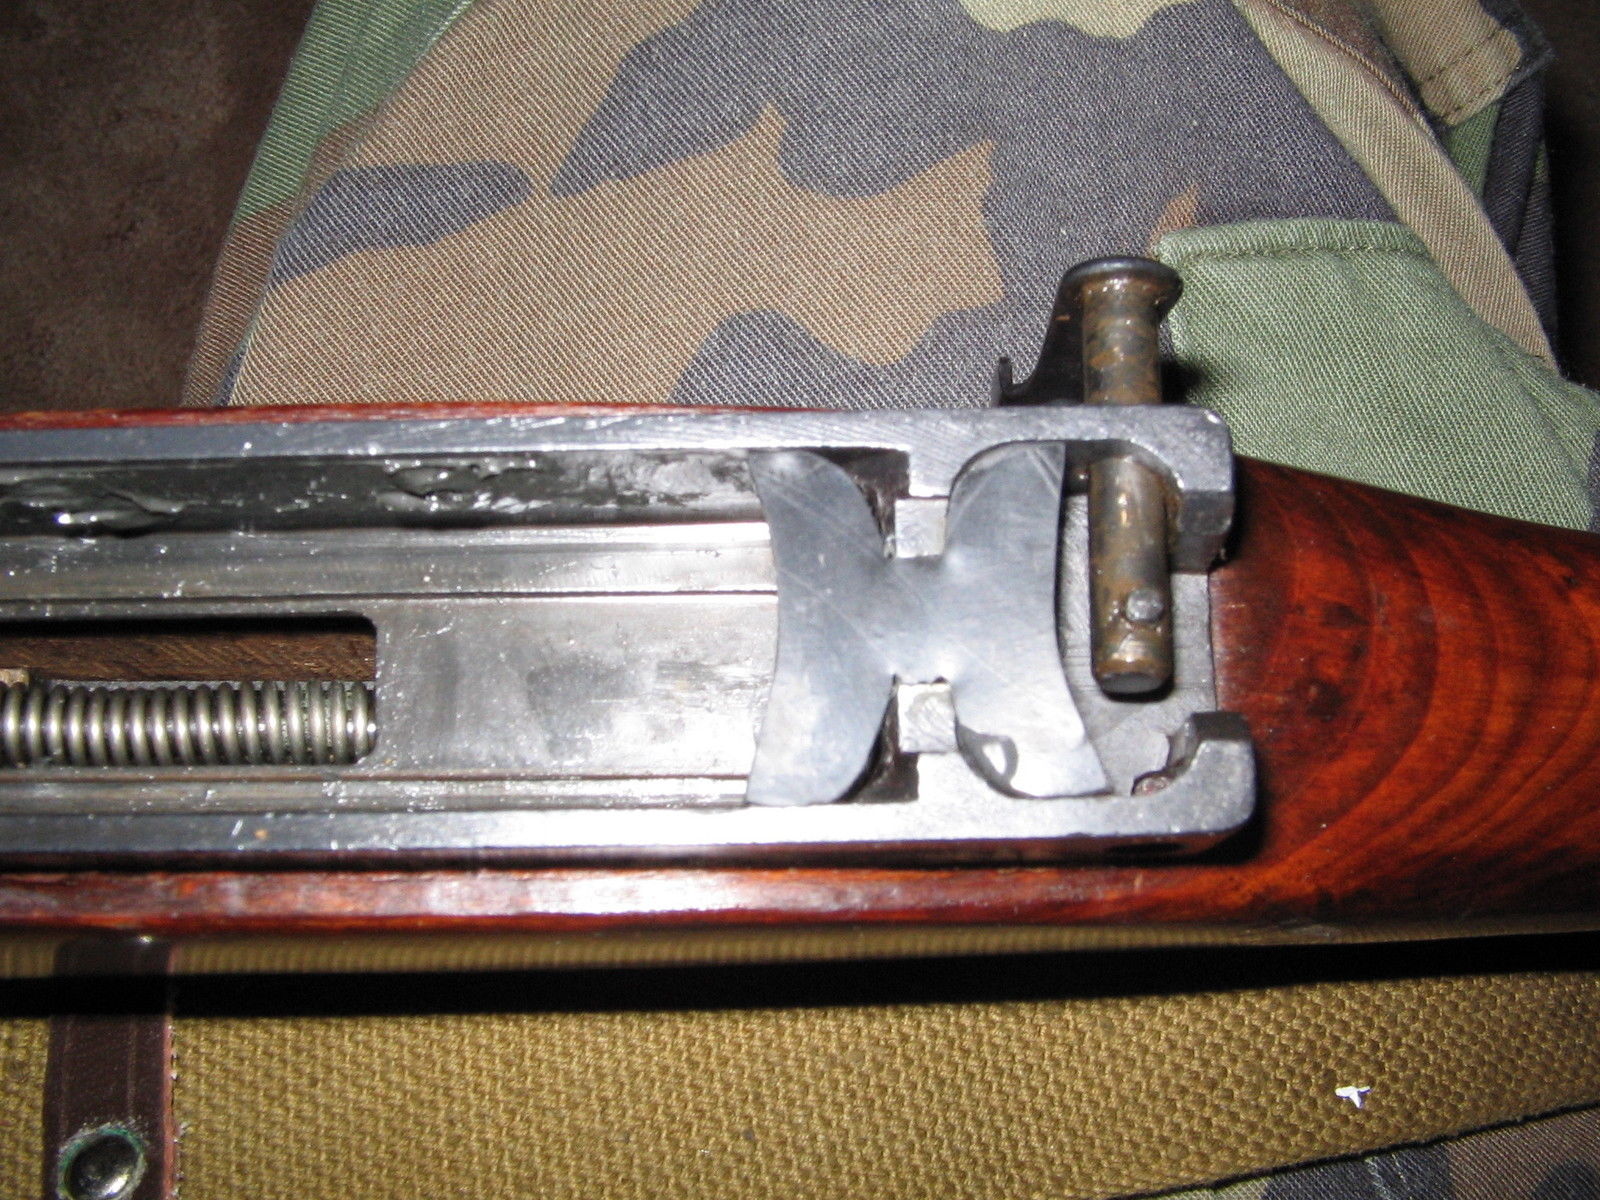
Of Springs and Things:
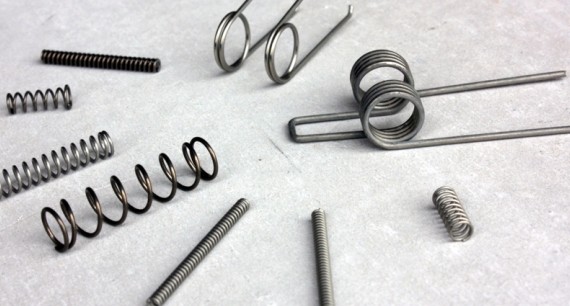
AR-15 Lower Assembly Springs
In other firearms, springs are also used throughout the firearm for lock works (trigger group), extraction, ejection, and firing pins, among others. Coil springs are used in magazines (tube, internal, and detachable) and buffer tubes. Springs are intended to provide tension or compression, or both compression and tension. Most springs in firearms are captive to prevent loss and pre-loaded to provide the correct tension or compression necessary to ensure their effectiveness for the job that they perform. Some springs are under high tension while others are under light tension. Detailed information about springs can be found at http://en.wikipedia.org/wiki/Spring_%28device%29.
Springs are also a potential hazardous energy threat. Anyone who has disassembled a 1911-based pistol, and M1 Garand, M1A, Min-14, or Mini-30 can attest to the power that some captive springs have, such as the recoil spring and operating rod spring. In many new pistols, the recoil spring(s) is captive and is removed as a unit that is under pressure. Some springs used in firearms are considered “nuisance” springs, as they are a nuisance to find should they fly out of the gun and become lost. However, even small springs contain potential energy when they are compressed.
Managing spring energy is accomplished by slowly releasing the spring tension until no tension exists. In some cases, special tools are required to remove springs. In other cases, simply holding the spring in place while the means of captivating the spring is being removed is all that is necessary. While, in other cases, the spring itself can be simply compressed and then removed from its compression or tension points. Obviously, due diligence and attention to safety is tantamount to success.
The gunsmith’s creed is, “Leave no spring behind!” Although I am not a gunsmith, if I am to start on a project that involves springs in some form or fashion (for example, a trigger job on a Ruger 10/22), I need to know what every spring in the assembly does, what purpose does it serve, and where is it located in the assembly. That may mean researching an IPB (Illustrated Parts Breakdown) of the assembly, going to the WWW for information (videos or other instructional methods), and also taking pictures from various angles of the assembly. I also could not do the work on the trigger and install Geissele or Timney unit, but I do like to tinker according to my level of competence – I do not tinker much, as a result.
The point is that you do no tackle a problem until you know all of the solutions. When working with sprung assemblies, do your homework before you begin and rehearse what you are going to do before you do it – or get a competent gunsmith to do the work for you.
Case in point, I was replacing the magazine base on some XDs magazines with one that had finger extensions. I carefully read the “how to” on it and began working on the first unit. The magazine spring in the XDs magazine is not a captivated spring, I got the old base out and was just about to slide the new base home when the magazine shifted in my hand. The magazine internal floor plate went flying. Without the floor plate, you cannot assemble the magazine. Luckily, the spring did not clear the magazine housing so that was not an issue. The floor plate; however, landed somewhere in the twilight zone of my workroom/office/den/man cave. The floor plate has never been found; I had to order a whole new magazine, because Springfield does not sell magazine parts. I failed to do my homework and planning. Although I was not injured (except for my pride), flying parts could have caused some damage.
Always wear eye protection when working with sprung assemblies.
Chemical Warfare:
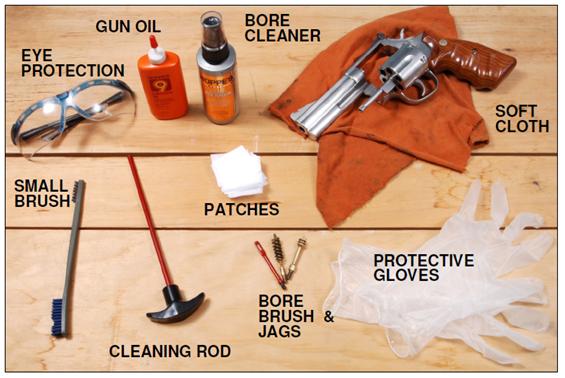
Cleaning Guns Means Using Chemicals
Chemicals may come in any variety of containers with aerosol cans taking a lot of space on my shelf. When cleaning the bolt parts on my AR, I use Brake-Kleen, compressed air, and then follow-up with Ballistol as a lubricant on the bolt and mil-spec grease for the bolt carrier rub points. Ballistol is also used in the barrel and locking lugs when I need to “deep clean” rather than just running a bore snake through it.
All chemicals are sources of hazardous energy and must be treated as such. Blow-back from aerosol chemicals is common during the spray-down. Even though I do wear glasses, I add an extra layer of protection with goggles. I also use chemical-resistant rubber gloves to protect the skin (although at my age, I may be asking too much). When using Brake-Kleen, all spraying is performed out doors in the open air, regardless of the temperature. A 3M 100 mask covers the mouth and nose and helps protect me in those places.
The major point to be made is to protect yourself when using hazardous chemicals that are also sources of hazardous energy. Use them properly and store them properly.
Hand-Loading and Re-Loading:
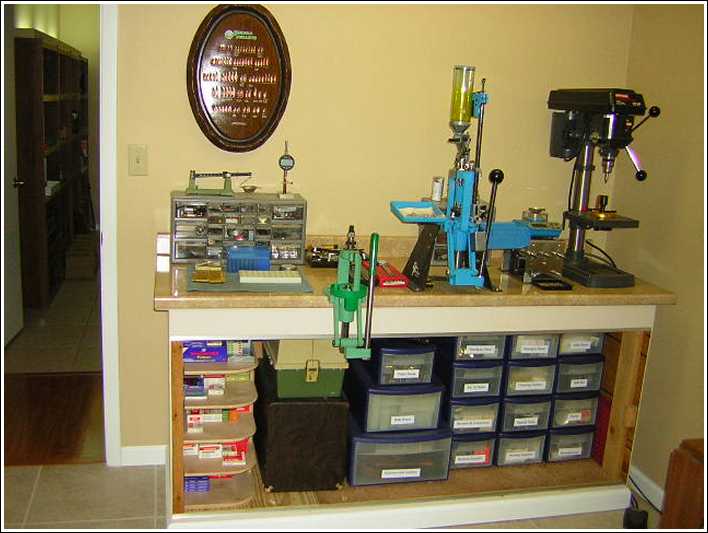
Re-Loading Has Its Own Share of Hazardous Energy
There are many advantages to hand loading and re-loading of ammunition and they are greater in number than what can be mentioned in this short article.
Loading manuals are available from virtually all American manufactures of ammunition. Brass cases can be matched by volume, weight, and concentricity, bullets by weight and design, powder charges by weight, type, case filling (amount of total usable case capacity filled by charge), and packing scheme (characteristics of granule packing).
There are obvious considerations when handling powder and primers and as many factors regarding the hand loading process itself. Some folks who hand-load sometimes like to test the limits of a cartridge. Without folks like Elmer Merrifield Keith (March 8, 1899 – February 14, 1984), we would not be enjoying the .357 magnum, .41 magnum, and .44 magnum ammunition or the many ‘wildcat’ cartridges that he helped develop.
For most hand loaders; however, the ability to be independent from manufactured ammunition is both an asset and a liability. Nonetheless, the hand-loader is constructing an item capable of hazardous energy in its assembled form and obvious safety standards for the handling and storage of these hazardous energy items must be in place. Moreover, guidelines for hand-loading cartridges must fall in with the limitations set by the bullet manufactures to ensure safe operation of these devices in the firearm for which they are intended. Common sense prevails over all when constructing your own ammunition.
Don’t Recoil From the Recoil:

Learn to Manage the Recoil
With handguns, the management of recoil is critical in regaining the sight picture after a cartridge has been fired. That is not to say that managing handgun recoil is more critical than that of a rifle, but firing a handgun that has different dynamics from that of a rifle takes a different skill set.
Flinching is perhaps the greatest bane of the accurate shooting. I read somewhere that, “The anticipation of recoil is worse than the recoil itself.” Obviously, whoever wrote that has not shot a .45-70 (300 (Standard) JHP 2,069 ft/s) cartridge or .458 Winchester Magnum (The design criteria for the .458 Winchester Magnum called for it to launch a 510 gr (33 g) bullet at 2,150 ft/s (660 m/s) out of a 26 in (660 mm) barrel) cartridge. For that matter, there is nothing pleasant about firing a 3” magnum 12-gauge slug from a short-barreled shotgun.
I am of a different line of thinking (which is normal for me). My anticipation of recoil is not about the recoil itself, but in not knowing when it will occur. I find that a poor trigger contributes to my flinching; it is not knowing when that trigger is going to release the hammer. I do not like surprises and I especially do not like “surprise breaks” on a trigger. I want to know, as close to precise as can be, when that trigger is going to release. I am prepared for recoil; I am not prepared to second-guess a trigger.
Regardless if the trigger is stock or custom-tuned, get a hand full of ‘snap caps’ and dry fire it until you know when the hammer will fall and you do not rely on simply anticipating that the hammer will fall sometime during the trigger stroke.
The Trigger Pull-Weight Can Affect Your Ability to Properly Manage the Hazardous Energy of a Firearm
There are ways and means to manage recoil and the individual shooter needs to find the ways and means that is best for the shooter to manage recoil. Managing recoil is also part of managing the hazardous energy unleashed once the trigger is pulled.
Don’t Be a Dope With a scope:
Good Optics Are highly Beneficial in Controlling What Happens Downrange
Regardless of the type of sights on a firearm, part of managing the hazardous energy of the firearm is mastery of the sights.
Most of my long guns are outfitted with optics; primarily scopes with while red dot sights come in a close second. Those rifles that are not outfitted with scopes are outfitted with rear ‘ghost’ sights or with sights that are ‘friendly” to my aging eyes. These optical devices and mechanical sights serve one purpose, to assist me in getting the firearm and bullets on target. I ask no more of them. I also have scopes on several pistols for the same reason.
Aiming through a scope or a red dot sight completely eliminates one third of the complexity of lining up iron sights. With that said; however, mastering the use of iron sights is still crucial to the use of a firearm. Lasers are becoming popular because of the quickness that a target can be acquired. Too many; however, rely too much on the laser and fail to develop the skills necessary to use iron sites. Many hunting rifles are manufactured without any sights, which necessitates the use of optics.
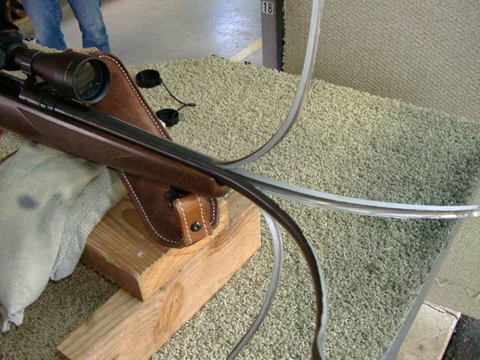
Scopes come in two basic configurations regardless of the type of scope (hunting vs. tactical); fixed magnification and adjustable magnification. An adjustable magnification scope with a magnification level from 3 to 9 are very common. Less and more ranges of magnification are, of course, available. In most cases, a fixed 4-power scope is enough for most shooting ranges (even out to 100 yards). Magnum cartridges and powerful scopes account for more missed and wounded game than standard loads with appropriate scopes. More magnification does not mean you can shoot any farther. Magnification only makes the target loom larger.
The 3-9×40 is the most common scope that I use, because it does everything that needs to be done at the most common distance that I anticipate shooting . I may be shooting at longer distances; that does not mean that I need to change to a different scope. It does mean that I need to know how to use the scope that I have for the distance that I need to shoot.
Scopes can be as inexpensive or as expensive as you desire. I have found that some inexpensive scope do the job just as well as the higher-end scopes. For example, I have had $65 scope for numerous years and it has not lost zero under fire yet when mounted on a marlin .30-30 rifle.
ne key factor in choosing a scope, regardless of magnification, is the eye relief. The distance that your eye must be to the ocular lens (the lens closest to the eye) to get a full, clear picture is the eye relief. Lower powered scopes will have a larger range of distance available for a full view. Higher-powered scopes are sometimes very critical in relation to the centering of your eye through the middle of the tube (parallax), and the distance your eye must be from the ocular lens. Sometimes there is only a half inch closer or farther you may be to see the whole available view.
The amount of eye relief needed depends on several factors but the most common problem is the distance from your sighting eye to the scope. If the scope is too close, you might be granted the “scope-eye” award, when the rear of the scope places a semi-circular gas above your eyebrow after the rifle recoils. If your eye is too far from the scope, you cannot obtain the perfect sight picture.
Recently I went through two scopes trying to get the correct eye-relief for me on a certain rifle. The first scope was physically short 2-7×32 power scope with an eye relief of approximately 3-inches. That scope was swapped out with a physical longer 3-9×40 scope with a 3.1-inch eye relief; albeit closer to my eye, the eye relief was still too long. The third scope, one with magnification of 3-9×40 and an eye relief of 6-inches was a perfect fit for me. I also have rifles with “scout scopes”; Long Eye Relief (LER) scopes that are mounted well forward of the receiver and have a 10-inch + eye relief. My scoped pistols are outfitted with Long Eye Relief (LER) scopes that have 16 to 20 inches of eye relief. The secret to mounting any scope is to move the
scope to your eye and not your eye to the scope.
Red dot and holographic sights do not have eye relief and are commonly used on rifles and handguns that will be used at close distances. Red dot sights; however, are still effective at intermediate distances (within 100 meters) but usually do not produce the shot accuracy of a good scope.
Regardless of the type of sighting device chosen, its purpose is to make you better at managing the hazardous energy released from the muzzle of the firearm.
Bolting it Down:
From the viewpoint of physics (dynamics, to be exact), a firearm, as for most weapons, is a system for delivering maximum destructive energy to the target with minimum delivery of energy on the shooter.
The balance of released energy varies from caliber to caliber, but is consistent with the following:
- Barrel friction
- Projectile motion
- Hot gases
- Barrel heat
- Unburned propellant
A Fine Gun Ruined!
As firearm operators, it is our responsibility to deliver the mail where it needs to be delivered and understand what the firearm is doing while doing so. It is also our responsibility to properly maintain the firearm and ensure that it operates within the manufactured specifications. Modifications or parts replacement actions must be performed to the highest standard. If need be, ensure that only a certified gunsmith perform the work on your firearm. Bubba’s Bargain basement and Gun Shop is not the place that you want to entrust with your personal firearm that might be capable of producing energy comparable that generated by a small-block Chevrolet engine.
Be a good manager of the hazardous energy that exists within and out of your favorite firearm.
Foreign Matter Does Matter
Additional Sources:
- On Hand Loading: http://en.wikipedia.org/wiki/Handloading
Elmer Keith: http://en.wikipedia.org/wiki/Elmer_Keith - On recoil (primarily rifle and shotgun): http://www.chuckhawks.com/rifle_recoil.htm
- On recoil energy: http://www.shooterscalculator.com/recoil-calculator.php and http://handloads.com/calc/recoil.asp
- On scopes: http://www.opticsplanet.com/howto/how-to-choose-a-riflescope-light-transmission-and-eye-relief.html
![]()