

Scope Mounting with Scope Rings
Lately, I have come across the issue of mounting a scope. Why this is an issue now, I don’t know. I have mounted quite a few scopes in my time, but I have simply become more cognizant about scope rings, bases, and how important these two items mean in ‘properly’ mounting a scope to a rifle, carbine, or even a pistol.
It is common practice to ensure that the scope is mounted as low to the barrel as possible. Scope rings heights normally come in three height flavors; low, medium, and high. There are, of course, extra-high and ultra-high scope rings. Scope height; however, is only part of the equation with proper cheek position on the stock in relation to the scope and the eye relief of the scope playing the other factors. For bolt-action rifles, bolt handle clearance to the ocular lens housing is another consideration.
Scope bases:
Essentially, there are three types of scope bases; Dovetail Redfield), Weaver, and Picatinny.
Dovetail (Redfield)
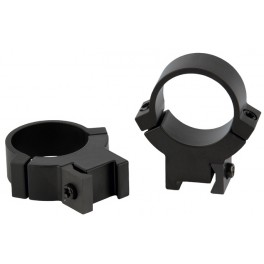
Dovetail (Redfield) Scope Ring Example
Weaver
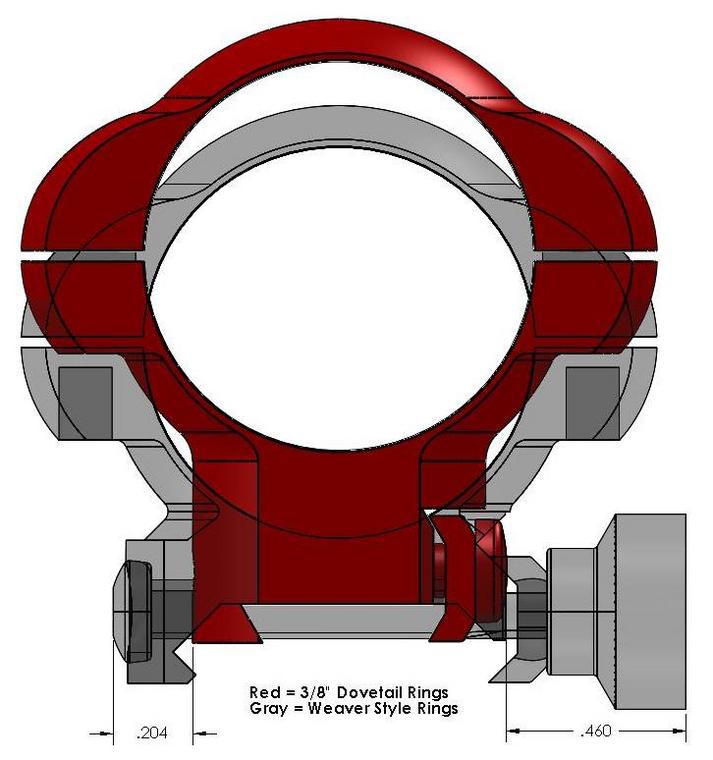
Dovetail and Weaver Scope Ring Comparison
Picatinny/MIL-STD-1913
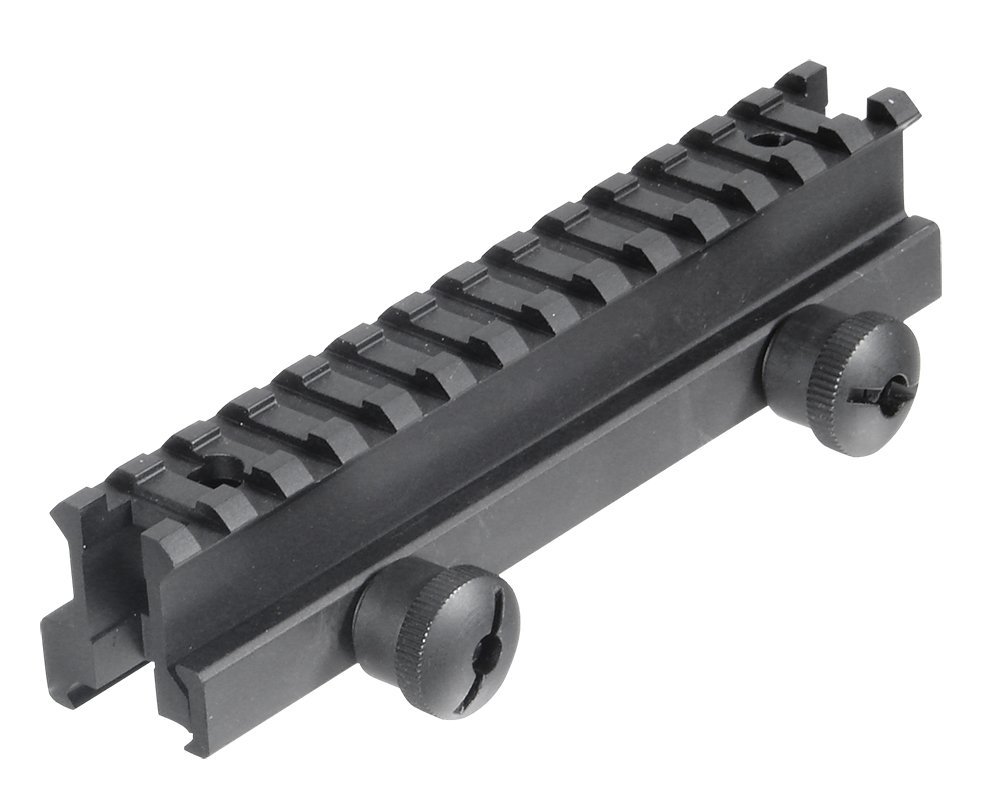
Picatinny Rail Example (Sight Riser)
AR-based rifles (and others) commonly employ the Picatinny rail in their design.
Scope Rings:
Scope rings, as with scope bases, are manufactured for Dovetail, Weaver, and Picatinny rails. Dovetail-based scope rings only work with Dovetail slots. Weaver rings will fit Picatinny bases, but Picatinny rings are not compatible with Weaver bases, as the mounting key in the Picatinny style scope rings is thicker (square) than that of the Weaver scope ring. However, Weaver style base manufacturers have been cutting thicker slots in their bases to accommodate picatinny rings, and picatinny ring manufacturers have started to put smaller recoil lugs (mounting keys) on their rings. The mounting key is what is actually inserted into the mounting groove of the Weaver or Picatinny base.
Scope rings also come in aluminum and steel and can be permanent mounts or quick-detachable mounts (my favorite). Scope rings may also be in various finishes, such as; anodized aluminum, matte, high-gloss, or stainless steel.
Numerous manufactures of scope rings and bases abound to include; Weaver, Redfield, UTG, Leupold, Burris, Warne, Millet, Talley, and others. Scope rings range from cheap in price to expensive, high-end models. Generally, expensive, high-end scope rings and mounts are precision machined with closer regard to tolerances. However, there are many scope rings in ‘reasonable’ prices ranges that are excellent performers.
Scope rings can be singular units or modular.
Scope rings must be sized to the diameter of the scope tube being mounted. Popular scope tube diameters are one-inch (25.4mm), 30mm, and 34mm. It is important that the correct scope ring diameter be matched to the scope tube.
Some scope rings may require ‘lapping’ to properly fit the scope tube. Ideally, the rings should place equal pressure on the scope tube throughout the ring’s mounting surface. Lapping removes imperfections in the scope ring mounting surfaces to prevent damage to the scope. Wheeler has a complete kit (Wheeler Scope Mounting Kit Combo, 1-Inch/30mm) that provides everything necessary to mount a scope the correct way, including an instructional DVD. Proper scope installation is critical to the accuracy of your firearm. Get the most accuracy possible out of your gun by ensuring proper scope installation. The Wheeler Alignment Bars, Lapping Bars and Lapping Compound allow you to achieve the perfect fit between scope and rings. Securing Fasteners properly is critical to accuracy as well. Precisely controlled torque along with thread locking compound will keep your scope held securely in place. Professional grade bits and the F.A.T. Wrench are the perfect combination to properly secure fasteners without deformation.
Two separate front and rear scope rings are the most common.
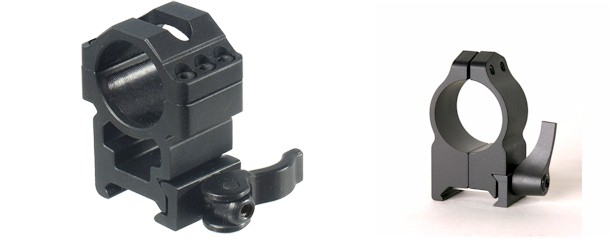
Scope Ring Types – Top- Clamp (left) and Side-Clamp (right)
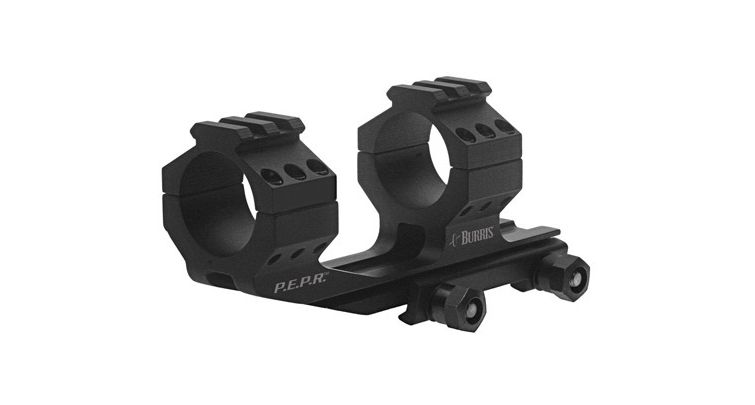
Offset Scope Mount Example
Some scope rings have padded inserts to protect the scope’s finish.
Scope Height:
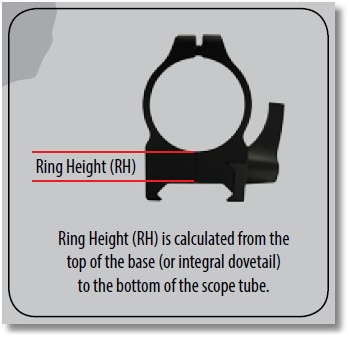
Scope Ring Height Measurement
Common scope heights for 1-inch scope tubes are as follows:
- Low = .250-inch
- Medium = .375-inch
- High = .525-inch
- Extra High = .650-inch
- Ultra-High = .935-inch
Common scope heights for 30mm scope tubes are identical except that the Ultra-High scope height is .850-inch.
50mm scopes will generally use high rings. Heavy barrels may require extra-high. Mediums may occasionally work with standard contour barrels.
42-45mm scopes will mostly use medium rings with standard contour barrels.
40mm scopes will generally use low rings with standard contour barrels.
Flattop rifles will need super-high rings with an optical center of 1.5 inches or just slightly less for a proper cheek weld.
Critical Scope Dimensions:
Aside from the scope tube diameter, two other dimensions are critical when deciding what scope rings will be used to mount the scope; the diameter of the objective lens housing (the lens nearest the target) and the diameter of the ocular lens housing (the lens closest to the eye), but not for the same reason.
Objective Lens:
Example of a Large Objective Lens
For most lever-action rifles, providing the proper clearance between the objective lens housing and the barrel is adequate to prevent the bolt, upon levering the action, from interference with the ocular lens housing. I normally mount a 3-9×40 magnification lens scope on low rings with my Marlin Model 336c lever guns with no clearance problems. Large objective lens scopes usually means higher scope mounting rings for the objective lens to clear the barrel (and also any mid-barrel mounted sights).
Ocular Lens:
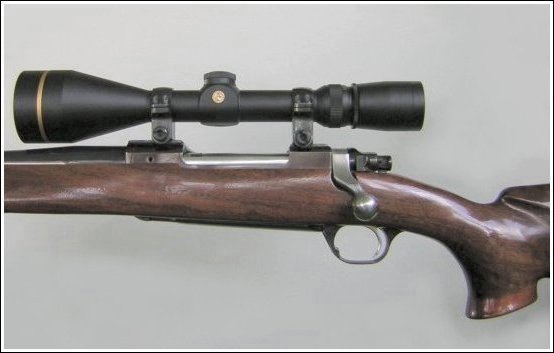
With semi-automatic and pump action rifles, the diameter of the ocular lens is not a concern as far as mounting. With lever-action and bolt-action rifles; however, the bolt must clear the ocular lens housing. Recently, I found that with the Ruger M77/357 carbine, the 90-degree bolt of the carbine when used with one scope would rub against the ocular lens housing ever so slightly. Enough so; however, that the scope was changed out with another scope that has a slightly smaller ocular lens housing and enough clearance was available between the ocular lens housing and the bolt handle knob was adequate to prevent rubbing during normal bolt operation. The replacement scope was a higher power scope than what was originally mounted, which resulted in a larger objective lens.
Scope Length:
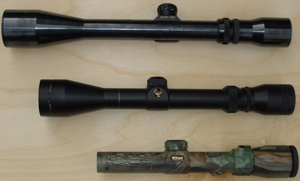
Scopes Come In Various Lengths
While you may have achieved a suitable distance between the objective lens housing and the barrel of the rifle that does not mean that the scope height is correct for your eye at the ocular end. It is best to have the ocular lens a little high than a little low, which forces you to scrunch your cheek low and into the stock in order to obtain a correct scope picture. A slightly higher ocular lens can be accommodated by the use of a cheek rest (adjustable or slip-on) to raise the eye to the correct level for a perfect scope picture. Note that when using a cheek rest, the rest must not interfere with the bolt’s action (on lever-action and bolt-action rifles).
Determining Scope Ring Height:
I normally keep three inexpensive scope rings on hand; low profile, medium profile, and high profile. These mounts allow me to rest the scope in the mounts for sizing purposes. These are only used to size the scope and are not mounted to a scope. I will profile the scope against the rifle while the rifle is locked into a sight vice.
I use a slice of an old mouse pad, which is approximately 1/16-inch thick, to act as a rest for the objective lens of the scope and then rest the objective lens housing on the ‘spacer’ to provide the minimum clearance between the objective lens housing and the barrel. The scope is then raised to as close to parallel with the rifle as I can. Then, using a steel rule, I’ll measure the distance between bottom of the scope tube and the top of the scope base. This provides an approximate height for the scope. Next, I’ll mount the closest scope rings that fit the approximate measurement. The scope is then placed in the rings and the tops are loosely fitted to the scope. In general; however, I can approximate the required scope ring height simply using the guidelines set forth earlier in this article regarding scope height.
I then move rearward and try out the approximate eye relief and cheek rest. For a bolt-action rifle, this is a good time to check for clearance between the ocular lens housing and the bolt handle during cycling. If all seems favorable, it is time to select the desired scope rings to use – and I have my favorites (your favorites may differ from mine).
I have come to appreciate Warne scope rings and they are my first choice for QD and permanent mount scope rings. I have also used UTG and Weaver “quad’ scope mounts successfully. For my latest project, mounting a scope to the Ruger American in .223 caliber, I had selected the Center Point 4-16×40 power scope that came with ‘quad’ scope mounts that were already mounted to the scope. I plain did not like them after I mounted the scope the scope to the rifle in a trail fitting. The scope sat too high for both the ocular lens and the objective lens for my liking. The eye relief of the scope was; however, as close to perfect for me as possible. I have used Center Point scopes in the past and I have never been disappointed in them. But, I digress.

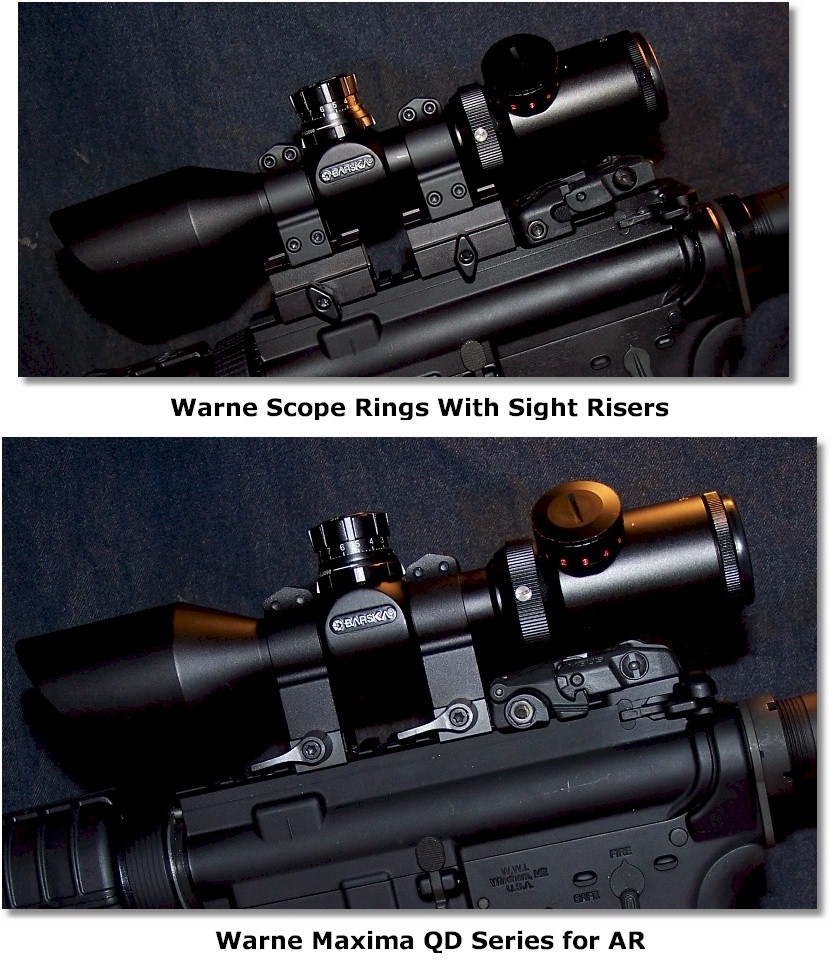
Warne Medium Height 1″ Scope Rings
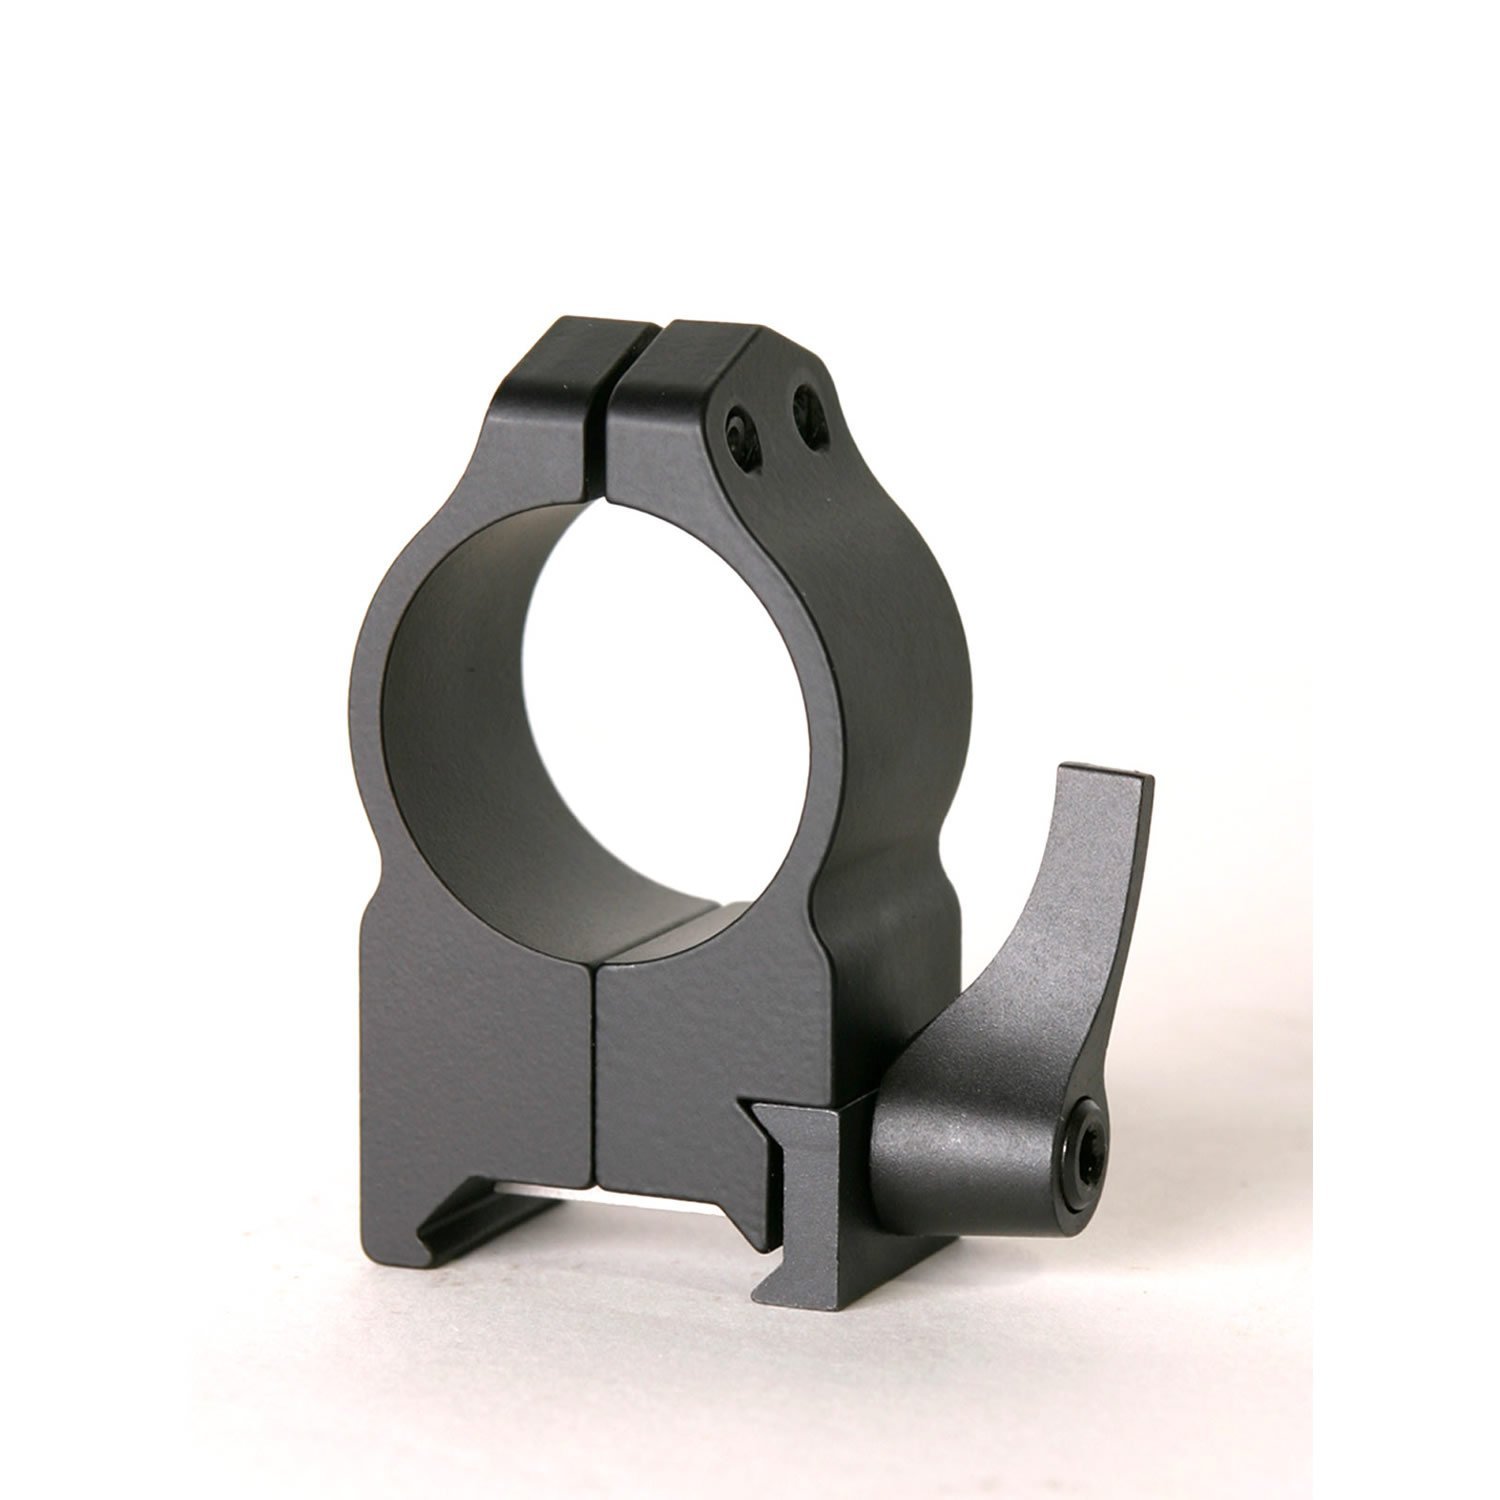
Warne Maxima Series 1″ QD Scope Rings for AR
Some folks like ‘see-through’ scope mounts. These scope mounts allow the shooter to view the iron sights but keeps the scope mounted; the shooter simply lifts the head into a position behind the scope when needed. Higher scope mountings; however, affect the scope’s effectiveness at close ranges. A lot of people are discovering that low-power, variable (or even fixed magnification scopes) are more flexible than high power scopes. 2-7×32 and 3-9×40 magnification scopes are common and both can use the same scope rings to provide objective lens-to-barrel clearance in most cases.
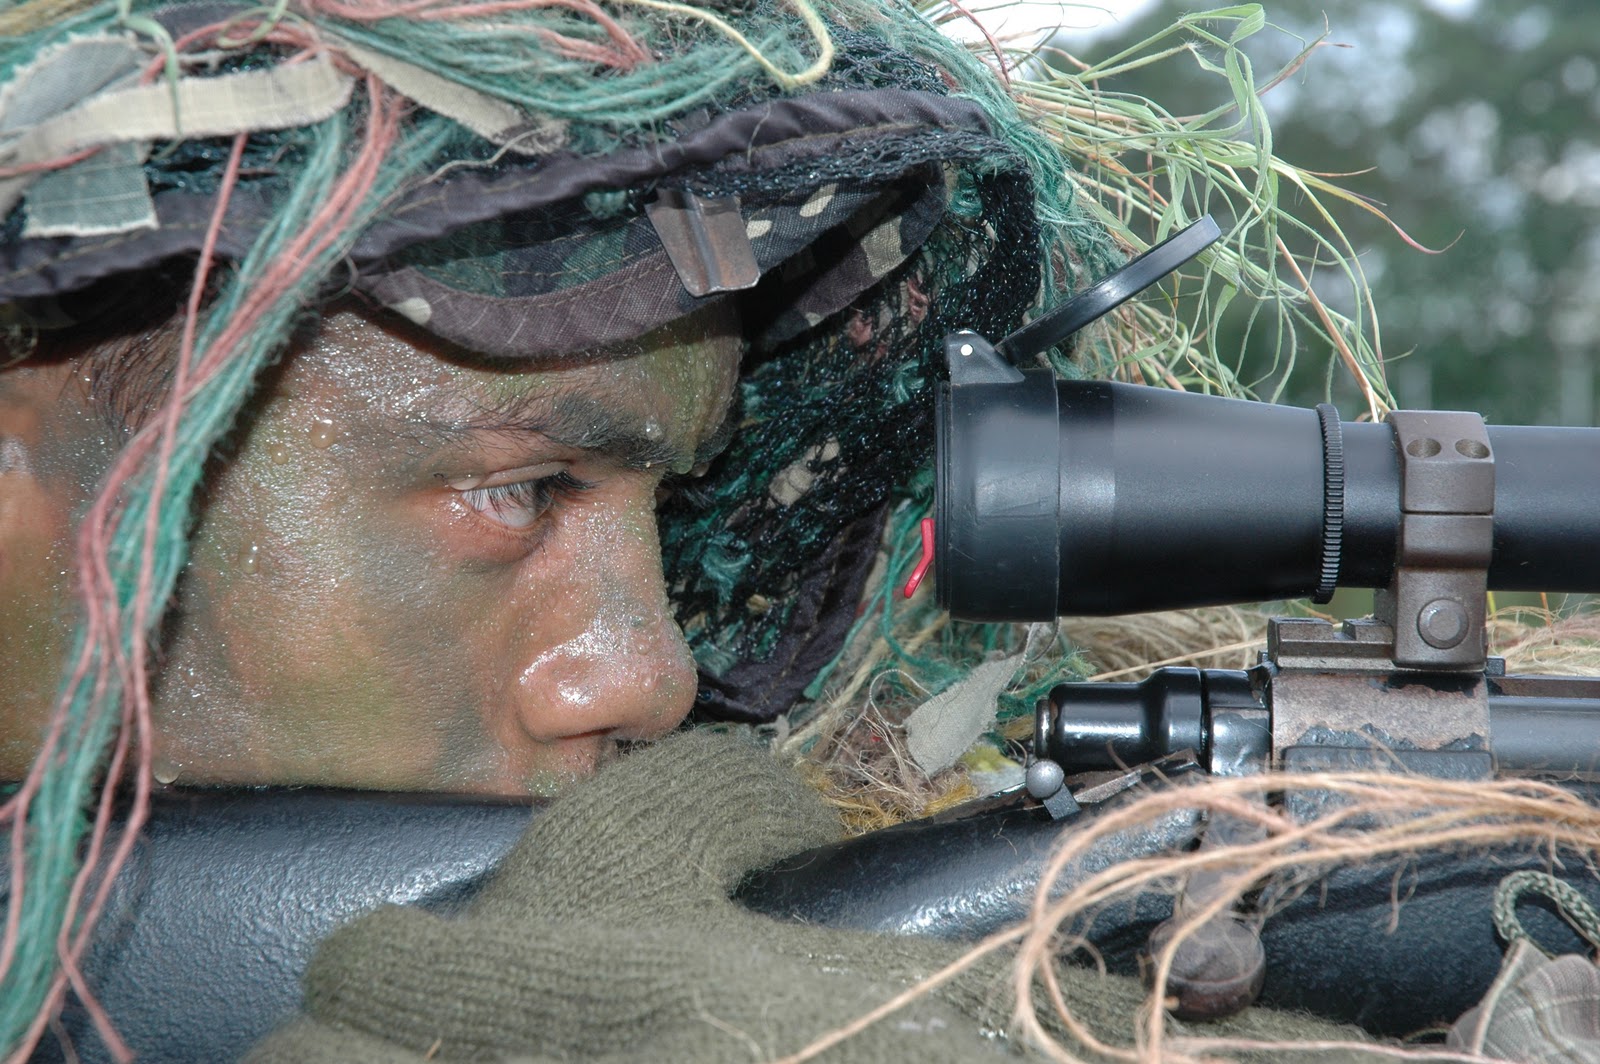
In modern sporting rifles, like AR-based rifles and carbines, the optic sight height can affect ‘co-witnessing’ of the iron sights, but that is another topic in itself. For this article, the emphasis is on scopes that will be mounted close to the shooter; short and intermediate eye relief scopes fall into this category.
Eye Relief Chart
Mounting and Leveling, Leveling, and Leveling, and Leveling, and…:
The type of scope ring will dictate how you mount and level the scope. For top-secured scope rings, the bottom of the scope ring is positioned in the rail and the scope is then set into place within the rings. With these types of rings, I always place the top of the mounts loosely in place with the provided screws; this prevents the scope from falling out of the scope rings while I set up the scope/rifle combination.
With the Warne type of scope ring, the entire ring is disassembled to allow the rings to surround each side of the scope housing. Then it is loosely reassembled enough to allow the scope to slide freely within the rings. (The QD mounts Warne scope rings can then be adjusted to the desired position on the rail and just adjusted until they are snug against the rail to prevent the scope rings (and scope) from falling off the rifle.)
With either style of ring, tighten the scope mounts just enough to allow the scope to drag slightly through the rings. This is where the fun really begins.
Adjust the Scope for the Correct Eye Relief
Once you believe that you have the eye relief adjusted, use a pencil or washable felt pen to mark the position of the scope to one of the rings – front or rear, no matter as long as you can return the scope to that position in the ring.
Remove each scope mounting screw (not the base) and add a dab of Lok-Tite 242 (blue). This will help prevent the scope screws from backing out under recoil but still allows the screws to be removed easily at a later time (NO RED LOC-TITE PLEASE!).
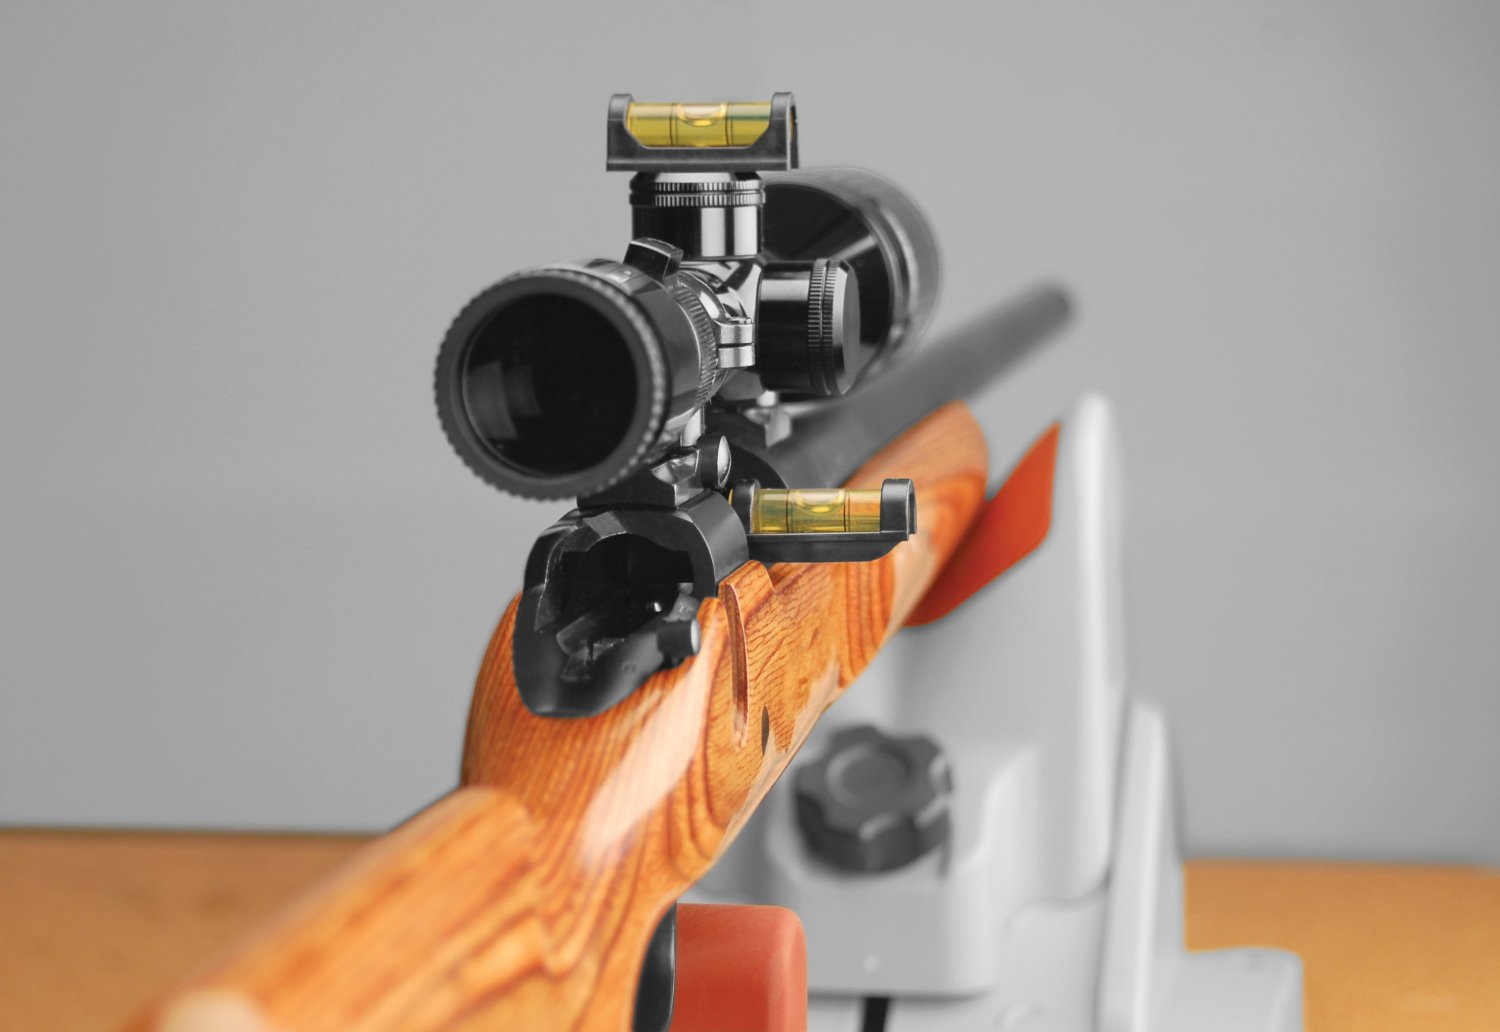
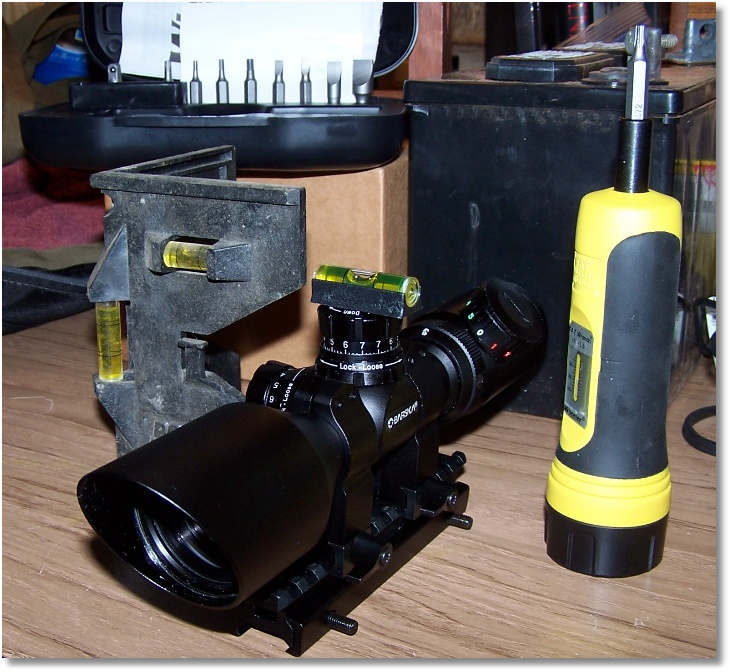
Wheeler Level-Level-Level System

Wheeler Professional Reticle Leveling System
The Wheeler Professional Reticle Leveling System is a precision tool and technique designed to allow a scope to be perfectly leveled on any firearm with ease. CNC machining, factory adjusted calibration set screws, anodized aluminum construction and protective molded case put this instrument in a class of its own. The Barrel Clamp Level is attached to the guns barrel while the smaller Reference Level is placed on scope base, bottom half of a ring or other flat surface perpendicular to the vertical axis of the gun. The gun is then rotated until the Reference Level is aligned. The tuning adjustment knob on the Barrel Clamp Level is then turned until its level is centered to match the Reference Level. At this point the Barrel Clamp Level is calibrated to the guns axis. The Scope can be installed loosely and the Reference Level placed on top of the scopes turret cap. The scope is rotated until the Reference Level is aligned with the Barrel Clamp Level and then simply secured in place. The Wheeler PRLS is the most effective instrument available for precision scope alignment.
With flat top rifles, like those with Weaver and Picatinny rails, there may be more than enough mounting rail to use the Wheeler Level-Level-Level system, but if you are like me and mount scopes on anything a scope can be mounted, the Wheeler Professional Reticle Leveling System is a worthwhile investment.
First things first – level the rifle for and aft and side to side. This may take repeated attempts until you get the rifle as level as possible. The Wheeler Level-Level-Level or the Wheeler Professional Reticle Leveling System (see, Sources for Stuff at end of article) allows you to monitor the level of the rifle as you level the scope.
Move the scope (if it had moved) to the eye relief mark that you made earlier. Place the small level on top of the elevation turret (or cap). Slowly rotate the scope within the rings until level. At this point ensure that the bottom scope mount is secured to the scope base. Note: Move the scope bases forward until they stop in the rail. Then tighten the scope base against the rail while holding each scope base tight against the forward edge of the slot to guard against skewing the mount. Double-check that both the scope and rifle are level. If not, readjust as necessary.
NOTE: When using Weaver and Picatinny scope mounts, and when attaching the scope mounts to the base, ensure that the scope rings are pushed all the way forward (toward the muzzle) in the slot before tightening.
Return, if necessary, the scope to the eye relief marks that you made earlier.
Tighten each scope ring screw a little at a time in a staggered fashion until the scope cannot be moved in the rings. Using the Wheeler Fat Wrench and appropriate bit, tighten each screw in 5-inch pound increment until the desired torque is achieved. On most rings this would be about 20-inch pounds (Warne steel rings require 25-inch pounds). If in doubt about what torque setting to use, contact the manufacturer or visit the manufacture’s web site. For example, I recently e-mailed Ruger about torque specification on the scope rings provided with the Ruger M77/357. Ruger responded the next day (20-inch pounds on the scope rings and 30-inch pounds for the base screws). Good customer service!
Double-check the scope alignment after each torque setting. If you are satisfied, move on to completing the tightening until the final torque setting is achieved.
What you should have is a scope that clears the objective lens housing to the barrel, level and plum scope reticules, and the most perfect eye relief that you can achieve from different shooting positions with the proper cheek weld. If the scope is somewhat high for you, but not enough to warrant a different set of scope rings, you may opt for a removable cheek rest (I use these more often than not because no mounted scope is perfect), purchase an adjustable cheek rest that can be affixed to your stock, or spend a gaggle of money finding a stock with a raised or adjustable comb.
The rifle is now ready for bore-sighting, which is a topic unto itself and beyond the scope of this article.
If this sounds too much for you, deliver the rifle, scope, and scope rings to a competent and qualified gunsmith for mounting and bore sighting. Consider; however, that a competent gunsmith will charge you for the service of mounting a scope. For myself, I gain considerable satisfaction knowing that I can do it myself and have the tools to do it again – cost, priceless.
Picatinny Rail Mounting Shortcut:
Leveling a Scope With a Sight Riser and a Flat Surface
The UTG 1-Inch High 13-slot Hi-profile Full Size Riser Mount is a 13-slot unit.
Remove the side mounting screws but not the tension strip. Then, lay the scope riser on a flat, level surface (I use a carpenter’s level to verify a level surface). Mount the scope rings and scope rings to the riser. Level the scope to the table level, tighten everything down to the specified torque, remove the scope and scope rings from the riser as a unit and transfer to your favorite MSR or other rifle that incorporates a Picatinny rail. In most cases, you will be as close to correct as you need to be.
You can also use this same method for Weaver mounts, as they will fit the slots in a picatinny rail. For Weaver mounts, measure the distance from center-to-center of the recoil lug slots and transfer this measurement to the Picatinny rail.
Of course, double-check for the correct eye relief, reticule alignment, and scope height from the barrel.
Some Other Thoughts on Scope Rings:
If you purchase a scope that has scope rings provided with it, assess the rings for worthiness. The scope rings may be adequate, but the scope mounting screws may not be. For example, one scope that I purchased had Phillip-head screws for mounting. Appropriate hex head screws were found and the Phillip-head screws were canned. The mount itself has been on the rifle for five years now.
Don’t be afraid to not use provided scope mounts. It’s worth the money to provide you piece of mind with good scope mounts.
Regardless of the type of scope ring/mount that I am working with, I tend to apply a very thin coating of grease to the mounting rail where the scope rings are mounted. This provides a hydraulic seal to prevent moisture from creeping between the mounting points, also acts as an additional ‘cushion’ against recoil, and helps to prevent scarring of your favorite rilfe from metal-to-metal contact from the scope ring mounts.
Amazon is a good resource for scope mount reviews.
If the words ‘shimming’ and ‘lapping’ scare you, deliver the rifle, scope, and scope rings to a competent and qualified gunsmith for mounting and bore sighting. In some cases, installing shims or lapping the scope mounts for a ‘perfect’ fit may be necessary. A scope alignment tool may also be useful in extreme cases. The Wheeler Fat Wrench (see, Sources for Stuff at end of article) is indispensable.
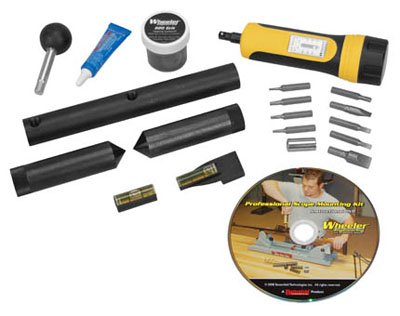
Wheeler Scope Mounting Kit
I can also recommend the Wheeler Professional Reticle Leveling System (see, Sources for Stuff at end of article) as a substitute (or to work with) the Wheeler Level-Level-Level system.
To Summarize:
The purpose of scope rings is to mount a scope to a rifle and to ensure that it stays in place under recoil.
Scope rings need to be properly fitted to the scope and the rifle. They need to be high enough so that the objective lens housing clears the barrel, but not too high as to negate proper eye alignment with the ocular lens.
There are many scope rings available and deciding which scope ring is right for your shooting needs can be a daunting task. Once I find a good scope ring, I tend to stay with it under I find something better for a decent price. With that said, I would not use ten-dollar scope rings to mount a one-thousand dollar scope (not that I need a scope of that price).
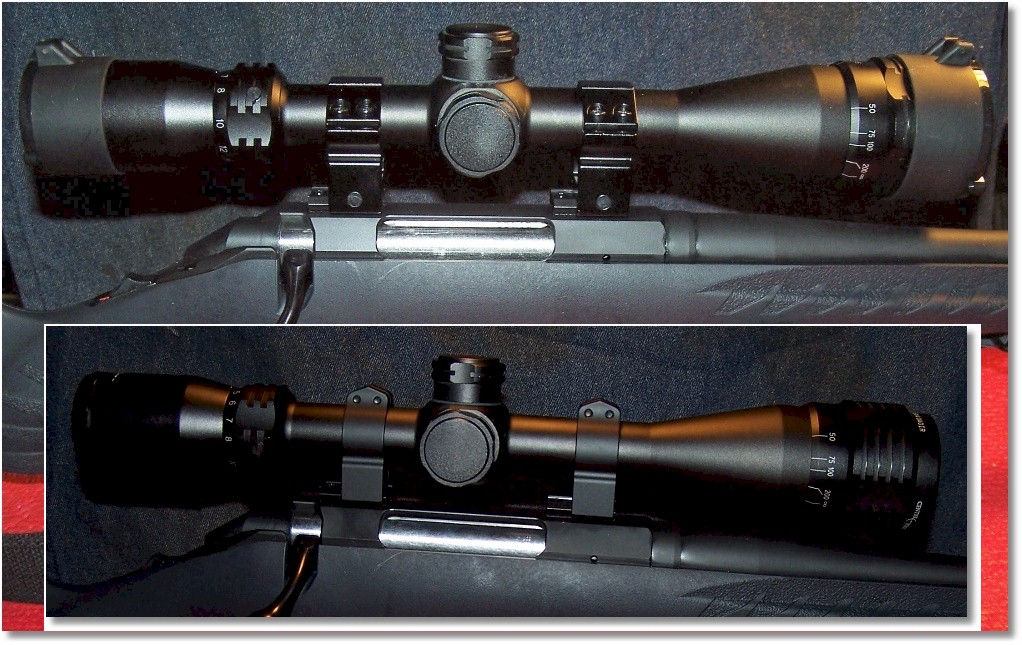
Ruger American Updated Scope Mount – Top is Original and Inset is Improved
Updating the AR Scope Mounting
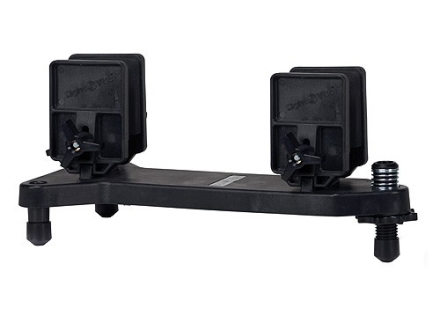
Winchester Sight Vise
Decide, before you mount the scope, if you want the scope to be quickly detached for cleaning the rifle, stored separate from the rifle, or to be mounted on another rifle. For example, my UTG 3-9×40 Generation 2 Sniper Scope can be removed from one AR and mounted on a second one if need be. I run a UTG red/green dot sight on my Windham Weaponry ‘SRC’ and this sight can be quickly detached and the UTG 3-9×40 Generation 2 Sniper Scope quickly mounted.
Sources for Stuff:
Wheeler Level-Level-Level System: http://www.amazon.com/Wheeler-113088-Scope-Leveling-Tool/dp/B000BYAKDM/ref=sr_1_1?s=sporting-goods&ie=UTF8&qid=1425168880&sr=1-1&keywords=Wheeler+Level-Level-Level
Wheeler Fat Wrench: http://www.amazon.com/Wheeler-Firearms-Accurizing-Torque-Wrench/dp/B0012AXR4S/ref=sr_1_1?s=sporting-goods&ie=UTF8&qid=1425215220&sr=1-1&keywords=Wheeler+Fat+Wrench
Wheeler 540-127 Scope Mounting Kit with storage case: http://www.amazon.com/Wheeler-540-127-Scope-Mounting-storage/dp/B001HY4EI2/ref=sr_1_2?s=sporting-goods&ie=UTF8&qid=1424653791&sr=1-2&keywords=Wheeler+scope+mounting+kit
Wheeler Professional Reticle Leveling System: http://www.amazon.com/gp/product/B004TAB7ZO/ref=oh_aui_detailpage_o00_s00?ie=UTF8&psc=1
UTG 1-Inch High 13-slot Hi-profile Full Size Riser Mount: http://www.amazon.com/UTG-1-Inch-13-slot-Hi-profile-Riser/dp/B003TWX8HS/ref=sr_1_5?ie=UTF8&qid=1424693409&sr=8-5&keywords=UTG+Sight+Riser
Kolpin Sight-Vise Gun Vise and Rifle Shooting Rest with V Front: http://www.midwayusa.com/product/951811/kolpin-sight-vise-gun-vise-and-rifle-shooting-rest-with-v-front
Scope rings used in article:
Warne Scope Mounts Medium Matte Permanent Attach Rings (1-Inch): http://www.amazon.com/gp/product/B000NK4JC2/ref=oh_aui_detailpage_o08_s00?ie=UTF8&psc=1
Warne Maxima 1″ Ar15 Flat Top U-High: http://www.amazon.com/gp/product/B0016LEVL6/ref=oh_aui_detailpage_o02_s00?ie=UTF8&psc=1
![]()